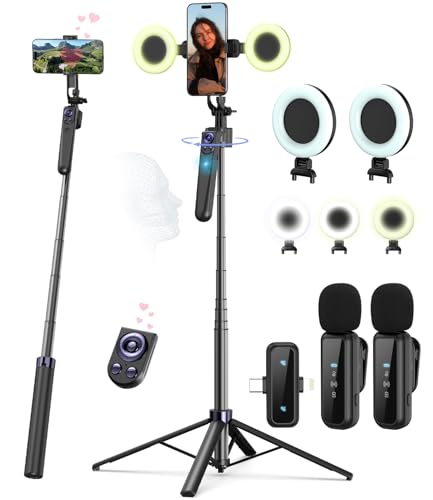


Have you ever wanted to share live moments with your friends and family through your iPhone camera? Setting up a live camera on your iPhone allows you to stream real-time video to your audience, making your experiences more interactive and engaging. Whether you’re sharing a special event, a behind-the-scenes look, or simply connecting with your followers, setting up a live camera on your iPhone is easier than you might think.
In this guide, we’ll walk you through the steps to set up a live camera on your iPhone, so you can start sharing your world in real-time. From choosing the right app to selecting the best settings, we’ll cover everything you need to know to get started with live streaming on your iPhone.
Step-by-step guide for live camera setup
Setting up a live camera on your iPhone can be done easily with the right tools and knowledge. Follow these steps to get your live camera up and running:
Step 1: Download a live streaming app
Start by downloading a live streaming app from the App Store. Popular options include Periscope, Facebook Live, and Instagram Live. These apps allow you to broadcast live video from your iPhone to your audience.
Step 2: Grant necessary permissions
Once you have downloaded the app, open it and grant the necessary permissions, such as access to your camera and microphone. This will allow the app to use your iPhone’s camera for live streaming.
Follow the app’s on-screen instructions to set up your live stream, add a title and description, and choose your privacy settings.
Required equipment for live camera streaming
Setting up a live camera stream on your iPhone requires a few key pieces of equipment to ensure a smooth and professional broadcast. Here are the essential tools you will need:
- iPhone with a reliable camera and sufficient storage capacity
- Stable internet connection (Wi-Fi or cellular data)
- External microphone for better audio quality
- Tripod or stabilizer for steady shots
- Lighting equipment for well-lit videos
- Power bank or charger to keep your iPhone powered throughout the stream
By having these items ready, you can create high-quality live camera streams on your iPhone with ease.
Choosing the right app for live camera streaming
When setting up a live camera on your iPhone, choosing the right app for live streaming is crucial. There are several apps available in the App Store that offer different features and functionalities. Here are some key factors to consider when selecting an app:
- Compatibility: Make sure the app is compatible with your iPhone model and iOS version.
- Features: Look for apps that offer the features you need, such as live streaming to multiple platforms, customizable settings, and easy sharing options.
- Ease of use: Choose an app that is user-friendly and intuitive to navigate, especially if you are new to live streaming.
- Reliability: Opt for a reputable app with positive reviews and a track record of stable performance.
Some popular apps for live camera streaming on iPhone include OBS Studio, Streamlabs, and Switcher Studio. Take the time to research and test different apps to find the one that best fits your needs and preferences.
Connecting your iPhone to the live camera setup
To set up your iPhone as a live camera, you will need to follow these steps:
Step 1: Connect your iPhone to the same Wi-Fi network as the camera you want to use for the live stream.
Step 2: Download and install a live streaming app on your iPhone, such as OBS Camera, EpocCam, or Manything.
Step 3: Open the app and follow the on-screen instructions to set up the connection between your iPhone and the camera.
Step 4: Once the connection is established, you can start live streaming from your iPhone to the camera.
Make sure to test the connection and settings before going live to ensure a smooth streaming experience.
Setting up the camera settings for live streaming
When setting up your iPhone for live streaming, it’s important to adjust the camera settings to ensure high-quality video output. Here are some key settings to consider:
1. Resolution and Frame Rate
Make sure to select the appropriate resolution and frame rate for your live stream. Higher resolutions and frame rates can result in better video quality but may require more bandwidth.
2. Exposure and Focus
Adjust the exposure and focus settings to ensure that your video is well-lit and in focus. You can manually adjust these settings or use the auto-exposure and auto-focus features.
Troubleshooting common issues with live camera setup
If you encounter issues while setting up your live camera on your iPhone, here are some common troubleshooting steps to help you resolve them:
1. Check camera permissions: Make sure that you have granted the necessary camera permissions to the app you are using for live streaming. Go to Settings > Privacy > Camera to check and adjust the permissions.
2. Restart the app: Sometimes, simply closing and reopening the app can resolve minor issues with the camera setup. Force close the app and relaunch it to see if the problem is resolved.
3. Restart your iPhone: If restarting the app doesn’t work, try restarting your iPhone. This can help clear any temporary glitches that may be affecting the camera functionality.
4. Check internet connection: A stable internet connection is crucial for live streaming. Make sure you are connected to a reliable Wi-Fi network or have a strong cellular signal to ensure smooth streaming.
5. Update the app: Ensure that the app you are using for live streaming is up to date. Developers often release updates to fix bugs and improve performance, so updating the app may resolve any compatibility issues.
6. Contact app support: If you have tried the above steps and are still experiencing issues, reach out to the app’s support team for further assistance. They may be able to provide specific troubleshooting steps for your camera setup.


