
As an avid cyclist and photography enthusiast, I’m always looking for ways to capture the beautiful scenery and exhilarating experiences of my bike rides. One of the best ways I’ve found to do this is by attaching my iPhone camera to my bicycle.
There are several options available for securely attaching your iPhone camera to your bicycle. One popular option is using a handlebar mount specifically designed for holding smartphones. These mounts usually have a secure clamp that holds your iPhone in place, allowing you to easily access the camera while riding.
Another option is using a bike mounting system that allows you to attach your iPhone camera to various parts of your bike. These systems typically include a protective case for your iPhone, as well as different mounting options such as handlebar mounts, stem mounts, and even seatpost mounts. This allows you to choose the best location for your camera based on your specific needs and preferences.
How to Attach Your iPhone Camera to Your Bicycle: The Best Way
If you love biking and want to capture the beautiful moments of your rides on your iPhone camera, you’re not alone. Many cyclists enjoy documenting their adventures and sharing them with others. To help you capture the perfect shot while keeping your hands free and your iPhone secure, here’s the best way to attach your iPhone camera to your bicycle.
1. Handlebar Mount: One of the most popular and convenient ways to attach your iPhone camera to your bicycle is by using a handlebar mount. This mount securely holds your iPhone in place and allows you to adjust the angle of your camera to capture the best shots. It’s essential to choose a mount that is compatible with your iPhone model and offers a secure grip to prevent accidental drops. Look for mounts with adjustable straps or clamps for a sturdy and reliable attachment.
2. Stem Mount: Another option to consider is a stem mount, which attaches your iPhone camera to the stem of your bike’s handlebars. Stem mounts provide a more centralized position for your camera, minimizing vibrations and ensuring stable footage. They are designed to fit various stem sizes and offer easy installation. Make sure to choose a stem mount that provides a secure fit and doesn’t obstruct your view or interfere with your bike’s controls.
3. Chest Mount: If you prefer a more first-person perspective, a chest mount can be a great choice for attaching your iPhone camera to your bicycle. This type of mount secures your iPhone to your chest, allowing you to capture dynamic footage of your ride. Chest mounts are typically adjustable and comfortable to wear, ensuring that your camera stays steady while you navigate different terrains. However, keep in mind that a chest mount may restrict your movement slightly and may not be suitable for all biking styles.
4. DIY Solutions: If you’re a creative person or looking for a budget-friendly option, you can explore DIY solutions to attach your iPhone camera to your bicycle. For example, you can use a sturdy phone holder or pouch and attach it to your bike’s frame using zip ties or Velcro straps. This approach allows for flexibility in positioning your camera and can be customized according to your preferences. Just ensure that your DIY setup is secure and won’t put your phone at risk of falling or getting damaged.
Remember to prioritize your safety while attaching your iPhone camera to your bicycle. Ensure that the mount you choose doesn’t interfere with your bike’s handling or distract you while riding. Always test the secureness of the attachment before going on rides and consider using additional measures like a protective case or waterproof housing for your iPhone camera. With the right attachment method, you can capture stunning footage of your biking adventures and relive them for years to come.
Start capturing your bike rides with your iPhone
Are you an avid cyclist looking to take your bike rides to the next level? Why not start capturing your adventures with your iPhone? With the advancement in smartphone camera technology, you can now capture stunning photos and videos while you pedal away. Here are some tips to help you get started and attach your iPhone camera to your bike.
Choose the right mounting option: To capture stable and high-quality footage, it’s important to choose the right mounting option for your iPhone. There are various options available in the market, including handlebar mounts, frame mounts, and helmet mounts. Consider your riding style and preferences to determine the most suitable option for you.
- Handlebar mounts: These mounts are attached to the handlebars of your bike, offering a stable and easily accessible position to capture your rides.
- Frame mounts: Frame mounts attach your iPhone to the frame of your bike, allowing you to capture footage from a unique perspective.
- Helmet mounts: If you prefer capturing a first-person point of view, helmet mounts are a great option. They attach your iPhone securely to your helmet, giving you the freedom to move your head while capturing the action.
Invest in a sturdy and reliable mount: When attaching your iPhone to your bike, it’s essential to invest in a mount that is sturdy and reliable. The last thing you want is for your phone to come loose and fall off during your ride. Look for mounts made from durable materials and ones that provide a secure grip on your phone.
Consider using a protective case: To ensure the safety of your iPhone, consider using a protective case while attaching it to your bike. A case with shock-absorbing features can help protect your phone from any bumps or vibrations that may occur during your ride.
By following these tips and choosing the right mounting option for your iPhone, you can start capturing your bike rides like never before. Share your stunning footage with friends and family, or even use it to document your progress as a cyclist. So, grab your iPhone, attach it securely to your bike, and get ready to capture all those memorable moments on your rides!
Explore Different Attachment Options for Your iPhone Camera on a Bicycle
In my quest to capture amazing footage while riding my bicycle, I have experimented with various ways to attach my iPhone camera securely. Below, I would like to share some of the attachment options that I have explored and found practical for biking adventures.
Handlebar Mount: One of the most common attachment options is a handlebar mount specifically designed for iPhones. These mounts securely hold your device in place and allow you to easily adjust the angle. They often come with anti-vibration features to ensure smooth and stable footage. This attachment option is great for capturing the viewpoint from your handlebars while cycling.
Chest Mount: If you prefer a different viewpoint, a chest mount can be a great option. This attachment allows you to strap your iPhone camera to your chest, giving you a unique perspective of the trail or road ahead. It provides a stable and immersive view, making you feel like you are in the middle of the action. Chest mounts are often adjustable and fit comfortably for most riders.
- Rear Rack Mount: For those looking to capture footage of the road behind them, a rear rack mount can be a valuable attachment option. These mounts securely attach your iPhone camera to your bike’s rear rack, allowing you to record what is happening behind you. This option is particularly useful for commuters or cyclists who want to document their surroundings.
- Helmet Mount: If you want to capture footage from your own perspective, a helmet mount is worth considering. This attachment option allows you to affix your iPhone camera to your helmet, giving you hands-free recording capabilities. It provides a stable and natural viewpoint, making it ideal for capturing your journey or showcasing your skills.
- DIY Mounts: If you enjoy getting creative, you can explore DIY options for attaching your iPhone camera to your bicycle. From using zip ties and adhesive mounts to repurposing old accessories, there are plenty of ways to create a custom attachment. DIY mounts can be a cost-effective solution and offer customization options to suit your needs.
When exploring different attachment options for your iPhone camera on a bicycle, it is essential to prioritize safety and stability. Ensure that your chosen mount securely holds your device in place and does not obstruct your vision or interfere with your riding. Experiment with different options to find the attachment method that works best for you and enhances your cycling adventures.
Find the Perfect Solution for Your Cycling Needs
As an avid cyclist, I understand the importance of capturing the beautiful scenery and thrilling moments of your cycling adventures. Whether you’re a seasoned pro or just starting out, having a reliable and convenient way to attach your iPhone camera to your bicycle is key. Luckily, there are several innovative options available that can enhance your cycling experience and ensure you never miss a shot.
One of the best solutions I’ve found is a handlebar mount specifically designed for iPhones. It securely attaches your iPhone to your bike’s handlebars, keeping it steady and stable while you ride. This allows you to easily access your camera and capture breathtaking photos and videos without the risk of dropping or damaging your phone. Additionally, most handlebar mounts are adjustable, allowing you to position your iPhone at the perfect angle for optimal viewing and recording.
Another great option is a bike phone holder that doubles as a camera mount.
These holders come in various designs and offer a secure grip on your iPhone while providing easy access to all its functions. With a phone holder like this, you can attach your iPhone to the handlebars or even the frame of your bike, allowing you to capture different perspectives and angles. Some holders also have built-in shock absorption features, which help minimize vibrations and ensure your photos and videos come out smooth and clear.
When choosing the perfect solution for your cycling needs, it’s important to consider factors such as stability, ease of use, and compatibility with your iPhone model. Additionally, don’t forget to invest in a protective case for your phone to further safeguard it from any potential damage while you ride. With the right attachment for your iPhone camera, you can focus on enjoying your cycling adventures while capturing stunning visuals to share with others.
Mounting Your iPhone Camera on Your Bicycle: Step-by-Step Guide
If you’re an adventure seeker and love capturing your cycling experiences on camera, attaching your iPhone camera to your bicycle is a great way to capture amazing shots and videos. In this step-by-step guide, I will walk you through the process of mounting your iPhone camera securely on your bicycle.
Step 1: Choose the Right Mounting Bracket
Before getting started, it’s essential to choose the right mounting bracket for your iPhone camera. There are various options available in the market, such as handlebar mounts, stem mounts, or top tube mounts. Consider your preferred camera angle and stability when selecting the mounting bracket.
Step 2: Position the Mounting Bracket
Once you have chosen the mounting bracket, position it on your bicycle’s handlebar, stem, or top tube. Make sure to select a spot that provides a stable and secure attachment for your iPhone camera. You may need to adjust the position a few times to find the perfect spot.
Step 3: Attach the Mounting Bracket
Once you have positioned the mounting bracket, use the provided screws or straps to attach it securely to your bicycle. Make sure the bracket is tightly fastened to prevent any movement or vibrations while cycling.
Step 4: Connect Your iPhone Camera
With the mounting bracket in place, it’s time to attach your iPhone camera to it. Most mounting brackets come with a secure holder or clamp that holds your iPhone camera in place. Carefully slide your iPhone into the holder, ensuring that it is tightly secured.
Step 5: Test and Adjust
Before hitting the road, take a few test shots and videos to ensure that your iPhone camera is securely attached and the angle is perfect. If needed, make any necessary adjustments to the mounting bracket or camera position before starting your cycling adventure.
Step 6: Enjoy Capturing Your Adventures
Now that your iPhone camera is securely mounted on your bicycle, it’s time to hit the road and start capturing your amazing adventures. Whether you’re exploring scenic trails or conquering challenging terrains, your mounted iPhone camera will help you capture incredible moments to relive later.
Remember, always prioritize safety while cycling. Make sure your attention is focused on the road, and use caution when operating your iPhone camera. Happy cycling and happy capturing!
Easy-to-follow instructions for a secure attachment
When it comes to attaching your iPhone camera to your bicycle, it’s important to follow a few simple steps to ensure a secure attachment. With so many options available, it can be overwhelming to choose the best method, but here are some easy-to-follow instructions that will help you confidently attach your iPhone camera to your bicycle.
1. Choose a reliable mount
Start by selecting a reliable and sturdy mount that is specifically designed for attaching your iPhone to a bicycle. Look for mounts that are made from durable materials and have adjustable features to accommodate different handlebar sizes. A mount with a secure locking mechanism will give you peace of mind while riding.
2. Position the mount
Next, position the mount on your bicycle handlebar where you want your iPhone camera to be located. Ensure that the mount is tightly secured to the handlebar, as any looseness may result in vibrations or accidental detachment. Double-check the position to make sure it allows for a clear view without obstructing your ride or interfering with the bike’s controls.
3. Attach your iPhone camera
Once the mount is securely in place, carefully attach your iPhone camera to it. Make sure it is properly aligned and sits securely in the mount. Check for any wobbling or loose connections, as this can affect the stability of your camera while cycling. Use any additional brackets or attachments provided with the mount to further secure your iPhone camera in place.
4. Test the attachment
Before heading out on your bike, give the attachment a thorough test. Shake your bike gently to ensure the mount and your iPhone camera remain securely in place. Check for any movement or signs of instability. If everything looks and feels secure, you’re ready to take your iPhone camera for a ride!
By following these easy-to-follow instructions, you can confidently attach your iPhone camera to your bicycle for capturing amazing moments while on the go. Remember to always prioritize your safety and check the attachment regularly to ensure it remains secure throughout your ride.
The Pros and Cons of Various iPhone Camera Bike Mounts
When it comes to capturing your cycling adventures on camera, having a secure mount for your iPhone is essential. There are several options available on the market, each with its own pros and cons. Here, I’ll discuss the advantages and disadvantages of various iPhone camera bike mounts to help you make an informed decision.
Handlebar Mounts
One popular option for mounting an iPhone camera to your bike is a handlebar mount. These mounts typically attach to your bike’s handlebars and securely hold your phone in place. The pros of using a handlebar mount include easy accessibility, as your phone will be within reach while you’re riding, and a clear view of the road ahead. However, one downside is that vibrations from the road may impact the stability of your footage, potentially resulting in shaky videos.
Frame Mounts
Another option is a frame mount, which attaches your iPhone directly to your bike’s frame. This type of mount is more stable than a handlebar mount, as it absorbs vibrations better. It also keeps your iPhone protected from elements like dust and water. However, frame mounts can be more difficult to install and may limit your visibility of the screen while riding. Additionally, depending on the design of your bike frame, you may need to choose a specific frame mount that fits your bike’s geometry.
Chest Mounts
If you prefer a different perspective for your cycling videos, a chest mount may be a good option. Chest mounts typically consist of a harness that secures your iPhone camera to your chest, giving you a first-person point of view. The benefits of using a chest mount include stable footage, as your body acts as a stabilizer, and the ability to capture more of your surroundings. On the downside, chest mounts may obstruct your view of the handlebars and may not be as comfortable for long rides.
Conclusion
Choosing the right iPhone camera bike mount depends on your personal preferences and the type of footage you want to capture. If convenience and easy accessibility are important to you, a handlebar mount may be the way to go. If stability and protection are your priorities, a frame mount is worth considering. For a unique perspective and more immersive footage, a chest mount could be the best choice. Ultimately, the best mount for you will depend on your specific needs and preferences as a cyclist and videographer.
Discover the best options and weigh their advantages and disadvantages
If you enjoy cycling and want to capture your adventures on your iPhone camera, you’ll need a reliable and secure way to attach it to your bicycle. There are several options available, each with its own advantages and disadvantages. Here are some of the best options to consider:
Handlebar Mounts
Handlebar mounts are a popular choice for attaching an iPhone camera to a bicycle. They provide a secure and easily accessible location for your phone, allowing you to capture videos and photos while on the move. These mounts often come with adjustable features that allow you to position your phone at the desired angle. The main advantage of handlebar mounts is their convenience and visibility. However, one disadvantage is that they may add extra weight to your handlebars and affect the balance of your bike.
Frame Mounts
Another option to attach your iPhone camera to your bicycle is using frame mounts. These mounts are designed to attach your phone directly to the frame of your bike, keeping it more stable and reducing the risk of it getting damaged. Frame mounts are often lightweight and compact, ensuring that your phone is secure while not obstructing your cycling experience. However, one disadvantage is that frame mounts may limit your range of motion when cycling, as they are fixed in one location on your bike.
Rearview Mirror Mounts
If you prefer to have a rearview mirror on your bike, there are mounts available that can also hold your iPhone camera. These mounts attach to the same location as the rearview mirror and provide a stable and easily accessible spot for your phone. The advantage of rearview mirror mounts is that they offer a dual function, allowing you to capture your adventures while also ensuring your safety on the road. However, one disadvantage is that the rearview mirror mount may obstruct your view of the road slightly, depending on its design.
Getting the Most out of Your iPhone Camera on a Bike Ride: Tips and Tricks
As an avid cyclist and photography enthusiast, I have always been excited about capturing the breathtaking scenery and memorable moments during my bike rides. The iPhone camera has become an essential tool for me to document my adventures on two wheels. In this article, I will share some tips and tricks to help you get the most out of your iPhone camera while cycling.
1. Invest in a sturdy and secure bike mount: To ensure that your iPhone stays in place and captures stable shots, it’s crucial to invest in a reliable bike mount. Look for one that offers a secure grip and can withstand vibrations and bumps on the road. This will allow you to focus on the ride without worrying about your phone falling off.
2. Use the camera grid and level: The camera grid and level are handy features on the iPhone camera app that can greatly improve the composition of your photos. Enable the grid to follow the rule of thirds and align your subjects and horizons accordingly. The level can help you maintain a straight horizon line and avoid tilted or crooked shots.
- 3. Experiment with different camera modes: The iPhone camera offers a variety of modes, such as panorama, burst, and time-lapse. Experiment with these modes to capture unique perspectives and create dynamic photos and videos.
- 4. Optimize exposure and focus: Tapping on the screen while in the camera app allows you to adjust the exposure and focus of your shots. Take advantage of this feature to ensure that the lighting and subject are properly captured.
- 5. Capture action shots with burst mode: If you’re looking to capture fast-paced action while cycling, burst mode is your best friend. Simply hold down the shutter button to take a series of photos in rapid succession. This will increase your chances of getting the perfect shot.
6. Edit your photos on the go: With the numerous photo editing apps available for the iPhone, you can enhance your images and add creative filters right from your bike. Take a few minutes during breaks to edit your photos and share them with the world.
By following these tips and tricks, you can make the most out of your iPhone camera during your bike rides. Remember to prioritize safety and always be aware of your surroundings while capturing stunning shots!
Capture stunning shots while keeping safety in mind
When attaching your iPhone camera to your bicycle, safety should always be a top priority. Here are some final tips to help you capture stunning shots while staying safe:
1. Secure the mount properly
Make sure the mount you choose is secure and stable. Double-check all the attachment points and ensure that there is no wobbling or movement. This will prevent your iPhone camera from falling off during your ride and potentially causing an accident.
2. Use a protective case
Invest in a durable and shockproof case to protect your iPhone camera from any accidental bumps or falls. Additionally, consider using a waterproof case to shield it from rain or any other unexpected weather conditions while you’re out on the road.
3. Keep your focus on the road
Remember to always prioritize your safety and the safety of others around you. While capturing stunning shots is exciting, ensure that you remain focused on the road and maintain proper control of your bicycle. Avoid getting too distracted by your iPhone camera to prevent accidents.
4. Plan your shots in advance
To minimize the risk of accidents and ensure that you capture the best shots, plan your routes and shots in advance. Familiarize yourself with the area you’ll be riding in and identify safe and scenic spots along the way where you can stop and take photos without interfering with traffic or other cyclists.
5. Practice safe photography techniques
When taking photos while riding your bicycle, always use both hands to steer and control your bike. Use voice commands or a Bluetooth remote to trigger the shutter on your iPhone camera. Avoid looking directly into the camera screen while riding to prevent accidents and maintain your focus on the road.
Conclusion
By following these safety guidelines and keeping these tips in mind, you can capture stunning shots with your iPhone camera while ensuring your safety and the safety of others. Enjoy your rides and create amazing memories!
Best way to attach iphone camera to bicycle

KAMISAFE 80" Phone Tripod Selfie Stick - Tripod for iPhone with Remote Tall Travel Tripod Stand Phone Holder for Video Photo Vlog, 360° Rotation Camera...
Features
| Part Number | KM-80 tripod |
| Model | KM-80 tripod |
| Warranty | 30-day Full Refund and 12-month Quality Warranty |
| Color | Black (80 inch) |


| Price history for KAMISAFE 80" Phone Tripod Selfie Stick - Tripod for iPhone with Remote Tall Travel Tripod Stand Phone Holder for Video Photo Vlog, 360° Rotation Camera Tripod w Cold Shoe Mount for iPhone Android | |
|---|---|
|
Latest updates:
|
|


| Price history for Newmowa Phone Vlog Selfie Monitor Screen, Magnetic Phone Holder Clip Mount, Using Phone Rear Camera for Selfie Vlog Live Stream TikTok, Compatible with iPhone (Wireless Remote for iPhone) | |
|---|---|
|
Latest updates:
|
|

Matterport Axis Gimbal Stabilizer for Smartphone Camera - Motorized Rotating Mount for Professional 3D 360 Photo Scans for iPhone and Android Phones
Features
| Part Number | Axis |
| Model | AXIS |
| Color | black |


| Price history for tridaptor - Universal Digiscoping Adapter | High-Precision Phone to Telescope 3-Axis Metal Holder Mount for Spotting Scope Binocular Monocular Microscope|Fits 2.4" Eyepiece Max&Any Cell Phone Camera | |
|---|---|
|
Latest updates:
|
|


| Price history for NEEWER Overhead Camera Mount Rig with Dual Ballhead Super Clamp/Phone Holder for Desktop Top Down Shots, Metal Multi Device Mount Platform for Photography Lighting, Max Load 26.5lb/12kg, NK002 | |
|---|---|
|
Latest updates:
|
|


| Price history for NEEWER Clip On 67mm Phone ND Filter Kit, Upgraded Lens Clip Cold Shoe Mount/Locking Knob, CPL/ND32/6 Point Star/4 Graduated Color Filters Set Compatible with iPhone 15 Pro Max 14 13 Samsung S22 S23 | |
|---|---|
|
Latest updates:
|
|


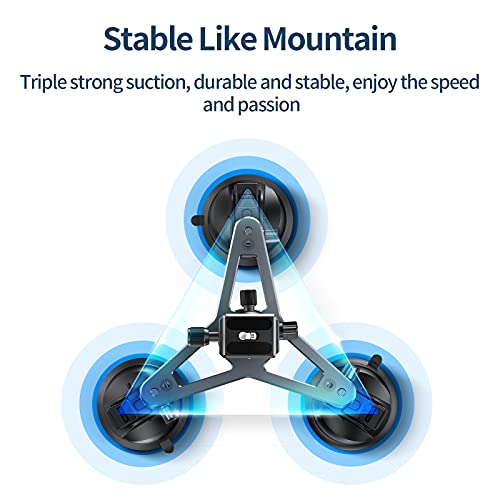

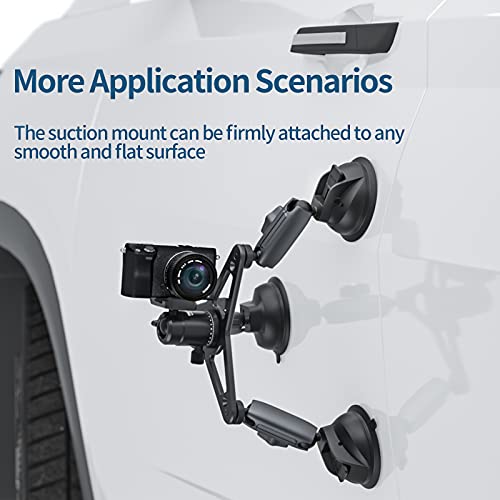

| Price history for Triple Suction Cup Car Mount Heavy Duty Tripod with 360 Ball Head for GoPro Insta360 DJI Action DSLR Mirrorless Camera, Dashboard Windshield Window Hi-Speed Motion Vehicle Holder Attach Accessories | |
|---|---|
|
Latest updates:
|
|

NEEWER Tabletop Overhead Camera Mount Stand with 2 Section Telescopic Extension Arm, Phone Holder, Ball Heads, Screw Adapters, Desk Light Stand for Camera,...
Features
| Part Number | 10101937 |
| Model | TL253A+DS001 |
| Color | Black |
| Is Adult Product |


| Price history for NEEWER Tabletop Overhead Camera Mount Stand with 2 Section Telescopic Extension Arm, Phone Holder, Ball Heads, Screw Adapters, Desk Light Stand for Camera, Phone, Webcam, Ring Light, TL253A+DS001 | |
|---|---|
|
Latest updates:
|
|


| Price history for ULANZI Smartphone Video Rig with Handle, LINO Filmmaking Case Aluminum Alloy Phone Video Stabilizer Grip Tripod Mount for Video Maker Videographer with Cold Shoe for iPhone 13 Mini Pro Max 8 Plus | |
|---|---|
|
Latest updates:
|
|
Question and answers:
What is the best way to attach an iPhone camera to a bicycle?
There are a few different options for attaching an iPhone camera to a bicycle. One popular choice is to use a handlebar mount, which allows you to securely attach your iPhone to the handlebars of your bicycle. Another option is to use a universal smartphone mount, which can be attached to various parts of your bicycle. Some people also choose to use a chest or helmet mount to capture unique perspectives while cycling. Ultimately, the best method for attaching an iPhone camera to a bicycle will depend on personal preferences and the type of cycling you plan to do.
Are there any specific handlebar mounts that are recommended for attaching an iPhone camera to a bicycle?
Yes, there are several handlebar mounts that are highly recommended for attaching an iPhone camera to a bicycle. One popular option is the Quad Lock Bike Mount, which provides a secure and stable attachment for your iPhone. The RokForm Pro Series Bike Mount is another reliable choice, offering a sturdy and adjustable mount for your iPhone camera. The Morpheus Labs M4s iPhone Bike Mount is also highly rated, providing a strong and versatile mounting solution. It’s always a good idea to read reviews and compare different handlebar mounts to find the best one for your needs.
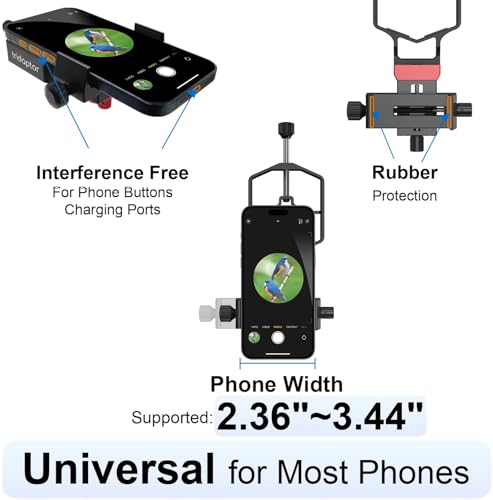
Is it possible to use a universal smartphone mount to attach an iPhone camera to a bicycle?
Yes, a universal smartphone mount can be used to attach an iPhone camera to a bicycle. These mounts are designed to hold various types of smartphones, including the iPhone. They typically feature adjustable arms or brackets that securely hold the iPhone in place. Universal smartphone mounts can be attached to different parts of the bicycle, such as the handlebars, stem, or top tube. It’s important to choose a mount that is compatible with the size and model of your iPhone to ensure a secure fit.
Can I use a chest or helmet mount to attach an iPhone camera to a bicycle?
Yes, it is possible to use a chest or helmet mount to attach an iPhone camera to a bicycle. These mounts allow you to capture unique and dynamic perspectives while cycling. Chest mounts are worn on the chest or torso and provide a stable and hands-free way to film or take photos. Helmet mounts, on the other hand, attach directly to the helmet and offer a first-person point of view. Both options can be used with iPhone cameras by using compatible mounts or adaptors. When using a helmet mount, be sure to follow local laws and regulations regarding helmet usage.


