

Are you ready to step back in time and capture moments instantly with the iconic Polaroid OneStep 600 instant camera? This vintage camera has made a comeback in recent years, attracting a new generation of photography enthusiasts who appreciate the charm of instant film photography. Whether you’re a seasoned photographer or a beginner looking to explore the world of instant photography, the Polaroid OneStep 600 is a fun and easy-to-use camera that can help you create unique and nostalgic images.
In this guide, we’ll walk you through the basics of using the Polaroid OneStep 600 instant camera, from loading film to adjusting settings and capturing the perfect shot. With a few simple tips and tricks, you’ll be on your way to creating stunning instant photos that you can cherish for years to come.

Unboxing and Setting Up Your Camera
When you receive your Polaroid OneStep 600 Instant Camera, the first thing you’ll want to do is unbox it and set it up for use. Follow these steps to get started:
- Open the box and remove all the contents.
- Check that the camera is in good condition and all parts are included.
- Insert the film cartridge into the camera following the instructions provided.
- Ensure the camera is powered on and ready to use.
Once you have completed these steps, you’re ready to start capturing instant memories with your Polaroid OneStep 600 Instant Camera!
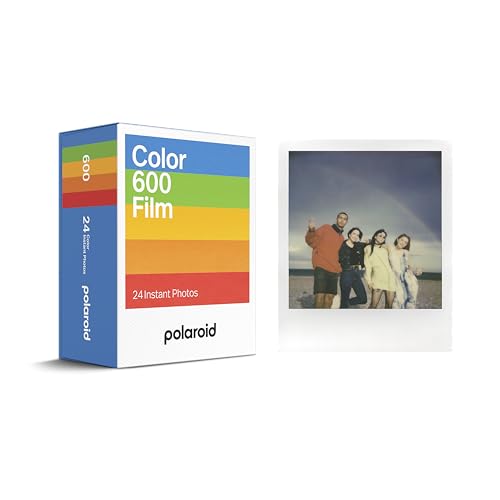
Loading film into the camera
To load film into your Polaroid OneStep 600 Instant Camera, follow these steps:
| 1. | Open the film door located on the front of the camera by sliding the latch to the side. |
| 2. | Insert the film pack into the camera with the black film cover facing outwards. |
| 3. | Close the film door securely until you hear a click. |
| 4. | Turn on the camera by sliding the power switch to the On position. |
| 5. | Wait for the film pack to eject the dark slide, which indicates that the film is loaded and the camera is ready to use. |
Adjusting the exposure settings
To get the perfect exposure for your Polaroid OneStep 600 instant camera, you can adjust the exposure settings based on the lighting conditions. Here’s how:
1. Brightness/Exposure Control: The Polaroid OneStep 600 camera has a built-in brightness/exposure control slider on the front. Slide it to adjust the exposure level. Move it towards the sun icon for bright conditions and towards the cloud icon for darker conditions.
2. Flash: If you are shooting in low light or indoor settings, make sure to use the built-in flash. The flash will help illuminate your subject and improve the overall exposure of the photo.
3. Distance: Ensure that you are at the right distance from your subject. The OneStep 600 camera has a fixed-focus lens, so make sure your subject is within the recommended distance range for sharp and well-exposed photos.
4. Experiment: Don’t be afraid to experiment with different exposure settings and lighting conditions to see what works best for your photos. Practice makes perfect, so take some test shots and adjust the settings accordingly.
Framing and composing your shot
When using a Polaroid OneStep 600 instant camera, framing and composing your shot is crucial to getting the best results. Here are some tips to help you frame and compose your shot effectively:
- Use the viewfinder: The camera has a built-in viewfinder that helps you frame your shot. Look through the viewfinder to ensure that your subject is properly centered and in focus.
- Consider the distance: The camera has a fixed focus lens, so make sure your subject is within the recommended distance for sharp photos. Usually, the ideal distance is around 4 feet.
- Think about composition: Pay attention to the composition of your shot. Consider the rule of thirds and place your subject off-center for a more visually appealing photograph.
- Check the lighting: Lighting plays a crucial role in photography. Make sure your subject is well-lit and avoid shooting in harsh sunlight or low-light conditions.
Practice makes perfect
Don’t be afraid to experiment with different angles and compositions. The more you practice framing and composing your shots, the better you’ll become at capturing beautiful instant photographs with your Polaroid OneStep 600 camera.
Taking a photo with the OneStep 600
Using the OneStep 600 instant camera is a simple and fun process. To take a photo, follow these steps:
1. Prepare your camera
Make sure your camera is loaded with compatible film and that the battery is charged. Check the exposure dial and adjust it based on the lighting conditions.
2. Frame your shot
Look through the viewfinder and frame your subject. Make sure the camera is at the right distance for optimal focus.
Tip: Keep in mind that the OneStep 600 has a fixed focus lens, so ensure your subject is within the recommended distance for clear photos.
Once you have framed your shot, press the shutter button to capture the moment. The photo will be ejected from the camera, and you can watch it develop right before your eyes!
Viewing and Developing Your Instant Photo
After taking a photo with your Polaroid OneStep 600 Instant Camera, wait for the image to fully develop. The development process usually takes a few minutes, but the image may continue to develop over the next 24 hours.
Once the image is fully developed, you can gently peel apart the protective cover to reveal your instant photo. Be careful not to touch the surface of the photo as it may still be sensitive to pressure and fingerprints.
To ensure the best quality of your instant photo, store it in a cool, dry place away from direct sunlight. Avoid bending or folding the photo to prevent damage.
If you notice any abnormalities in the development of your instant photo, such as discoloration or streaks, refer to the troubleshooting section of your camera manual for possible solutions.
| Tip: | For optimal results, consider using a Polaroid OneStep 600 Instant Film pack designed specifically for your camera model. |
Troubleshooting common issues
If you encounter any issues while using your Polaroid OneStep 600 instant camera, here are some common troubleshooting tips:
1. Blurry photos: Make sure the lens is clean and free of smudges. Also, check if the film is loaded correctly and not expired.
2. Flash not working: Ensure the flash is charged and the batteries are inserted correctly. If the issue persists, try replacing the batteries.
3. Film not ejecting: If the film is not ejecting, check if the film pack is inserted properly and that the camera is turned on. You may also need to gently pull on the film tab to help it eject.
4. Camera not turning on: Check the battery compartment to ensure the batteries are inserted correctly and have power. If the camera still does not turn on, try replacing the batteries.
5. Dark or overexposed photos: Adjust the exposure dial based on the lighting conditions. Dark photos may require a higher exposure setting, while overexposed photos may need a lower setting.
Remember to always refer to the camera’s manual for specific troubleshooting steps and maintenance tips.
Tips and Tricks for Capturing the Perfect Instant Photo
Using a Polaroid OneStep 600 instant camera can be a fun and nostalgic experience. Here are some tips and tricks to help you capture the perfect instant photo:
- Check the lighting: Good lighting is crucial for a great instant photo. Make sure you’re shooting in well-lit areas to avoid dark or blurry images.
- Get up close: The OneStep 600 works best when you’re shooting subjects that are within 4-8 feet away. Get close to your subject for clear and sharp images.
- Use the flash: If you’re shooting indoors or in low light conditions, don’t forget to use the built-in flash to ensure your photos turn out well-exposed.
- Experiment with angles: Try shooting from different angles to add interest to your photos. Don’t be afraid to get creative and play around with composition.
- Wait for the image to develop: After you take a photo, give it some time to fully develop before handling it. This will help prevent smudging or distorting the image.


