
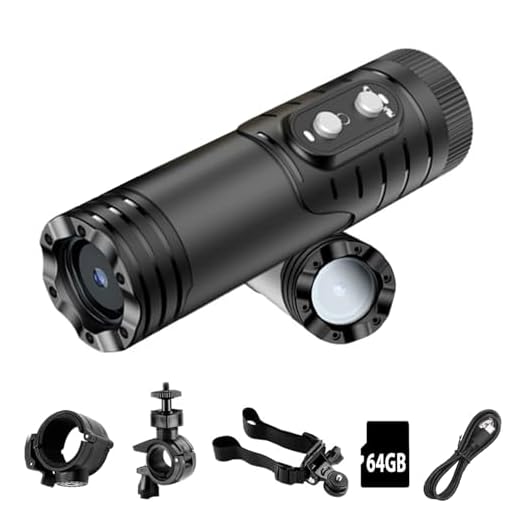


Are you an adrenaline junkie who loves capturing the thrill of your motorcycle rides? If so, then a GoPro motorcycle helmet camera is a must-have accessory for you. These compact and durable cameras are designed to withstand the rigors of motorcycle riding while capturing stunning footage of your adventures.
Whether you’re cruising down the highway, carving through twisty mountain roads, or hitting the dirt trails, a GoPro helmet camera can document every twist and turn of your journey. In this guide, we’ll walk you through the steps on how to use a GoPro motorcycle helmet camera effectively to capture the best footage of your rides.
Benefits of Using a GoPro Motorcycle Helmet Camera
There are several benefits to using a GoPro motorcycle helmet camera while riding:
1. Capturing your rides: With a GoPro camera mounted on your helmet, you can easily capture all your rides and relive the moments later.
2. Safety and security: A helmet camera can serve as a safety tool by providing video evidence in case of accidents or disputes on the road.
3. Sharing experiences: You can share your thrilling motorcycle adventures with friends and family by recording them with a helmet camera.
4. Improving skills: By reviewing footage from your rides, you can analyze your riding style and improve your skills as a motorcyclist.
5. Creating memories: A GoPro helmet camera allows you to create lasting memories of your motorcycle journeys that you can cherish for years to come.
Easy Installation Process for GoPro Helmet Cameras
Installing a GoPro helmet camera on your motorcycle helmet is a simple process that allows you to capture all your adventurous rides. Follow these easy steps to securely attach your GoPro camera:
Step 1: Prepare Your Helmet
Before installing the GoPro camera, make sure your helmet is clean and dry. Remove any dirt or debris that may interfere with the adhesive.
Step 2: Attach the Mount
Peel off the adhesive backing of the GoPro helmet mount and firmly press it onto the desired location on your helmet. Make sure the surface is flat and smooth for a secure attachment.
Tip: It’s recommended to position the mount on the top or side of your helmet for the best angle while recording.
Once the mount is securely attached, you can easily clip your GoPro camera onto it and start recording your thrilling motorcycle adventures!
Recording High-Quality Footage with GoPro Helmet Cameras
GoPro helmet cameras are a popular choice for capturing action-packed footage while riding a motorcycle. To ensure you record high-quality videos, follow these tips:
1. Mounting: Properly mount the GoPro camera on your helmet to ensure a stable and secure attachment. Make sure the camera is facing the right direction to capture the best angle of your ride.
2. Settings: Adjust the camera settings to the appropriate resolution and frame rate for the type of footage you want to capture. Experiment with different settings to find the best quality for your needs.
3. Lighting: Pay attention to the lighting conditions when recording. Avoid filming directly into the sun to prevent glare and overexposure. Try to capture footage in well-lit environments for the best results.
4. Stabilization: Consider using a stabilizing mount or software to reduce shaky footage and improve overall video quality. Smooth footage is essential for a professional-looking final product.
5. Editing: After recording, use editing software to enhance your footage further. Trim unnecessary parts, add music or effects, and adjust colors and contrast to create a polished video.
By following these tips and practicing with your GoPro helmet camera, you can capture stunning footage of your motorcycle adventures with ease.
Safety Precautions When Using GoPro Helmet Cameras
When using a GoPro helmet camera, it is important to prioritize safety to ensure a smooth and secure recording experience. Here are some safety precautions to keep in mind:
- Always wear a helmet that fits properly and securely fastened before attaching the camera.
- Make sure the camera mount is stable and securely attached to the helmet.
- Check the camera’s battery life and storage capacity before starting your ride.
- Ensure the camera lens is clean and free from any obstructions that may affect the video quality.
- Avoid mounting the camera in a way that obstructs your vision or could potentially cause injury in the event of a crash.
- Follow all traffic rules and regulations while riding with the camera to avoid accidents.
- Regularly check the camera and mount for any signs of wear or damage that may compromise its stability.
- Take breaks to adjust the camera position or settings if needed, but always do so in a safe location away from traffic.
- Be mindful of your surroundings and other road users while recording with the camera to prevent any distractions.
Editing and Sharing Your GoPro Helmet Camera Videos
Once you have captured some amazing footage with your GoPro helmet camera, the next step is to edit and share your videos. Editing allows you to cut, trim, and enhance your footage to create a polished final product. Here are some tips on how to edit and share your GoPro helmet camera videos:
1. Editing Software
There are several editing software options available that are compatible with GoPro footage, such as GoPro Studio, Adobe Premiere Pro, Final Cut Pro, and iMovie. Choose a software that suits your skill level and editing needs.
2. Editing Process
Import your footage into the editing software and start cutting and trimming the clips to remove any unwanted parts. Add transitions, music, and effects to enhance your video. You can also adjust the color, brightness, and contrast to make your footage look professional.
| Step | Description |
|---|---|
| 1 | Import footage into editing software |
| 2 | Cut and trim clips |
| 3 | Add transitions, music, and effects |
| 4 | Adjust color and brightness |
Once you are happy with your edited video, export it in a suitable format for sharing on social media platforms or video-sharing websites. You can also create a highlight reel of your best moments to showcase your adventures with your GoPro helmet camera.
Remember to respect copyright laws when using music in your videos and always give credit to the original creators. Sharing your GoPro helmet camera videos can inspire others to explore the world and capture their own adventures.
Tips for Getting the Best Shots with Your GoPro Helmet Camera
Using a GoPro helmet camera can capture some amazing footage while riding your motorcycle. To ensure you get the best shots, here are some tips to keep in mind:
- Mounting Position: Experiment with different mounting positions on your helmet to find the best angle for your shots. Make sure the camera is secure and doesn’t obstruct your vision.
- Settings: Adjust the settings on your GoPro to suit the lighting conditions and desired effect. Play around with resolution, frame rate, and exposure settings to get the best results.
- Stabilization: Consider using a stabilization mount or software to reduce shakiness in your footage, especially when riding on rough terrain.
- Composition: Pay attention to the composition of your shots. Try to frame the action in an interesting and dynamic way to create visually appealing footage.
- Experiment: Don’t be afraid to try new angles and techniques to capture unique and exciting footage. Get creative and have fun with your GoPro helmet camera!


