

Mounting a GoPro camera in your car can add a new dimension to your driving experience, allowing you to capture exciting moments and breathtaking views.
Whether you want to record your road trips, track your driving skills, or simply capture memorable moments, mounting a GoPro in your car is a great way to document your adventures.
With the right mounting accessories and placement, you can achieve stable and high-quality footage that will enhance your driving videos.
Step-by-Step Guide on Mounting GoPro Camera in Car
Mounting a GoPro camera in your car can be a great way to capture exciting moments while driving. Follow these steps to securely mount your GoPro camera:
Step 1: Choose the Right Mount
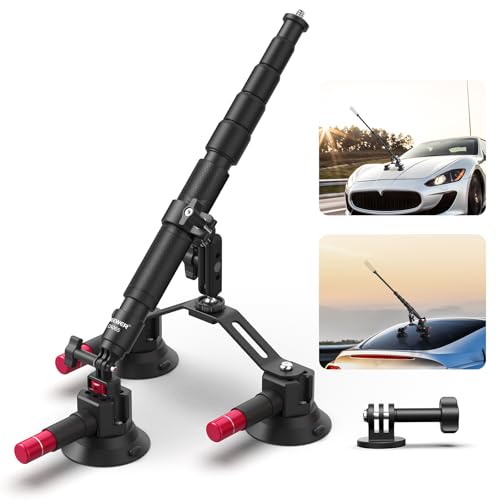
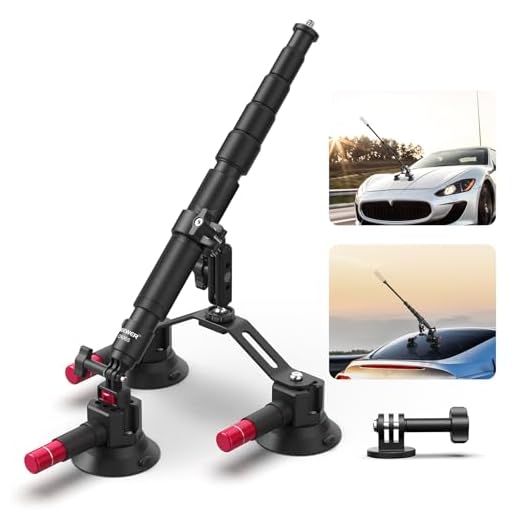
Start by selecting the appropriate mount for your car. There are various mounts available, such as suction cup mounts, adhesive mounts, or roll bar mounts. Choose the one that best suits your car’s interior and the angle you want to capture.
Step 2: Clean the Mounting Surface
Before attaching the mount, make sure to clean the surface where you will be placing it. Use a microfiber cloth and some rubbing alcohol to ensure a clean and smooth surface for the mount to adhere to.
Continue with the rest of the steps to securely attach your GoPro camera in your car and start recording your adventures on the road!
Choosing the Right Mounting Location
When mounting your GoPro camera in your car, it is crucial to choose the right location to ensure optimal footage and safety. Here are some key factors to consider:
1. Line of Sight
Ensure that the camera has a clear line of sight to capture the desired view. Avoid obstructing the camera with dashboard elements or windshield wipers.
2. Stability
Select a mount location that provides stability and minimizes vibrations. Mounting the camera on a flat surface or using a suction cup mount on a smooth surface can help achieve stable footage.
Preparing the Surface for Mounting
Before attaching your GoPro camera to your car, it’s important to prepare the mounting surface properly to ensure a secure and stable attachment. Here are some steps to follow:
Clean the Surface
Start by thoroughly cleaning the area where you plan to mount your GoPro camera. Use a mild cleaner or alcohol wipe to remove any dirt, dust, or debris that could interfere with the adhesive’s bond.
Dry the Surface
After cleaning, make sure the surface is completely dry before attaching the mount. Any residual moisture can compromise the adhesive’s effectiveness. You can use a clean, dry cloth to ensure the surface is dry and ready for mounting.
Attaching the Mount to the Car
Before you attach the GoPro camera to your car, you need to find a suitable mounting location. Make sure the surface is clean and dry to ensure the mount adheres properly.
Here are the steps to attach the mount to your car:
- Choose the location where you want to mount the camera. Popular spots include the windshield, dashboard, or the body of the car.
- Use the adhesive mount provided with your GoPro camera. Peel off the protective film from the adhesive side of the mount.
- Press the adhesive side firmly against the chosen location on your car. Make sure it is securely attached.
- Allow the adhesive to set for at least 24 hours before mounting the GoPro camera onto the mount.
Once the mount is securely attached to your car, you can easily attach and detach your GoPro camera as needed for capturing your adventures on the road.
Securing the GoPro Camera on the Mount
Once you have attached the GoPro camera to the mount, it’s important to secure it properly to ensure it stays in place during your car ride. Follow these steps to securely fasten the camera:
Step 1: Tighten the Mount
Make sure the mount is securely attached to the desired location in your car. Use any included tools or tightening mechanisms to ensure the mount is stable and will not move during your drive.
Step 2: Lock the Camera
After placing the GoPro camera on the mount, use the locking mechanism (if available) to secure the camera in place. This will prevent any accidental movement or dislodging of the camera while you’re on the road.
Adjusting the Camera Angle and Position
Once you have mounted your GoPro camera in your car, it’s important to adjust the camera angle and position to ensure you capture the best footage possible. Here are some tips for getting the perfect shot:
- Start by adjusting the angle of the camera so that it is pointing in the direction you want to capture. You can tilt the camera up or down to get the desired view.
- Make sure the camera is securely mounted and not shaking or moving while driving. This will help avoid blurry footage.
- Experiment with different positions for the camera to find the best angle for your specific needs. You can mount it on the dashboard, windshield, or even on the side of the car.
- Consider using a swivel mount or adjustable arm to easily change the camera angle while on the go.
- Check the camera’s viewfinder or app to see the live footage and make any necessary adjustments before recording.
Testing the Stability of the Mount
Before hitting the road with your GoPro mounted in your car, it’s crucial to test the stability of the mount. This step ensures that your camera stays securely in place and captures smooth footage without any unwanted vibrations.
Steps to test the stability:
- Attach the GoPro to the mount following the manufacturer’s instructions.
- Place the camera in the desired position inside your car, making sure it has a clear view of the road ahead.
- Drive on different terrains, including smooth roads, bumpy roads, and turns, to simulate real-life conditions.
- Check the footage afterward to see if there are any shakes or vibrations that may affect the video quality.
By testing the stability of the mount before your journey, you can make any necessary adjustments to ensure your GoPro captures stable and high-quality footage during your car rides.
Safely Removing the Camera from the Mount
Once you have finished recording your adventures, it’s important to safely remove your GoPro camera from the mount to avoid any damage. Follow these steps:
Step 1: Turn Off the Camera
Before removing the camera, make sure it is turned off to prevent any accidental recordings or data loss.
Step 2: Release the Mount
Gently press the release button or lever on the mount to detach the camera. Be careful not to apply too much force to avoid damaging the mount or camera.
Tip: If the mount is sticky or difficult to release, try using a small amount of lubricant to help loosen it.


