


Are you looking to improve the audio quality of your videos shot with a DSLR Canon camera? One of the best ways to achieve this is by using an external microphone. While the built-in microphone on your camera can capture sound, it often picks up unwanted noise and lacks the clarity and depth that an external microphone can provide.
Using a microphone with your DSLR Canon camera can make a significant difference in the overall production value of your videos. Whether you are filming interviews, vlogs, or short films, having clear and crisp audio can elevate the viewing experience for your audience.

In this guide, we will walk you through the steps on how to properly connect and use a microphone with your DSLR Canon camera. From choosing the right microphone for your needs to setting it up correctly, we will cover everything you need to know to start capturing professional-quality audio for your videos.
How to Connect a Microphone
To connect a microphone to your DSLR Canon camera, follow these steps:
- Locate the microphone input: Find the microphone input port on your camera, usually located on the side or front.
- Choose the right microphone: Select a compatible external microphone for your camera. Make sure it has the correct connector for your camera’s input.
- Connect the microphone: Insert the microphone plug into the camera’s microphone input port. Ensure it is securely connected.
- Adjust settings: Access your camera’s menu and adjust the audio input settings to use the external microphone.
- Test the microphone: Record a short test video to check if the microphone is working properly. Monitor the audio levels to ensure good sound quality.
By following these steps, you can easily connect a microphone to your DSLR Canon camera and improve the audio quality of your videos.
Step-by-Step Guide
Using a microphone with your Canon DSLR camera can greatly improve the audio quality of your videos. Follow these steps to connect and set up a microphone:
| 1. | Choose the right microphone: Make sure the microphone you have is compatible with your Canon DSLR camera. Consider factors like microphone type (shotgun, lavalier, etc.) and connection type (3.5mm jack, XLR, etc.). |
| 2. | Attach the microphone: Connect your microphone to the camera’s microphone input. For most Canon DSLR cameras, the microphone input is located on the side near the other ports. |
| 3. | Adjust microphone settings: Access the camera’s menu and locate the audio settings. Set the input level to an appropriate level to avoid distortion or low volume. |
| 4. | Test the microphone: Record a short test video with the microphone attached. Play back the video to ensure the audio is clear and at the desired level. |
| 5. | Monitor audio levels: While recording, keep an eye on the audio levels displayed on the camera’s screen. Adjust the input level as needed to maintain optimal audio quality. |
| 6. | Use external audio recorder (optional): For even better audio quality, consider using an external audio recorder and syncing the audio with your video in post-production. |
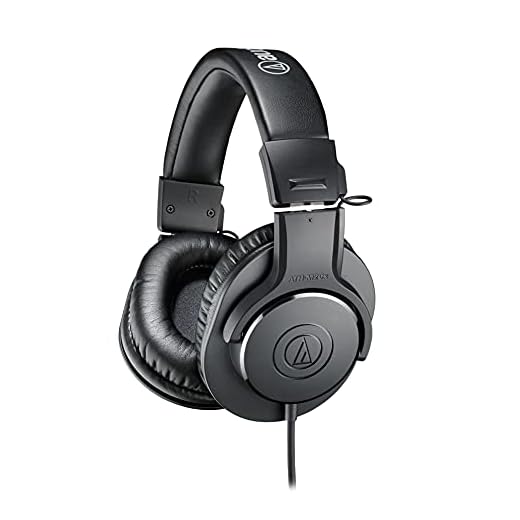
Choosing the Right Microphone
When selecting a microphone for your DSLR Canon camera, it’s important to consider the type of microphone that will best suit your needs. There are several options available, each with its own advantages and disadvantages.
1. Shotgun Microphone
A shotgun microphone is a popular choice for capturing directional sound. It is ideal for recording audio in a specific direction and minimizing background noise. This type of microphone is great for interviews, vlogs, and outdoor filming.
2. Lavalier Microphone
A lavalier microphone, also known as a lapel mic, is a small and discreet microphone that can be clipped to clothing. This type of microphone is perfect for hands-free recording and capturing clear audio in close-range situations, such as interviews or presentations.
Consider your filming needs and the environment in which you will be recording when choosing the right microphone for your DSLR Canon camera. It’s essential to test different microphones to find the one that best suits your requirements.
Microphone Settings on Canon DSLR
When using a microphone with your Canon DSLR camera, it is important to ensure that the microphone is properly configured to capture high-quality audio. Here are some microphone settings you can adjust on your Canon DSLR:
1. Input Levels: Adjust the input levels on your camera to ensure that the microphone is not too loud or too quiet. You can usually adjust the input levels in the camera’s audio settings menu.
2. Wind Noise Reduction: If you are shooting outdoors or in a windy environment, consider enabling the wind noise reduction feature on your camera. This can help reduce unwanted noise caused by wind hitting the microphone.
3. Audio Monitoring: Use headphones to monitor the audio while recording to ensure that the microphone is capturing clear sound. This can help you make adjustments on the fly if needed.
4. External Microphone: For the best audio quality, consider using an external microphone with your Canon DSLR. External microphones can provide better sound quality and allow you to capture audio from a specific direction.
By adjusting these microphone settings on your Canon DSLR camera, you can ensure that you capture high-quality audio for your videos or recordings.
Adjusting Audio Levels
When using a microphone with your DSLR Canon camera, it is important to ensure that the audio levels are properly adjusted to capture clear and high-quality sound. Here are some tips on adjusting audio levels:
1. Monitor the audio levels
Before you start recording, make sure to monitor the audio levels on your camera. Many DSLR Canon cameras have a built-in audio level meter that shows you the volume of the sound being captured. Adjust the levels so that the audio signal does not peak or clip, resulting in distortion.
2. Use manual audio settings
Instead of relying on automatic audio settings, consider using manual audio settings on your camera. This gives you more control over the audio levels and allows you to adjust them according to the environment and the type of sound you are recording. Experiment with different settings to find the best balance for your recording.
Using an External Recorder
If you want to achieve higher quality audio recordings with your DSLR Canon camera, you can use an external recorder. This device allows you to capture audio separately from your camera and then sync it up in post-production.

Here’s how to use an external recorder with your DSLR Canon camera:
- Connect the external recorder to your microphone using the appropriate cables.
- Adjust the recording settings on the external recorder to ensure optimal audio quality.
- Start recording on the external recorder before you begin filming with your DSLR camera.
- After filming, import both the video from your camera and the audio from the external recorder into your editing software.
- Sync up the audio and video tracks in your editing software by matching the waveforms or using a clapperboard as a reference.
- Adjust the audio levels as needed and make any necessary edits to achieve the desired sound quality.
- Export your final video with the high-quality audio track included.
Testing Your Microphone
Once you have connected your microphone to your DSLR Canon camera, it’s important to test it to ensure everything is working correctly before you start recording. Here are some steps to help you test your microphone:
- Turn on your camera and microphone.
- Set your camera to video mode.
- Adjust the microphone settings on your camera if needed.
- Speak into the microphone to check if the sound is being picked up.
- Monitor the audio levels on your camera to ensure they are not peaking or too low.
- Record a test clip and play it back to check the audio quality.
By following these steps, you can make sure that your microphone is working properly and that you are ready to start recording high-quality audio with your DSLR Canon camera.
Recording Techniques
When using a microphone with your DSLR Canon camera, there are several recording techniques you can employ to ensure high-quality audio:
1. Positioning: Properly position the microphone close to the sound source to capture clear audio. Experiment with different placements to find the optimal position.
2. Wind Protection: Use a windscreen or deadcat to reduce wind noise when filming outdoors. This will help maintain the clarity of the audio.
3. Levels: Adjust the microphone levels on your camera to prevent clipping or distortion. Start with a low level and gradually increase it until you reach the desired volume.
4. Monitoring: Use headphones to monitor the audio while recording. This will help you identify any issues and make adjustments in real-time.
5. Post-Processing: After recording, you can enhance the audio quality by using editing software to adjust levels, remove noise, and add effects if necessary.
Editing Audio in Post-Production
After recording your audio with a microphone connected to your DSLR Canon camera, it’s important to edit the audio in post-production to enhance its quality. Here are some steps to follow:
- Import the audio files into your editing software.
- Listen to the audio and identify any background noise or unwanted sounds.
- Use audio editing tools to remove background noise, adjust levels, and enhance clarity.
- Apply equalization to balance the audio frequencies.
- Add effects or filters to improve the overall audio quality.
- Sync the edited audio with your video footage for a seamless viewing experience.
By following these steps, you can ensure that your audio sounds professional and enhances the overall quality of your video content.
Troubleshooting Common Issues
When using a microphone with your DSLR Canon camera, you may encounter some common issues. Here are a few troubleshooting tips to help you resolve them:
1. No Sound:
If you are not getting any sound from your microphone, check the following:
- Make sure the microphone is properly connected to the camera’s microphone input.
- Check the microphone’s battery to see if it needs to be replaced.
- Adjust the microphone’s input level on the camera to ensure it is not muted or set too low.
2. Background Noise:
If you are hearing unwanted background noise in your recordings, try the following:
- Use a directional microphone to focus on capturing sound from a specific direction.
- Reduce environmental noise by moving to a quieter location or using a windscreen to block out wind noise.
- Adjust the microphone’s gain settings to minimize noise interference.
| Issue | Solution |
|---|---|
| No Sound | Check microphone connection, battery, and input level. |
| Background Noise | Use directional microphone, reduce environmental noise, adjust gain settings. |
Final Tips and Recommendations
Here are some final tips and recommendations for using a microphone with your DSLR Canon camera:
- Always test your microphone setup before important recordings to ensure the audio quality is optimal.
- Use a windscreen or deadcat to reduce wind noise when recording outdoors.
- Adjust the microphone levels on your camera to avoid distortion or clipping.
- Consider using an external recorder for higher quality audio recordings.
- Experiment with different microphone placements to find the best sound for your specific recording situation.
By following these tips, you can enhance the audio quality of your videos and create professional-looking content with your DSLR Canon camera.
FAQ
How do I connect a microphone to my DSLR Canon camera?
To connect a microphone to your DSLR Canon camera, you will need a microphone with a 3.5mm jack. Simply plug the microphone into the microphone input jack on your camera. Make sure to adjust the audio settings on your camera to ensure the microphone is recognized and the audio levels are set correctly.
What are the benefits of using an external microphone with a DSLR Canon camera?
Using an external microphone with your DSLR Canon camera can greatly improve the audio quality of your videos. External microphones are designed to capture clearer audio and reduce background noise, resulting in professional-sounding recordings. This can make a significant difference, especially when recording interviews, vlogs, or any other content where audio quality is important.


