

Have you ever gazed up at the night sky, mesmerized by the twinkling stars and wondered how to capture their beauty with your DSLR camera? Shooting stars can be a challenging yet rewarding experience for photographers, requiring careful planning, the right equipment, and a good understanding of camera settings. In this guide, we will walk you through the essential steps to help you take stunning pictures of stars and the Milky Way.
Whether you’re a beginner looking to dip your toes into astrophotography or a seasoned photographer wanting to enhance your skills, capturing stars with your DSLR camera can open up a whole new world of creativity and wonder. With the right techniques and a bit of practice, you can create breathtaking images that will leave viewers in awe of the beauty of the night sky.
Essential Tips for Astrophotography with DSLR Camera
When it comes to capturing stunning images of the night sky with a DSLR camera, there are a few key tips to keep in mind. Whether you’re a beginner or a seasoned astrophotographer, these essential tips will help you get the most out of your equipment and capture breathtaking shots of the stars.
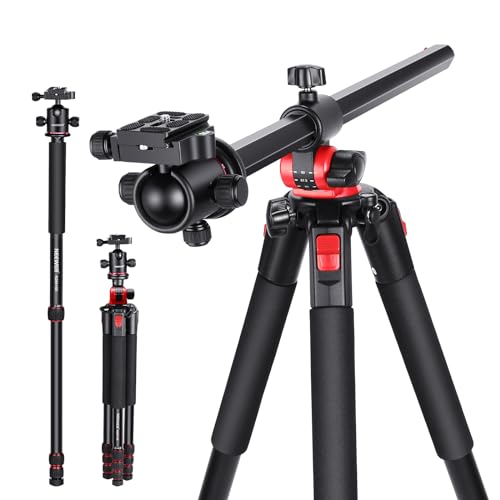
1. Use a Sturdy Tripod
One of the most important tools for astrophotography is a sturdy tripod. A stable base is essential for long exposure shots of the night sky, as even the slightest movement can result in blurry images. Invest in a high-quality tripod to ensure your camera remains steady throughout the long exposure process.

2. Know Your Camera Settings
Understanding your camera settings is crucial for capturing clear and detailed images of the stars. Make sure to set your camera to manual mode and adjust the ISO, aperture, and shutter speed to suit the conditions of the night sky. Experiment with different settings to find the perfect combination for your desired shot.
| ISO | Aperture | Shutter Speed |
|---|---|---|
| Start with a low ISO (e.g., 400) to reduce noise | Use a wide aperture (e.g., f/2.8) to let in more light | Set a long shutter speed (e.g., 20-30 seconds) for star trails |
Choosing the Right DSLR Camera for Star Photography
When it comes to capturing stunning photos of stars, choosing the right DSLR camera is crucial. Here are some key factors to consider when selecting a camera for astrophotography:
Sensor Size
The size of the camera’s sensor plays a significant role in capturing clear and detailed images of stars. Full-frame sensors are preferred for astrophotography as they offer better low-light performance and noise reduction compared to crop sensors.
ISO Performance
Look for a DSLR camera with good ISO performance to ensure you can capture bright and sharp images of stars. Higher ISO settings allow you to shoot in low-light conditions without introducing too much noise into your photos.
- Check the camera’s maximum ISO range to see if it meets your requirements for shooting stars.
- Consider cameras with low-light optimized sensors for better performance in astrophotography.
By considering these factors, you can choose the right DSLR camera to capture breathtaking photos of stars in the night sky.
Understanding Camera Settings for Night Sky Photography
When capturing stunning images of the night sky with your DSLR camera, understanding the right camera settings is crucial for achieving the best results. Here are some key settings to consider:
1. Aperture
Choose a wide aperture (small f-stop number) to allow more light into your camera and capture brighter stars. However, be mindful of depth of field considerations when selecting your aperture setting.
2. Shutter Speed
Use a long exposure to capture the faint light of stars. Experiment with different exposure times to find the optimal balance between capturing enough light and avoiding star trails.
Selecting the Best Lens for Capturing Stars
When it comes to taking pictures of stars with a DSLR camera, selecting the right lens is crucial for achieving stunning results. Here are some key factors to consider when choosing a lens for astrophotography:
Wide Aperture: Look for a lens with a wide maximum aperture (f/2.8 or wider) to gather as much light as possible in low-light conditions.
Wide Angle: A wide-angle lens (around 14-24mm) is ideal for capturing expansive views of the night sky and creating dramatic compositions.
Fast Focusing: Opt for a lens with fast and accurate autofocus capabilities to quickly lock onto stars and ensure sharp images.
High-Quality Optics: Choose a lens with high-quality optics to minimize aberrations and distortions, resulting in clear and detailed star images.
By considering these factors and selecting the best lens for capturing stars, you can enhance your astrophotography skills and create breathtaking images of the night sky.
Using a Sturdy Tripod for Stable Shots
When capturing pictures of stars with a DSLR camera, using a sturdy tripod is crucial for achieving sharp and stable shots. Here are some tips on how to properly use a tripod for astrophotography:
- Select a tripod that is sturdy and can support the weight of your camera and lens without wobbling.
- Set up the tripod on a flat and stable surface to minimize vibrations during long exposures.
- Extend the legs of the tripod fully and adjust the height to your desired shooting position.
- Use a remote shutter release or the camera’s self-timer to avoid camera shake when pressing the shutter button.
- Consider using a sandbag or weight hanging from the center column of the tripod to add extra stability in windy conditions.
- Ensure that the tripod head is securely tightened to prevent any movement while framing and capturing the stars.
Mastering Manual Focus for Sharp Star Images
One of the most crucial aspects of capturing stunning star images with your DSLR camera is mastering manual focus. Follow these tips to ensure sharp and clear star photos:
1. Set your lens to manual focus mode
Switch your lens to manual focus mode to have full control over focusing. This is essential for capturing sharp star images as autofocus may struggle in low light conditions.
2. Use Live View and zoom in
Activate Live View mode on your camera and zoom in on a bright star or planet in the night sky. Adjust the focus ring on your lens until the star appears as a pinpoint of light.
Follow these steps to achieve precise manual focus and capture sharp star images with your DSLR camera.
Setting the Correct Exposure Time for Star Trails
To capture stunning star trail photos, it is essential to set the correct exposure time on your DSLR camera. The exposure time determines how long the camera’s shutter remains open, allowing light to hit the sensor and create the image. When photographing star trails, longer exposure times are generally preferred to capture the movement of the stars across the sky.
For star trail photography, start by setting your camera to Bulb mode, which allows you to manually control the exposure time. Experiment with exposure times ranging from a few minutes to several hours, depending on the effect you want to achieve. Keep in mind that longer exposure times will result in longer star trails and a more dramatic effect.
Additionally, consider the ambient light conditions and the brightness of the stars in the sky when determining the exposure time. A dark, clear night with bright stars may require shorter exposure times, while a moonlit night or urban setting with light pollution may necessitate longer exposure times to capture the stars effectively.
Remember to use a sturdy tripod to keep your camera stable during long exposures and avoid camera shake. Experiment with different exposure times and settings to find the perfect balance for capturing stunning star trail photos with your DSLR camera.
Utilizing a Remote Shutter Release for Minimal Camera Shake
One of the key factors in capturing clear and sharp images of stars with a DSLR camera is minimizing camera shake. Even the smallest movement of the camera can result in blurry photos, especially when shooting at long exposure times.
A great way to reduce camera shake is by using a remote shutter release. This handy accessory allows you to trigger the camera’s shutter without physically touching the camera, thus eliminating the risk of introducing vibrations that can affect image quality.
When using a remote shutter release for astrophotography, make sure to set up your camera on a stable tripod and frame your shot as desired. Then, connect the remote shutter release to your camera and trigger the shutter to capture the image without any shake.
By utilizing a remote shutter release, you can greatly improve the sharpness of your starry sky photos and achieve stunning results. It’s a simple yet effective tool that can make a significant difference in the quality of your astrophotography.
Post-Processing Techniques for Enhancing Star Photos
Once you have captured stunning star photos with your DSLR camera, it’s time to enhance them further through post-processing techniques. Here are some tips to make your star photos truly shine:
1. Adjust Brightness and Contrast
One of the first steps in post-processing is to adjust the brightness and contrast of your star photos. This can help bring out the details of the stars and make them more prominent in the image. Be careful not to overdo it, as this can lead to unnatural-looking photos.
2. Reduce Noise
Since star photos are often captured in low light conditions, they can be prone to noise. Use noise reduction tools in your editing software to clean up any noise and make your stars appear sharper and clearer. Be mindful not to lose too much detail in the process.
Tips for Finding Dark Skies and Ideal Conditions for Star Photography
When taking pictures of stars with your DSLR camera, finding dark skies with minimal light pollution is crucial for capturing clear and vibrant images of the night sky. Here are some tips to help you find the best locations for star photography:
1. Research Light Pollution Maps
Before heading out to shoot stars, use online light pollution maps to identify areas with low light pollution levels. Look for locations far away from cities and urban areas to minimize light interference in your photos.
2. Check Weather Conditions
Keep an eye on weather forecasts to ensure clear skies and minimal cloud cover for optimal star photography conditions. Cloudy skies can obstruct your view of the stars and affect the quality of your images.
- Choose nights with no or minimal moonlight to avoid excessive brightness in your photos.
- Consider the season and time of year, as different constellations and celestial events are visible during specific months.
By finding dark skies and ideal conditions for star photography, you can enhance the quality of your images and capture stunning shots of the night sky with your DSLR camera.
FAQ
What equipment do I need to take pictures of stars with a DSLR camera?
To take pictures of stars with a DSLR camera, you will need a DSLR camera with manual settings, a sturdy tripod, a wide-angle lens with a fast aperture (f/2.8 or wider is recommended), a remote shutter release or timer, and a dark location with minimal light pollution.
What camera settings should I use to capture stars with a DSLR camera?
When capturing stars with a DSLR camera, you should set your camera to manual mode, use a wide aperture (such as f/2.8 or wider), set the ISO to a high value (usually between 800-3200), and use a long exposure time (start with 15-30 seconds and adjust as needed).
How can I focus my DSLR camera to capture sharp images of stars?
To focus your DSLR camera for capturing stars, set your lens to manual focus, use live view mode on your camera, zoom in on a bright star, and manually adjust the focus until the star appears sharp. You can also use the infinity focus mark on your lens as a starting point.
What post-processing techniques can I use to enhance my star photos taken with a DSLR camera?
After capturing star photos with a DSLR camera, you can enhance them using post-processing software like Adobe Lightroom or Photoshop. Some common techniques include adjusting the white balance, increasing contrast, reducing noise, and enhancing the clarity of the stars.


