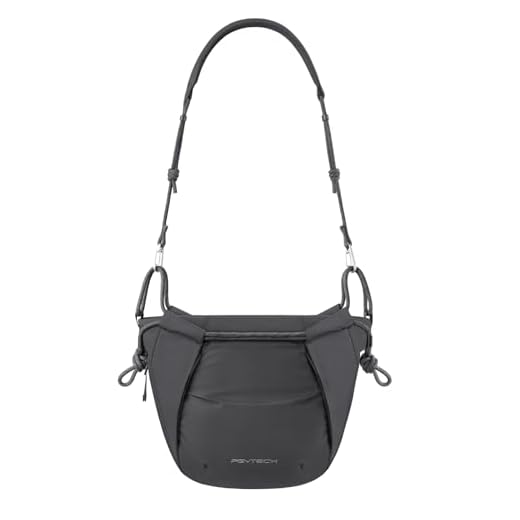
Are you tired of lugging around your DSLR camera without proper protection? A camera bag is a must-have accessory for any photographer, providing a safe and secure way to transport your gear. Instead of buying an expensive camera bag, why not try making your own? In this DIY tutorial, we will guide you through the process of sewing a custom DSLR camera bag that is both functional and stylish.
Materials You’ll Need:
– Heavy-duty fabric
– Padding or foam

– Zipper
– Sewing machine
By following our step-by-step instructions, you can create a camera bag that perfectly fits your DSLR camera and accessories. Not only will you save money by making your own camera bag, but you’ll also have the satisfaction of knowing you crafted it yourself. Let’s get started on this fun and practical sewing project!
Step-by-step guide on sewing a DSLR camera bag
Creating your own DSLR camera bag can be a fun and rewarding project. Follow these steps to sew a custom camera bag that fits your needs:
Materials you will need:
- 1 yard of durable fabric
- Foam padding
- Velcro strips
- Sewing machine
- Scissors
- Thread
Steps to sew a DSLR camera bag:
- Measure and cut the fabric to the desired size, leaving extra for seam allowance.
- Cut the foam padding to fit the dimensions of the fabric and sew it onto the fabric to create a padded lining.
- Sew the sides and bottom of the bag together, leaving the top open.
- Add a Velcro closure to the top of the bag to secure your camera.
- Add any additional pockets or compartments as needed.
- Finish by sewing the straps or handles onto the bag.
Once you have completed these steps, you will have a custom DSLR camera bag that is both functional and stylish!
Materials needed for the camera bag
Before you start sewing your own DSLR camera bag, make sure you have the following materials ready:
Fabric:
You will need a durable and water-resistant fabric to protect your camera. Choose a material that is thick enough to provide adequate padding.
Padding:
Foam padding or quilted padding to protect your camera from bumps and scratches.
Other materials:
- Thread
- Zipper
- Buckles or snaps
- Strap (if you want to make it a crossbody bag)
- Measuring tape
- Scissors
- Sewing machine or needle and thread
Choosing the right fabric for the bag
When selecting fabric for your DSLR camera bag, it is important to choose a material that is durable and protective. Look for fabrics that are water-resistant or waterproof to keep your camera safe from any unexpected spills or rain. Nylon and polyester are popular choices for camera bags due to their strength and resistance to wear and tear.
Consider the padding
Ensure that the fabric you choose has enough padding to protect your camera from bumps and shocks. Padding is crucial in keeping your equipment safe while on the move.
Check the weight and flexibility
Opt for a fabric that is lightweight and flexible to make carrying your camera bag more comfortable. Heavy or stiff fabrics can make the bag cumbersome and difficult to maneuver.
Cutting and sewing the bag pattern
Once you have chosen your fabric and lining, it’s time to cut out the pieces for your camera bag. Use the pattern you created earlier to trace and cut out the main body pieces, side panels, straps, and any additional pockets or compartments you want to include.
Next, pin the pieces together with right sides facing each other and sew along the edges, leaving an opening for turning the bag right side out. Be sure to reinforce the seams for durability, especially if you plan on carrying heavy camera equipment.
After sewing the main body of the bag, attach the straps and any additional components before turning the bag right side out. Finally, press the seams and topstitch around the edges to give your camera bag a polished finish.
Adding padding and compartments for protection
Once you have the basic structure of your DSLR camera bag sewn together, it’s time to add padding and compartments to protect your camera and accessories. Start by cutting pieces of foam padding to fit the interior of the bag. You can use a sharp knife to cut the foam to the desired size and shape.
Next, sew the foam pieces into place inside the bag using a needle and strong thread. Make sure to secure the foam tightly so it doesn’t shift around while you’re on the move. You can also add additional layers of padding if you want extra protection for your gear.
To create compartments for your camera and accessories, measure the items you want to store in the bag and sew dividers into place. You can use fabric or foam to create individual compartments for each item, keeping them organized and protected from bumps and scratches.
By adding padding and compartments to your DIY DSLR camera bag, you can ensure that your gear stays safe and secure while you’re out capturing photos. Take your time to customize the interior to suit your needs and preferences.
Attaching straps and closures to the camera bag
Once you have completed sewing the main body of the camera bag, it’s time to attach the straps and closures to make it functional and easy to carry around. Here’s how you can do it:
1. Adding shoulder straps
Measure and cut two pieces of sturdy fabric to the desired length for shoulder straps. Attach one end of each strap to the sides of the bag using strong thread or rivets. Make sure the straps are securely attached and can bear the weight of the camera.
2. Installing closures
Choose the type of closure you want for your camera bag, such as a zipper, magnetic snap, or buckle. Sew or attach the closure to the top flap or opening of the bag to keep your camera secure inside. Make sure the closure is easy to use and durable.
| Tip: | Consider adding padding or reinforcement to the straps for extra comfort and support while carrying the camera bag. |
Final touches and customization of the camera bag
Once you have completed sewing the basic structure of your DSLR camera bag, you can add some final touches and customize it to your liking. Here are a few ideas:
1. Add padding:
For extra protection, consider adding some padding to the interior of the bag. This will help cushion your camera and lenses from any bumps or knocks.
2. Personalize it:
You can personalize your camera bag by adding patches, pins, or embroidery. This will make your bag unique and reflect your personal style.
With these final touches, your DIY DSLR camera bag will be ready to use and showcase your creativity!
FAQ
What materials do I need to sew a DSLR camera bag?
You will need durable fabric, foam padding, a zipper, lining fabric, thread, sewing machine, and basic sewing tools like scissors and pins. These materials will ensure your camera bag is sturdy and protective.
Is it difficult to sew a DSLR camera bag for a beginner?
Sewing a DSLR camera bag can be a manageable project for beginners with basic sewing skills. The key is to follow a pattern and take your time to ensure accurate measurements and stitching. With practice and patience, you can create a custom camera bag that suits your needs.
Can I customize the design of my DSLR camera bag?
Absolutely! One of the advantages of sewing your own camera bag is the ability to customize the design to fit your style and preferences. You can choose different fabrics, add pockets or compartments, adjust the size, and even incorporate extra padding for more protection.
How long does it take to sew a DSLR camera bag?
The time it takes to sew a DSLR camera bag can vary depending on your sewing experience and the complexity of the design. On average, it may take a few hours to a day to complete a basic camera bag. More intricate designs or additional features may require more time.
What are the benefits of sewing your own DSLR camera bag?
Sewing your own DSLR camera bag allows you to create a custom, one-of-a-kind accessory that perfectly fits your camera and accessories. You can choose the materials, design, and features based on your preferences. Additionally, sewing your own camera bag can be a rewarding and cost-effective way to protect your gear.