


Using a DSLR camera for your facecam in live streams or video recordings can greatly enhance the quality of your content. Not only do DSLR cameras offer superior image quality and depth of field, but they also provide more control over settings such as exposure, focus, and white balance. However, setting up a DSLR camera as a facecam requires some technical know-how and the right equipment.
In this guide, we will walk you through the steps to set up a facecam with a DSLR camera. From choosing the right camera and lens to connecting it to your computer and configuring the settings, we will cover everything you need to know to achieve professional-looking results. Whether you are a streamer, content creator, or video conferencer, using a DSLR camera as your facecam can take your production quality to the next level.

Choose the right camera
When setting up a facecam with a DSLR camera, choosing the right camera is crucial to ensure high-quality video output. Here are some key factors to consider when selecting a camera for your setup:
Resolution
Look for a camera with at least 1080p resolution to capture clear and sharp video footage. Higher resolutions such as 4K can provide even better quality, but may require more processing power and storage space.
Frame Rate
Consider the frame rate capabilities of the camera. A higher frame rate, such as 60fps, can result in smoother motion and more professional-looking videos. Make sure the camera supports the frame rate you desire.
| Brand | Model | Resolution | Frame Rate |
| Canon | EOS 80D | 1080p | 60fps |
| Nikon | D7500 | 4K | 30fps |
| Sony | Alpha a6400 | 4K | 30fps |
Select the right lens
When setting up a facecam with a DSLR camera, selecting the right lens is crucial for achieving the desired results. The lens you choose will have a significant impact on the quality of your video footage, so it’s important to consider factors such as focal length, aperture, and image stabilization.
For facecam setups, a lens with a focal length between 24mm and 50mm is typically recommended as it provides a good balance between capturing the subject and the surrounding background. A wide aperture (such as f/1.8 or f/2.8) is also beneficial for creating a shallow depth of field, which can help to blur the background and make the subject stand out.
Additionally, opt for a lens with image stabilization to reduce the impact of hand shake and ensure smooth, stable footage. This is especially important if you plan to move around or make gestures during your video recording.
| Focal Length | Aperture | Image Stabilization |
|---|---|---|
| 24mm – 50mm | f/1.8 – f/2.8 | Recommended |
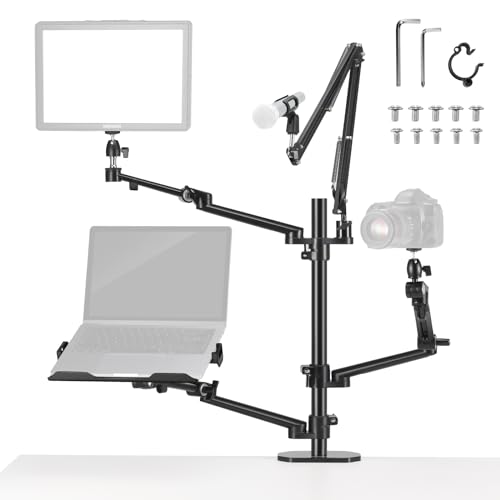
Mount the camera securely
Once you have your DSLR camera ready, it’s important to mount it securely in a stable position. This will ensure that the camera stays in place and doesn’t move or shift during your recording sessions. There are various ways to mount a DSLR camera for use as a facecam, such as using a tripod or a camera mount specifically designed for this purpose.
Using a tripod
A tripod is a versatile and reliable tool for mounting your DSLR camera. Make sure to choose a tripod that is sturdy enough to support the weight of your camera and has adjustable height and angle settings. Position the tripod in a suitable location where the camera can capture your face clearly and adjust the height and angle as needed.
Using a camera mount
If you prefer a more compact and adjustable option, consider using a camera mount that attaches directly to your monitor or desk. These mounts are designed to hold DSLR cameras securely in place and can be adjusted to achieve the desired angle and position for your facecam setup.
Set up the lighting
Good lighting is crucial for achieving high-quality video with your DSLR camera. Here are some tips for setting up the lighting for your facecam:
1. Natural light:
Whenever possible, try to take advantage of natural light. Position your setup near a window or in a well-lit room to make the most of natural light sources.
2. Artificial lighting:
If natural light is not sufficient or consistent, consider investing in artificial lighting sources such as softboxes or ring lights. These can help create a more even and flattering light for your facecam setup.
Experiment with different lighting angles and intensities to find the best setup for your recording environment.
Connect the camera to your computer
Once you have set up your DSLR camera on a tripod or mount, the next step is to connect it to your computer. Follow these steps to establish a connection:
- Use a USB cable: Most DSLR cameras come with a USB cable that you can use to connect the camera to your computer. Plug one end of the cable into the camera’s USB port and the other end into a USB port on your computer.
- Install camera software: Some cameras require you to install specific software on your computer to enable the connection. Check the camera’s manual or manufacturer’s website for instructions on installing the necessary software.
- Turn on the camera: Once the camera is connected to your computer, turn it on and set it to the appropriate mode for live streaming or recording.
- Check the connection: Open your preferred streaming or recording software on your computer and check if the camera is recognized. You may need to select the camera as the video input source in the software settings.
Important note:
Make sure to check the camera’s battery level and consider using an AC adapter if you plan to stream or record for an extended period to avoid running out of power.
Adjust the camera settings
Before you start using your DSLR camera as a facecam, you will need to adjust the camera settings to ensure the best video quality. Here are some key settings to consider:
- Resolution: Set the resolution to at least 1080p for crisp and clear video.
- Frame rate: Choose a frame rate that works best for your recording environment, typically 30fps or higher.
- Exposure: Adjust the exposure settings to ensure proper lighting for your facecam feed.
- Focus: Make sure your camera is focused correctly on your face to avoid any blurriness.
- White balance: Set the white balance to match the lighting conditions in your recording area.
By adjusting these settings, you can optimize your DSLR camera for use as a facecam and ensure high-quality video output for your viewers.
Position the camera correctly
When setting up your DSLR camera as a facecam, it’s important to position the camera correctly to ensure the best angle and framing for your video. Here are some tips to help you position your camera:
- Place the camera at eye level: Position the camera at eye level or slightly above to create a more flattering angle for your face.
- Frame yourself properly: Make sure you are centered in the frame with enough headroom and space around you to avoid cutting off any part of your face.
Test the setup
Before going live or recording your video, it’s important to test your setup to ensure everything is working correctly. Here are some steps to follow:
- Turn on your DSLR camera and connect it to your computer.
- Open your streaming or recording software and select the DSLR camera as your video source.
- Adjust the camera settings such as focus, exposure, and white balance for the best image quality.
- Position the camera at the desired angle and frame yourself in the shot.
- Test the audio quality by speaking into the microphone and adjusting the levels if needed.
- Check the lighting conditions and make any necessary adjustments to avoid shadows or overexposure.
- Record a short test video or go live on a private stream to review the video and audio quality.
- Make any final adjustments before starting your official recording or live stream.
Adjust as needed
Once you have your DSLR camera connected and positioned, you may need to make some adjustments to ensure the best quality for your facecam setup. Here are some tips to help you adjust as needed:
Focus |
Make sure your camera is focused properly on your face. Use the manual focus feature on your camera if needed to get a crisp image. Must-Have
Tilta Pocket Follow Focus System Precision focus control for filmmakers
The Tilta Pocket Follow Focus features a compact design and allows precise focusing with A/B stops. Lightweight yet sturdy, it easily attaches to any 15mm rod system, making it a valuable tool for filming.
|
Exposure |
Check the exposure settings on your camera to ensure your face is well-lit and visible. Adjust the aperture, shutter speed, and ISO as needed to get the right lighting. |
Start recording!
Once you have set up your DSLR camera as a facecam and connected it to your computer, you are ready to start recording. Here are the steps to get your recording session going:
1. Open your recording software
Launch your preferred recording software on your computer. This could be OBS Studio, XSplit, or any other software you are comfortable using for recording.
2. Configure your camera settings
Ensure that your DSLR camera is set to the desired resolution and frame rate for recording. You may also want to adjust the exposure, focus, and white balance settings to get the best quality footage.
Once everything is set up, hit the record button on your recording software to start capturing your video with the DSLR camera as your facecam.
FAQ
What equipment do I need to set up a facecam with a DSLR camera?
To set up a facecam with a DSLR camera, you will need a DSLR camera with video capabilities, a compatible lens, a tripod, a capture card, a USB cable, and video capture software on your computer.
Can I use a DSLR camera as a facecam for streaming?
Yes, you can use a DSLR camera as a facecam for streaming. By connecting your DSLR camera to your computer using a capture card and USB cable, you can use it to capture high-quality video for your streams. Just make sure your camera is compatible with your streaming software and has the necessary settings adjusted for video capture.


