Setting the white balance in your DSLR camera is a crucial step in achieving accurate colors in your photographs. While most cameras come with preset white balance options like Auto, Daylight, Cloudy, and Fluorescent, sometimes the lighting conditions may not fit perfectly into these presets. This is where custom white balance comes into play.
Custom white balance allows you to calibrate your camera to the specific lighting conditions of your environment, ensuring that the colors in your photos appear true to life. By following a few simple steps, you can easily set a custom white balance in your DSLR camera and take your photography to the next level.
Setting custom white balance
Setting a custom white balance on your DSLR camera can help you achieve accurate color reproduction in your photographs. Here are the steps to set a custom white balance:
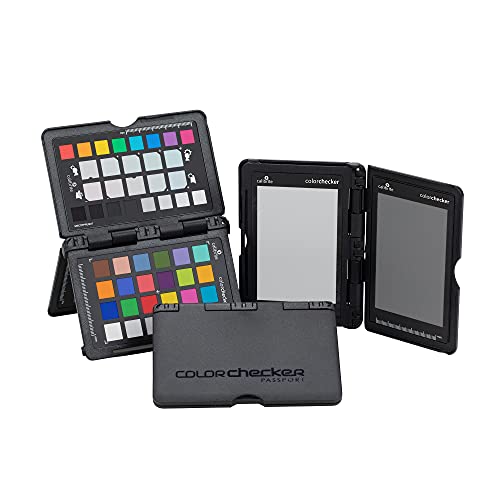
- Find a neutral gray card or surface: Look for a neutral gray card or surface in the scene you are photographing. This will be used as a reference point for setting the white balance.
- Select the custom white balance option: Access the white balance settings on your camera and select the custom white balance option.
- Place the gray card in the light: Place the gray card in the same lighting conditions as your subject, making sure it is well lit and filling the frame.
- Take a reference photo: Take a photo of the gray card, ensuring it is properly exposed.
- Set the custom white balance: In the custom white balance menu, choose the reference photo you just took as the basis for setting the white balance.
- Save the custom white balance: Once the white balance is set, save the custom white balance setting for future use in similar lighting conditions.
Step-by-step guide
To set a custom white balance in your DSLR camera, follow these steps:
- Locate the white balance setting on your camera. This is usually represented by a WB symbol.
- Access the white balance menu by pressing the WB button or navigating through the camera’s menu.
- Select the custom white balance option from the menu. This is typically denoted by a “C” or “Custom” icon.
- Place a neutral-colored object, such as a white sheet of paper or a gray card, under the lighting conditions you will be shooting in.
- Point your camera at the neutral object and take a picture, ensuring it fills the frame.
- Go back to the custom white balance menu and select the option to set the white balance using the image you just captured.
- Choose the image you took of the neutral object and set it as the custom white balance reference.
- Confirm the settings and exit the menu.
- Your custom white balance is now set, and your camera should adjust the color temperature accurately based on the reference image.
Choosing the right mode
When setting custom white balance in a DSLR camera, it is important to choose the right mode to ensure accurate color reproduction in your photos. Most DSLR cameras offer several white balance modes, such as Auto, Daylight, Cloudy, Shade, Tungsten, Fluorescent, and Custom.

For setting a custom white balance, you need to select the Custom white balance mode on your camera. This mode allows you to manually set the white balance based on the specific lighting conditions of your shooting environment.
By choosing the Custom white balance mode, you can capture images with true-to-life colors and avoid color casts caused by incorrect white balance settings. Remember to adjust the white balance whenever the lighting conditions change to maintain color accuracy in your photos.
Using a Gray Card
One effective method for setting custom white balance in a DSLR camera is by using a gray card. A gray card is a neutral gray card that is used as a reference point for the camera to determine the correct white balance settings.
Here’s how you can use a gray card to set custom white balance:
1. Set Up Your Scene
Place the gray card in the same lighting conditions as your subject. Make sure the card is well-lit and positioned where it will be in the frame.
2. Capture a Reference Shot
Take a photo of the gray card in the scene. Ensure that the card fills the frame and is well-exposed.
Manual Adjustment Process
Setting custom white balance manually on your DSLR camera involves a few simple steps:
| 1. | Find a neutral white or gray object in the same lighting conditions as your subject. |
| 2. | Set your camera to the custom white balance mode (usually indicated as “WB” on the camera). |
| 3. | Take a picture of the white or gray object, filling the frame with it. |
| 4. | Access the custom white balance settings on your camera and select the image you just captured as the reference. |
| 5. | Save the custom white balance setting. |
Now your camera is calibrated to the specific lighting conditions, ensuring accurate color reproduction in your photos.
Checking the results
Once you have set the custom white balance on your DSLR camera, it’s important to check the results to ensure that the colors in your photos are accurate. Here are a few steps to verify the custom white balance:
- Take a test shot of a neutral gray or white object under the same lighting conditions you will be shooting in.
- Review the image on your camera’s LCD screen to see if the colors look natural and balanced.
- Zoom in on the image to inspect finer details and check for any color casts or inaccuracies.
- If the colors appear off, you may need to re-adjust the custom white balance settings and take another test shot.
By carefully reviewing the results of your custom white balance settings, you can ensure that your photos accurately capture the true colors of the scene.
Benefits of Custom White Balance
1. Accurate Color Reproduction: Custom white balance ensures that the colors in your photos are as accurate as possible, making your images look more natural and true to life.
2. Consistent Results: By setting a custom white balance, you can achieve consistent color tones across all your photos, even in different lighting conditions.
3. Saves Time in Post-Processing: With custom white balance, you reduce the need for extensive color correction in post-processing, saving you time and effort.
4. Better Skin Tones: Custom white balance can help achieve more flattering and natural-looking skin tones in portraits, enhancing the overall quality of your images.
5. Improved Image Quality: Setting a custom white balance can improve the overall image quality by reducing color casts and ensuring better color accuracy throughout the photo.
Troubleshooting common issues
If you are experiencing issues with setting custom white balance on your DSLR camera, here are some common problems and solutions:
1. Incorrect lighting conditions: Make sure you are setting the custom white balance in the same lighting conditions that you will be shooting in. If the lighting changes, you will need to reset the white balance.
2. Using the wrong reference object: Ensure that you are using a neutral reference object, such as a white or gray card, to set the custom white balance. Using a colored object will result in inaccurate white balance.
3. Dirty or damaged sensor: If your camera’s sensor is dirty or damaged, it may affect the accuracy of the white balance. Clean your sensor following the manufacturer’s guidelines to ensure accurate white balance.
4. Outdated firmware: Check if your camera’s firmware is up-to-date. Updating the firmware may resolve any white balance issues caused by software bugs.
5. User error: Double-check that you are following the correct steps to set custom white balance on your camera. Refer to the user manual for detailed instructions.
White Balance Presets vs Custom
White balance presets are pre-defined settings in your camera that help adjust the color temperature of your photos based on common lighting conditions such as daylight, cloudy, fluorescent, etc. These presets are convenient and easy to use, especially for beginners, as they provide a quick way to get accurate colors without much manual adjustment.
On the other hand, custom white balance allows you to manually set the white balance to match the specific lighting conditions of your scene. By taking a reference photo of a neutral gray or white card in the same lighting as your subject, you can create a custom white balance setting that ensures accurate color reproduction in your photos.
Benefits of White Balance Presets:
- Convenient and quick to use
- Good for general shooting conditions
- Helpful for beginners
Benefits of Custom White Balance:
- Ensures accurate color reproduction
- Adjusts to specific lighting conditions
- Useful for challenging lighting situations
FAQ
What is white balance in a DSLR camera?
White balance is a setting on a DSLR camera that adjusts the colors in a photo to accurately represent the true colors of the scene, especially under different lighting conditions.
Why is it important to set custom white balance in a DSLR camera?
Setting custom white balance in a DSLR camera is important because it ensures that the colors in your photos are accurate and true to life, which can greatly enhance the overall quality of your images.
How can I set custom white balance in my DSLR camera?
To set custom white balance in a DSLR camera, you typically need to take a photo of a neutral gray or white card under the same lighting conditions as your subject, then use that image to set the custom white balance in your camera settings.
What are the benefits of setting custom white balance in a DSLR camera?
Setting custom white balance in a DSLR camera can help you achieve more accurate and natural-looking colors in your photos, reduce the need for post-processing adjustments, and save time in the editing process.


