Mounting your DSLR camera on a tripod is essential for achieving stable and sharp photographs. Whether you’re shooting landscapes, portraits, or long-exposure shots, using a tripod can greatly improve the quality of your images. In this guide, we will walk you through the step-by-step process of mounting your DSLR camera on a tripod.
Step 1: Choose a Compatible Tripod
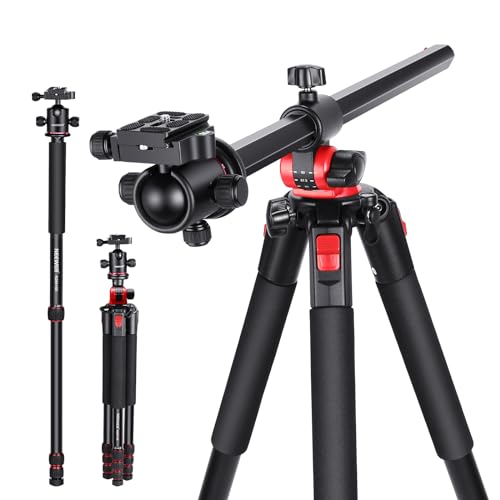
Before mounting your DSLR camera on a tripod, make sure you have a tripod that is compatible with your camera. Tripods come in various sizes and weight capacities, so choose one that can support the weight of your camera and lens.

Step 2: Attach the Quick Release Plate
Most tripods come with a quick release plate that allows you to easily attach and detach your camera. Attach the quick release plate to the bottom of your camera by screwing it into the tripod mount.
Step-by-Step Guide to Mount DSLR Camera on Tripod
Mounting your DSLR camera on a tripod is a crucial step to ensure stability and sharpness in your photos. Follow these simple steps to securely attach your camera to a tripod:
- Choose the Right Tripod: Select a tripod that is compatible with your camera’s weight and size. Make sure the tripod has a sturdy base and adjustable legs for stability.
- Attach the Plate: Most tripods come with a quick-release plate. Attach the plate to the bottom of your camera using the screw provided. Make sure it is securely fastened.
- Align the Plate: Line up the plate with the tripod head and slide it into place. Tighten the knob to secure the plate in position.
- Adjust the Camera: Use the tripod’s pan and tilt controls to position your camera at the desired angle. Make sure the camera is level and secure on the tripod.
- Test Stability: Gently shake the tripod to ensure the camera is securely mounted. Adjust the knobs and controls if needed to eliminate any wobbling.
- Begin Shooting: Once your camera is mounted and secure, you are ready to start capturing stunning photos with the stability provided by the tripod.
Choosing the Right Tripod for Your DSLR Camera
When it comes to mounting your DSLR camera on a tripod, selecting the right tripod is crucial. Here are some factors to consider:
1. Weight Capacity:
Make sure the tripod you choose can support the weight of your DSLR camera and any additional accessories you may use, such as a heavy lens or external flash.
2. Stability:
Look for a tripod with sturdy legs and a robust head that can provide stability and prevent camera shake, especially when shooting in low-light conditions or using long exposure times.
By considering these factors, you can ensure that your tripod provides the necessary support for your DSLR camera, allowing you to capture sharp and steady images.
Attaching the Quick Release Plate to Your Camera
Before mounting your DSLR camera on the tripod, you need to attach the quick release plate to your camera. Follow these steps:
- Locate the screw hole on the bottom of your camera.
- Align the quick release plate with the screw hole on the camera.
- Secure the plate by twisting the screw firmly into place using a screwdriver.
- Make sure the plate is securely attached to your camera before mounting it on the tripod.
By attaching the quick release plate to your camera, you can easily and quickly attach and detach your camera from the tripod whenever needed.
Securing the Camera to the Tripod Head
Once you have positioned the tripod and adjusted the height, it’s time to secure your DSLR camera to the tripod head. Follow these steps to ensure your camera is safely mounted:
- Locate the mounting plate on the tripod head. This plate usually has a screw that matches the bottom of your camera.
- Attach the mounting plate to the bottom of your DSLR camera by aligning the screw with the camera’s tripod socket.
- Tighten the screw securely to ensure the camera is firmly attached to the plate.
- Slide the mounting plate back onto the tripod head and ensure it locks into place.
- Double-check that the camera is securely attached by gently tugging on it.
Adjusting the Tripod Height and Position
Before mounting your DSLR camera on the tripod, it is important to adjust the height and position of the tripod to ensure stability and optimal shooting angles.
Follow these steps to adjust the tripod:
- Unlock the tripod legs by loosening the leg lock mechanisms.
- Extend or retract the legs to the desired height by pulling or pushing them.
- Lock the legs in place by tightening the leg lock mechanisms.
- Adjust the tripod head to the desired position by loosening the head lock knob and tilting or panning the head.
- Tighten the head lock knob once you have positioned the tripod head correctly.
Make sure the tripod is stable and level before mounting your DSLR camera to achieve steady and professional-looking shots.
Setting Up the Camera Settings for Stable Shots
Before mounting your DSLR camera on a tripod, it is important to set up the camera settings to ensure stable shots. Here are some key settings to consider:
| 1. Use a low ISO: | Set your camera’s ISO to the lowest possible setting (usually ISO 100 or 200) to reduce noise in your images. |
| 2. Aperture priority mode: | Switch your camera to aperture priority mode (usually marked as “A” or “Av” on the mode dial) to control the depth of field. |
| 3. Use a tripod: | Mount your camera securely on a tripod to eliminate camera shake and ensure sharp images. |
| 4. Turn on image stabilization: | If your lens has image stabilization, make sure to turn it on to further reduce camera shake. |
| 5. Use a remote shutter release: | To prevent any camera movement while taking the shot, use a remote shutter release or set a timer delay. |
Removing the Camera from the Tripod Safely
After you have finished shooting, it is important to remove the DSLR camera from the tripod safely to avoid any damage. Follow these steps to ensure a smooth and safe removal:
| 1. | Turn off the camera and wait for any moving parts to come to a complete stop. |
| 2. | Release the quick release plate or mounting plate by loosening the knob or lever carefully. |
| 3. | Hold the camera securely with one hand while using the other hand to lift it off the tripod mount. |
| 4. | Place the camera on a stable surface or in a protective case to prevent accidental drops or damage. |
| 5. | Store the tripod and camera equipment properly to maintain their longevity. |
By following these steps, you can safely remove your DSLR camera from the tripod and ensure its protection for future use.


