


Are you tired of using the same boring camera strap that came with your DSLR camera? Want to add a personal touch to your photography gear? Why not create your own custom camera strap that reflects your style and personality? In this article, we will guide you through the steps to make a unique and comfortable camera strap that will not only enhance your photography experience but also make a fashion statement.
With just a few materials and some creativity, you can design a camera strap that suits your needs and preferences. Whether you prefer a colorful and trendy strap or a more classic and elegant design, the possibilities are endless when you make your own camera strap. Plus, DIY camera straps can be a fun and rewarding project that allows you to showcase your crafting skills and stand out from the crowd.
From selecting the right materials to adding personalized touches, making your own camera strap is a great way to show off your individuality and elevate your photography game. So, grab your supplies and get ready to embark on this DIY adventure to create a one-of-a-kind DSLR camera strap that is sure to turn heads and make your photography sessions even more enjoyable!
Choosing the Right Material
When making your own DSLR camera strap, one of the most important decisions you’ll need to make is choosing the right material. The material you choose will determine the durability, comfort, and style of your strap. Here are a few common materials to consider:
Nylon
Nylon is a popular choice for camera straps due to its durability and strength. It is also lightweight and easy to clean, making it a practical option for photographers who are frequently on the go.
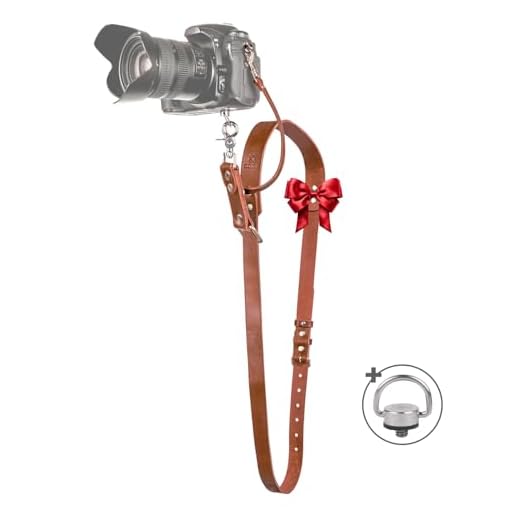
Leather
Leather camera straps are known for their classic and stylish look. While leather may be more expensive than other materials, it is durable and will develop a beautiful patina over time.
| Material | Pros | Cons |
|---|---|---|
| Nylon | Durable, lightweight, easy to clean | May not have the same aesthetic appeal as leather |
| Leather | Classic, stylish, develops patina | More expensive, requires more care |
Measuring the Length
Before you start making your own DSLR camera strap, you need to measure the length of the strap. This will ensure that the strap is the right size for you and your camera. To do this, hold one end of a measuring tape at the attachment point on your camera and drape the tape over your shoulder, letting it hang down to your hip.
Make sure the tape is comfortable and not too tight or too loose. Note the length and add a few extra inches to allow for adjustments and comfort. This measurement will determine the length of the strap you will cut and sew.
Selecting the Design
When it comes to selecting the design for your DIY DSLR camera strap, you have a wide range of options to choose from. You can opt for a simple and classic design using a sturdy fabric like canvas or denim. Alternatively, you can get creative and choose a fabric with a bold pattern or vibrant color to make a statement.
Consider the width of the strap as well. A wider strap may distribute the weight of your camera more evenly, reducing strain on your neck and shoulders during long shooting sessions. Additionally, think about the length of the strap. Make sure it’s adjustable to ensure a comfortable fit.
You can also personalize your camera strap by adding embellishments like embroidery, patches, or beads. This will not only make your strap unique but also add a touch of personality to your camera gear. Ultimately, the design you choose should reflect your style and preferences, making your DIY camera strap truly one-of-a-kind.
Cutting the Fabric
Start by laying out your chosen fabric on a flat surface. Measure and mark the dimensions for your camera strap. It’s recommended to make it about 2-3 inches wide and 30-40 inches long, depending on your preference.
Use fabric scissors to carefully cut along the marked lines. Make sure to cut straight to ensure a clean and professional-looking finish. You can also use a ruler or a cutting mat to help guide your cuts.
If you want to add padding to your camera strap, cut a piece of foam or batting to the same dimensions as your fabric. Place the padding in between two layers of fabric before sewing to create a soft and comfortable strap.
Once you have cut the fabric to your desired size, you are ready to move on to the next step of sewing the camera strap together.
Adding the Hardware
Now that you have your fabric cut to size, it’s time to add the hardware that will attach the strap to your DSLR camera. You will need the following items:
| 2 D-rings |
| 2 Swivel hooks |
| Needle and thread |
Start by folding one end of your fabric over the D-ring and sewing it securely in place. Repeat this process for the other end of the fabric and the second D-ring. Next, attach the swivel hooks to the D-rings on each end of the strap. Make sure they are securely fastened to prevent your camera from falling. Your homemade DSLR camera strap is now ready to use!
Sewing the Strap
Now that you have all your materials ready, it’s time to start sewing your camera strap. Follow these simple steps:
Step 1: Measure and Cut
Measure and cut your fabric to the desired length and width for your camera strap. Make sure to leave extra fabric for seam allowances.
Step 2: Sew the Fabric
Place the two pieces of fabric together with the right sides facing each other. Sew along the edges, leaving one end open to turn the strap inside out.
Tip: You can reinforce the stitching by going over it a few times to ensure it’s strong enough to hold your camera.
Once you have sewn the strap, turn it inside out and press it flat with an iron. Your camera strap is now ready to be attached to your DSLR camera!
Attaching the Strap
Once you have your custom DSLR camera strap ready, it’s time to attach it to your camera. Start by locating the strap attachment points on your camera body. These are usually located on either side of the camera near the top.
Next, thread one end of the strap through one of the attachment points. Make sure the strap is securely in place before moving on to the next step.
Repeat the same process for the other end of the strap, threading it through the remaining attachment point on the camera body.
Once both ends of the strap are securely attached to the camera, adjust the length of the strap to your desired comfort level. You can do this by sliding the adjuster along the strap until it fits snugly around your neck or shoulder.
Now you’re ready to use your custom DSLR camera strap and capture amazing photos with ease!
Testing the Comfort
Once you have made your own DSLR camera strap, it’s important to test the comfort of the strap before using it extensively. Here are a few tips on how to test the comfort of your DIY camera strap:
1. Wear the strap for an extended period of time
Put your camera around your neck or shoulder and wear it for a few hours to see how comfortable the strap feels. Make sure the weight of the camera is evenly distributed and that the strap doesn’t dig into your skin.
2. Check for any discomfort or irritation
Pay attention to any discomfort or irritation that may arise while wearing the strap. Look out for any pressure points or rubbing that could cause discomfort over time. Adjust the length or padding of the strap if needed.
| Comfort Test: | ✔️ Strap evenly distributes weight |
| ✔️ No discomfort or irritation |
Personalizing the Strap
Once you have chosen the materials for your DIY camera strap, you can add a personal touch by customizing it to your liking. Here are a few ideas to personalize your camera strap:
1. Customize with Embroidery
Consider adding your initials, a design, or a meaningful quote with embroidery to make your camera strap unique. You can use colorful threads and different stitches to create a personalized look.
2. Add Decorative Accents
You can embellish your camera strap with beads, buttons, patches, or other decorative accents to add a pop of style. Choose elements that reflect your personality and make your camera strap stand out.
Maintaining the Strap
Proper maintenance of your DIY camera strap is essential to ensure its longevity and functionality. Here are some tips to keep your strap in top condition:
1. Regular Cleaning
Make sure to regularly clean your camera strap to remove any dirt, dust, or grime that may accumulate over time. You can use a damp cloth or gentle cleaner to wipe down the strap and keep it looking fresh.
2. Check for Wear and Tear
Inspect your camera strap periodically for any signs of wear and tear, such as fraying threads or loose stitching. If you notice any damage, repair it promptly to prevent further deterioration.
Tip: Consider reinforcing high-stress areas of the strap with additional stitching or patches to increase durability.
FAQ
What materials do I need to make my own DSLR camera strap?
To make your own DSLR camera strap, you will need a piece of durable fabric, such as nylon webbing or cotton canvas, measuring about 2 inches wide and 50 inches long. You will also need two D-rings, two swivel hooks, a sewing machine, thread, and basic sewing supplies.
Is it difficult to make a DIY DSLR camera strap?
Making your own DSLR camera strap can be a fun and rewarding DIY project. While it may require some basic sewing skills, it is not overly difficult. By following a step-by-step tutorial and taking your time, you can create a custom camera strap that suits your style and needs.
Can I personalize my DIY DSLR camera strap?
Absolutely! One of the advantages of making your own DSLR camera strap is the ability to personalize it to your liking. You can choose the fabric, color, length, and even add embellishments like embroidery or patches to make it unique and reflective of your personality.
How long does it take to make a DIY DSLR camera strap?
The time it takes to make a DIY DSLR camera strap can vary depending on your sewing skills and the complexity of the design. Generally, it can take anywhere from 30 minutes to an hour or two to complete the project. It may take longer if you are adding intricate details or customization.


