


DSLR cameras are popular among content creators and streamers for their high-quality video output. If you’re looking to elevate your live streaming setup, connecting your DSLR camera to OBS (Open Broadcaster Software) can help you achieve professional-looking broadcasts.
However, the process of connecting a DSLR camera to OBS can be a bit tricky if you’re not familiar with the necessary steps. In this guide, we’ll walk you through the process of setting up your DSLR camera with OBS so you can start streaming in no time.

By connecting your DSLR camera to OBS, you can take advantage of its superior image quality, depth of field, and other features that will make your streams stand out from the crowd. Let’s dive into the steps you need to follow to connect your DSLR camera to OBS and level up your live streaming game.
Step-by-Step Guide to Connecting a DSLR Camera to OBS
Using a DSLR camera as a webcam in OBS can greatly improve the quality of your live streams or video recordings. Follow these steps to connect your DSLR camera to OBS:
Step 1: Install Camera Drivers
Make sure your DSLR camera is connected to your computer via USB and install any necessary camera drivers. These drivers will allow your computer to recognize and communicate with the camera.
Step 2: Install OBS Software
Download and install OBS (Open Broadcaster Software) on your computer. OBS is a free and open-source software for video recording and live streaming.
Continue with the setup process in OBS to configure your streaming settings. Ensure that your camera is selected as the video source in OBS.
Installing OBS on Your Computer
To connect your DSLR camera to OBS, you first need to install the OBS software on your computer. Here’s how you can do it:
Step 1: Download OBS
Go to the official OBS website and download the OBS software for your operating system (Windows, macOS, or Linux).
Step 2: Install OBS
Once the download is complete, run the installer and follow the on-screen instructions to install OBS on your computer.
Connecting Your DSLR Camera to Your Computer
Connecting your DSLR camera to your computer is a simple process that allows you to use your camera as a webcam for live streaming or video recording. Follow these steps to connect your DSLR camera to OBS:
- Make sure your camera supports video output via USB or HDMI.
- Use the appropriate cable to connect your camera to your computer.
- Install any necessary drivers for your camera on your computer.
- Open OBS Studio on your computer.
- Go to “Sources” in OBS Studio and click the “+” button.
- Select “Video Capture Device” from the list of sources.
- Choose your DSLR camera from the dropdown menu.
- Adjust the settings for your camera, such as resolution and frame rate.
- Click “OK” to save the settings.
- You can now use your DSLR camera as a webcam in OBS for live streaming or video recording.
“`html
Setting Up Your DSLR Camera for Live Streaming
Before connecting your DSLR camera to OBS for live streaming, you need to ensure that your camera is set up correctly. Follow these steps to prepare your camera:
1. Adjust Camera Settings
Set your camera to manual mode to have more control over exposure, focus, and other settings. Make sure to set the appropriate frame rate, resolution, and white balance for your live stream.
2. Connect Camera to Computer
Use a compatible USB cable or HDMI capture card to connect your DSLR camera to your computer. Check if your camera is recognized by your computer and install any necessary drivers.
Configuring OBS for DSLR Camera Input
Once you have connected your DSLR camera to OBS using a capture card or software, you’ll need to configure OBS to recognize and use the camera input. Follow these steps to set up your camera in OBS:
- Open OBS and go to the “Sources” section.
- Click the “+” button to add a new source.
- Select “Video Capture Device” from the list of source options.
- Name your new source (e.g., DSLR Camera) and click “OK”.
- In the properties window that appears, choose your DSLR camera from the dropdown menu under “Device”.
- Adjust the resolution, frame rate, and other settings as needed for your camera.
- Click “OK” to save your settings.
- You should now see your DSLR camera input in the OBS preview window.
With these steps, you have successfully configured OBS to use your DSLR camera as a video source. You can now start recording or streaming with your DSLR camera in OBS.
Adjusting Camera Settings in OBS
Once you have successfully connected your DSLR camera to OBS, you may need to adjust some settings to ensure optimal performance. Here are some key settings you may want to consider:
1. Resolution and Frame Rate
Make sure to set the resolution and frame rate of your camera in OBS to match the settings of your DSLR camera. This will help avoid any issues with compatibility and ensure a smooth video streaming experience.
2. Exposure and White Balance
Adjust the exposure and white balance settings on your DSLR camera to achieve the desired lighting and color balance. OBS allows you to make further adjustments to these settings within the software to fine-tune your video quality.
By taking the time to adjust these camera settings in OBS, you can optimize your video streaming setup and produce high-quality content for your audience.
Testing Your DSLR Camera Setup in OBS
Once you have connected your DSLR camera to OBS and configured the settings, it’s important to test the setup before going live. Here are some steps to follow:
1. Open OBS: Launch OBS on your computer and make sure your DSLR camera is connected and recognized by the software.
2. Check Camera Feed: In the OBS preview window, you should see the feed from your DSLR camera. Make sure the image is clear and properly framed.
3. Test Audio: If you are using the DSLR camera’s microphone for audio input, speak into the microphone to check the audio levels and quality.
4. Adjust Settings: If necessary, adjust the camera settings, such as exposure, white balance, and focus, to ensure optimal video quality.
5. Record a Test Stream: Start a test stream in OBS to check the video and audio quality in real-time. This will help you identify any issues and make adjustments as needed.
6. Monitor Performance: Keep an eye on OBS’s performance metrics to ensure that your computer can handle the streaming load from the DSLR camera.
By following these steps and testing your DSLR camera setup in OBS, you can ensure a smooth and professional-looking live stream.
Troubleshooting Common Issues
If you encounter any issues while connecting your DSLR camera to OBS, here are some common troubleshooting steps to help you resolve them:
1. Check the connection: Ensure that the USB cable is securely plugged into both the camera and the computer. Try using a different USB port or cable to rule out any connection issues.

2. Camera settings: Make sure that your camera is set to the correct mode for live streaming or video recording. Check the camera’s manual for instructions on how to set it up for use with OBS.
3. OBS settings: Verify that OBS is configured to recognize your camera as a video source. Go to the “Sources” tab in OBS and add a new video capture device, then select your camera from the list of available devices.
4. Restart OBS and the camera: Sometimes, simply restarting OBS or the camera can resolve connection issues. Close both programs, then reopen them and try reconnecting the camera.
5. Update drivers: Check for any updates for your camera’s drivers or firmware. Updating them may resolve compatibility issues with OBS.
6. Test with another software: If you’re still facing issues, try connecting your camera to a different software to see if the problem lies with OBS or the camera itself.
By following these troubleshooting steps, you should be able to resolve common issues when connecting your DSLR camera to OBS for live streaming or recording.
Tips for Optimizing DSLR Camera Performance in OBS
When using a DSLR camera with OBS, there are several tips to ensure optimal performance and quality for your live streams or recordings. Here are some key tips to consider:
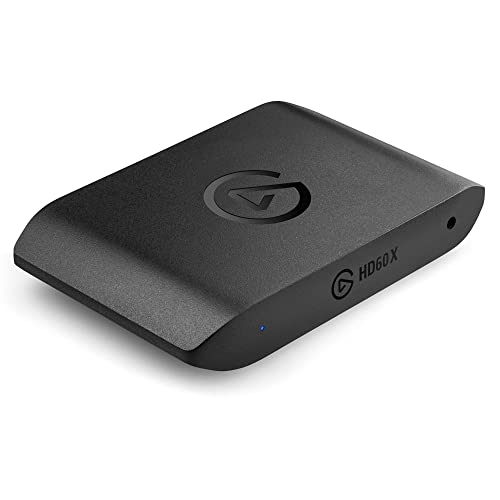
- Use a high-quality HDMI capture card: Invest in a reliable HDMI capture card to ensure a stable connection between your DSLR camera and OBS.
- Adjust camera settings: Set your DSLR camera to manual mode and adjust settings such as aperture, shutter speed, and ISO to achieve the best image quality.
- Use a tripod or stabilizer: Keep your DSLR camera steady by using a tripod or stabilizer to avoid shaky footage.
- Check your lighting: Make sure you have adequate lighting to enhance the quality of your video feed from the DSLR camera.
- Monitor your audio: Use an external microphone for better audio quality and sync it with your DSLR camera to avoid any delays.
- Test your setup: Before going live, test your DSLR camera setup in OBS to ensure everything is working properly and make any necessary adjustments.
FAQ
How do I connect my DSLR camera to OBS?
To connect your DSLR camera to OBS, you will need a capture card or a video capture device. Connect your DSLR camera to the capture card using an HDMI cable, and then connect the capture card to your computer via USB. In OBS, add a new video capture device as a source and select your capture card. You should now see the feed from your DSLR camera in OBS.

Do I need a special cable to connect my DSLR camera to OBS?
Yes, you will need an HDMI cable to connect your DSLR camera to a capture card or video capture device. This cable will carry the video signal from your camera to the capture card, which can then be connected to your computer for streaming or recording in OBS.
Can I use my DSLR camera as a webcam in OBS?
Yes, you can use your DSLR camera as a webcam in OBS by connecting it to a capture card or video capture device. This allows you to stream or record high-quality video from your DSLR camera directly into OBS for a professional-looking broadcast.
What are the advantages of using a DSLR camera with OBS?
Using a DSLR camera with OBS offers several advantages, including better image quality, depth of field control, and the ability to use different lenses for creative effects. DSLR cameras also have larger sensors and better low-light performance compared to standard webcams, resulting in a more professional-looking stream or recording.


