

Minolta lenses are known for their high quality and sharp images, making them a popular choice among photographers. If you have a collection of Minolta lenses and want to use them on your DSLR camera, you’re in luck! With the right adapter, you can easily attach your Minolta lens to your DSLR and start capturing stunning photos.
First, you’ll need to determine the mount type of your Minolta lens. Minolta lenses typically come in MD or A mount, so make sure you know which type of mount your lens has. Once you know the mount type, you can search for the appropriate adapter that will allow you to attach the lens to your DSLR camera.

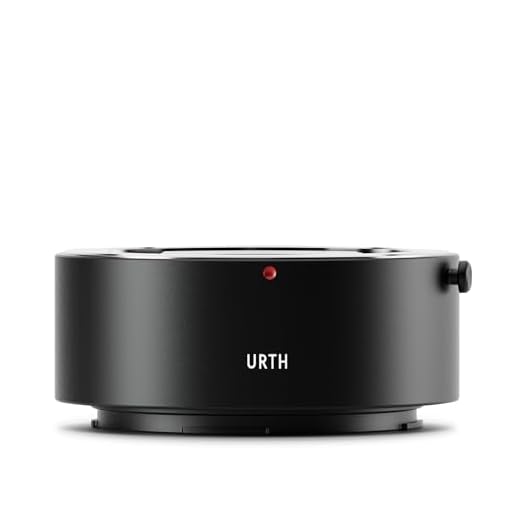
When choosing an adapter, it’s important to select one that is specifically designed for your Minolta lens mount and your DSLR camera mount. This will ensure a secure fit and proper alignment, allowing you to take full advantage of your Minolta lens’s capabilities on your DSLR camera.
Step-by-Step Guide: Attaching a Minolta Lens to a DSLR Camera
Attaching a Minolta lens to a DSLR camera is a straightforward process that can enhance your photography capabilities. Follow these simple steps to successfully mount your Minolta lens:
- Check Compatibility: Ensure that your Minolta lens is compatible with your DSLR camera model.
- Remove the Rear Lens Cap: Take off the rear lens cap from your Minolta lens to expose the mount.
- Align the Lens: Align the mounting index on the Minolta lens with the corresponding index on your DSLR camera’s lens mount.
- Twist and Lock: Gently twist the lens clockwise until you hear a click, indicating that the lens is securely attached.
- Test the Connection: Turn on your camera and test the lens to ensure it is working correctly with the DSLR.
- Adjust Camera Settings: Make any necessary adjustments to the camera settings to optimize the performance of the Minolta lens.
- Start Shooting: Once the lens is attached and set up, you’re ready to start capturing stunning images with your Minolta lens on your DSLR camera.
Gather the Necessary Equipment
Before you can attach a Minolta lens to your DSLR camera, you will need to gather a few essential items:
- A Minolta lens that is compatible with your DSLR camera mount.
- An appropriate lens adapter ring that allows you to connect the Minolta lens to your camera.
- Your DSLR camera with a clean lens mount.
- A lens cleaning cloth to ensure the lens mount and lens are free of dust and debris.
Identify the Lens Mount Type
Before attaching a Minolta lens to your DSLR camera, you need to identify the lens mount type. Minolta lenses typically come with either the MD or MC mount. The MD mount lenses have a locking pin on the side of the lens mount, while the MC mount lenses do not have this pin.
To determine the mount type of your Minolta lens, look for the markings on the lens barrel. The letters “MD” or “MC” usually indicate the mount type. If you are unsure, you can also consult the lens manual or do a quick online search to find out the specific mount type.
Once you have identified the mount type of your Minolta lens, you can proceed to attach it to your DSLR camera using the appropriate adapter or mount ring.
Check Compatibility with Your DSLR Camera
Before attaching a Minolta lens to your DSLR camera, it is crucial to check if the lens is compatible with your camera model. Not all lenses are compatible with all cameras, so it is essential to do your research beforehand.
First, make sure to identify the mount type of your Minolta lens. Different Minolta lenses come with different mount types, such as MD, MC, or A mount. Once you know the mount type, you can determine if it is compatible with your DSLR camera.
Additionally, check if your DSLR camera has the option to use manual lenses or if it requires electronic communication between the lens and the camera body. Some DSLR cameras may not support manual lenses or may require an adapter to use them.
By verifying the compatibility of your Minolta lens with your DSLR camera, you can avoid any potential issues and ensure a seamless attachment process.
Remove the Cap from the Lens
Before attaching your Minolta lens to your DSLR camera, you need to make sure to remove the lens cap. The lens cap is typically used to protect the lens from dust, scratches, and other damage when not in use. To remove the lens cap, simply twist it counterclockwise until it comes off. Be careful not to touch the glass surface of the lens with your fingers as this can leave fingerprints and smudges that may affect the image quality.
Align the Lens Mounts
Before attaching the Minolta lens to your DSLR camera, it is important to align the lens mounts correctly. This ensures a secure and proper connection between the lens and the camera body.
To align the lens mounts, locate the mounting index on both the lens and the camera body. The mounting index is usually a small dot or line that indicates where the lens should be attached to the camera. Line up the mounting index on the lens with the corresponding index on the camera body.
Once the mounting indexes are aligned, gently twist the lens clockwise until you hear a click, indicating that the lens is securely attached to the camera. Make sure the lens is firmly in place before using it to take photos.
Rotate the Lens Clockwise to Attach
Once you have properly aligned the lens mount with the camera body, gently rotate the lens clockwise until you feel it click into place. Make sure to apply even pressure and avoid forcing the lens onto the camera.
Be careful not to over-tighten the lens as this can damage the mount or the lens itself. Once the lens is securely attached, you can proceed to adjust the focal length and settings on your camera to start shooting with your Minolta lens.
Secure the Lens in Place
Once you have attached the Minolta lens to your DSLR camera, it is important to secure it in place to prevent any accidental detachment during use. Follow these steps to ensure the lens is securely attached:
- Rotate the lens in a clockwise direction until you hear a click, indicating that it is properly aligned with the camera mount.
- Check for any gaps between the lens and the camera body to ensure a tight fit.
- Use the locking mechanism (if your camera has one) to further secure the lens in place.
- Test the lens by gently twisting it to ensure it is firmly attached before starting to shoot.
Test the Lens Connection
After attaching the Minolta lens to your DSLR camera, it’s important to test the connection to ensure that the lens is properly mounted and functioning correctly. To do this, turn on your camera and look through the viewfinder. Check if the lens is detected by the camera and if you can adjust the aperture, focus, and zoom smoothly.
Take a test shot to see if the image is clear and sharp. Pay attention to any unusual noises or errors that may indicate a problem with the connection. If everything looks and works as expected, congratulations – you have successfully attached your Minolta lens to your DSLR camera!
Start Shooting with Your Minolta Lens on Your DSLR Camera
Now that you have successfully attached your Minolta lens to your DSLR camera, it’s time to start shooting! Here are a few tips to help you get the most out of your new setup:
1. Check the Compatibility
Make sure that the Minolta lens you are using is compatible with your DSLR camera. Some older lenses may not work with newer camera models, so it’s important to do your research beforehand.
2. Experiment with Different Settings
Take some time to experiment with different settings on your camera to find the best combination for your Minolta lens. Play around with the aperture, shutter speed, and ISO to see how they affect your photos.
With a little practice and experimentation, you’ll be able to capture stunning images with your Minolta lens on your DSLR camera!
FAQ
Can I attach a Minolta lens to a modern DSLR camera?
Yes, you can attach a Minolta lens to a modern DSLR camera with the help of an adapter. There are specific adapters available in the market that allow you to mount Minolta lenses on DSLR cameras from different manufacturers.
What type of adapter do I need to attach a Minolta lens to a DSLR camera?
To attach a Minolta lens to a DSLR camera, you will need a lens mount adapter. The adapter should have a Minolta mount on one side and the compatible mount for your DSLR camera on the other side. Make sure to get the right adapter for your specific camera model.
Are there any limitations or drawbacks when using a Minolta lens on a DSLR camera?
When using a Minolta lens on a DSLR camera with an adapter, there may be limitations such as loss of autofocus functionality, reduced image quality, and compatibility issues. It’s important to research and choose the right adapter for your camera to minimize any potential drawbacks.


