As a professional photographer, I have always found that using manual settings on a DSLR camera gives me full control over the image I am trying to capture. While shooting in automatic mode can be convenient and easy, it often results in images that lack creativity and uniqueness. By taking the time to adjust the settings manually, you can achieve stunning results that truly showcase your artistic vision.
One of the most important settings to consider when shooting in manual mode is the aperture. The aperture controls the amount of light that enters the camera and influences the depth of field in your image. A wide aperture (small f-stop number) will create a shallow depth of field, blurring the background and drawing attention to your subject. On the other hand, a narrow aperture (large f-stop number) will increase the depth of field, resulting in a sharper background.
Another crucial setting to master is the shutter speed. The shutter speed determines how long the camera’s sensor is exposed to light. A fast shutter speed (1/1000th of a second or faster) is ideal for freezing action, while a slow shutter speed (1/30th of a second or slower) can create a beautiful motion blur effect. Adjusting the shutter speed allows you to capture the perfect moment and convey the desired mood in your photograph.
Finally, understanding and controlling ISO is essential when shooting in manual mode. ISO measures the camera sensor’s sensitivity to light. A low ISO (such as 100) is ideal for bright outdoor conditions, while a higher ISO (800 or above) is necessary for low-light situations. However, it is important to note that a higher ISO can introduce digital noise into your image, so finding the balance between the ISO and other settings is crucial for achieving optimal image quality.
By experimenting with these manual settings on your DSLR camera, you can unlock the full potential of your photography skills and create images that truly stand out. Don’t be afraid to push the boundaries and try new combinations of aperture, shutter speed, and ISO. With practice and patience, you will develop your unique style and produce breathtaking photographs that capture the beauty of the world around you.
Understanding the Manual Settings on Your DSLR Camera
As a photographer, having a deep understanding of the manual settings on your DSLR camera is essential for achieving the best results. Manual settings give you full control over your camera’s exposure, allowing you to capture images exactly as you envision them.
One of the most important manual settings to master is the aperture. Aperture refers to the size of the opening in your camera’s lens. By adjusting the aperture, you can control the amount of light that enters the camera. A wider aperture, represented by a lower f-number, allows more light in and creates a shallow depth of field, making your subject appear sharp while the background becomes beautifully blurred. On the other hand, a smaller aperture, represented by a higher f-number, lets in less light and creates a larger depth of field, resulting in a greater focus throughout the image.
Another crucial manual setting is the shutter speed. Shutter speed determines the amount of time that the camera’s sensor is exposed to light. A fast shutter speed, such as 1/1000th of a second, freezes motion and is perfect for capturing sports or action scenes. On the other hand, a slow shutter speed, like 1/4th of a second, creates a sense of motion blur, allowing you to capture long-exposure shots of flowing water or moving cars at night. Adjusting the shutter speed can also help you control the exposure of your image, as a longer shutter speed lets in more light, while a shorter shutter speed reduces the amount of light captured.
In addition to aperture and shutter speed, the ISO setting is another important manual control. ISO determines the camera’s sensitivity to light. A lower ISO, such as 100, is ideal for shooting in bright conditions, as it produces the least amount of noise. As lighting conditions become darker, you can increase the ISO to compensate, but be cautious as higher ISO settings can introduce more grain or noise to your images. It’s essential to strike a balance between capturing enough light and maintaining image quality when adjusting the ISO.
By understanding and confidently using the manual settings on your DSLR camera, you can take complete artistic control over your images. Practice experimenting with different combinations of aperture, shutter speed, and ISO to achieve the desired exposure and creative effects in your photographs.
The Importance of Manual Control for DSLR Photography
As a passionate photographer, I have come to realize the immense importance of manual control when using a DSLR camera. While automatic mode may seem convenient, manual control allows me to have complete control over the settings of my camera, resulting in more creative and high-quality photographs.
One of the key advantages of manual control is the ability to adjust the exposure settings. By manually adjusting the aperture, shutter speed, and ISO, I can achieve the desired exposure for my photographs, even in challenging lighting conditions. This control allows me to experiment with different depths of field, freeze or blur motion, and reduce noise, ultimately enhancing the visual aesthetics of my images.
Manual control also gives me the freedom to manipulate the focus of my photographs. Instead of relying on the camera’s autofocus system, I can manually focus on my subject, ensuring that the desired elements are sharp and in focus. This level of precision is particularly important in portrait, macro, and landscape photography, where controlling the focus can make a significant difference in the overall impact of the image.
In addition to exposure and focus, manual control allows me to adjust other settings, such as white balance, picture style, and metering mode. These settings can greatly affect the mood and overall look of the photograph. By taking control of these variables, I can bring my creative vision to life and create images that truly reflect my personal style as a photographer.
In conclusion, manual control is essential for DSLR photography as it provides photographers with the ability to fully control and manipulate their settings. By taking control of exposure, focus, and other important variables, photographers can create unique and visually stunning images that showcase their creativity and skills. So, if you have a DSLR camera, I highly recommend exploring the manual mode and discovering the endless possibilities it offers.
Finding the Best Manual Exposure Settings for Your DSLR Camera
When shooting with a DSLR camera, one of the most important aspects to consider is the manual exposure settings. By manually adjusting the aperture, shutter speed, and ISO, you have complete control over the exposure of your images. This allows you to achieve the desired look and feel for each shot, whether you’re capturing a bright and crisp landscape or a moody indoor portrait.
Before diving into the specifics of finding the best manual exposure settings, it’s important to understand the basics of each setting. The aperture refers to the size of the lens opening and controls the depth of field, or how much of the image is in focus. The shutter speed determines how long the camera’s sensor is exposed to light, affecting the amount of motion blur in an image. Lastly, the ISO measures the sensitivity of the camera’s sensor to light, with higher ISO values resulting in more noise in the image.
Aperture
To find the best aperture setting, consider the desired depth of field for your image. For a shallow depth of field, such as in a portrait, choose a wide aperture (low f-number) to blur the background and keep the subject in focus. On the other hand, for landscape or architectural photography where you want everything in focus, use a narrow aperture (high f-number). Experiment with different apertures to achieve the desired effect for each shot.
Shutter Speed
When it comes to shutter speed, the goal is to freeze motion or create intentional motion blur. For action or sports photography, choose a fast shutter speed to freeze the subject in motion. On the other hand, if you want to capture motion blur, such as the smooth flowing water in a waterfall, use a slow shutter speed. Remember to use a tripod or stabilize your camera when using slow shutter speeds to avoid camera shake.
ISO
The ISO setting should be adjusted to achieve the correct exposure in combination with the aperture and shutter speed. Start with a lower ISO value, such as 100, for shooting in well-lit conditions. Increase the ISO only when shooting in low-light situations to maintain a proper exposure. Keep in mind that higher ISO values can introduce noise into the image, so find a balance between a high enough ISO for proper exposure and a low enough ISO for minimal noise.
In conclusion, finding the best manual exposure settings for your DSLR camera requires experimentation and understanding of how aperture, shutter speed, and ISO work together. By adjusting these settings to fit the desired look of each shot, you can capture stunning images with complete control over the exposure. Happy shooting!
Mastering Manual Focus for Sharper Images with Your DSLR Camera
As a photographer, one of the most important skills you can master is manual focus. While autofocus can be convenient and useful in many situations, there are times when manual focus is necessary to achieve the sharpest images possible with your DSLR camera. By understanding the techniques and settings involved in manual focus, you can take greater control over your photography and capture incredible detail and clarity in your shots.
Understanding Your Camera’s Manual Focus Options
Before you can begin mastering manual focus, it is important to familiarize yourself with your camera’s manual focus options. Most DSLR cameras have a range of options, including focus ring on the lens, focus peaking, and magnification. Experiment with each of these features to see which ones work best for you and the type of photography you are interested in.
Refining Your Technique
Once you understand your camera’s manual focus options, it’s time to refine your technique. One effective method is to use the focus ring on your lens to manually adjust the focus until your subject appears sharp in the viewfinder or on the LCD screen. Another technique is to use focus peaking, which highlights the areas of the frame that are in focus. This can be particularly useful when shooting subjects with intricate details.
Additionally, utilizing the magnification feature can help you achieve precise focus, especially when shooting at wide apertures. By zooming in on your subject, you can ensure that the most important elements are sharp and clear. Practice these techniques regularly to become more proficient in manual focus and improve the overall sharpness of your images.
Optimizing Your Camera Settings
In order to maximize the sharpness of your images with manual focus, it is important to optimize your camera settings. Start by selecting a smaller aperture, as this will increase the depth of field and help keep your subject in focus. Additionally, using a higher ISO setting can help increase the camera’s sensitivity to light, allowing for faster shutter speeds and reducing the risk of motion blur.
Finally, consider using the manual exposure mode to have full control over the shutter speed and aperture settings. This will give you the flexibility to make adjustments based on the specific shooting conditions and desired effects. Remember to experiment with different settings to find what works best for you and the subject you are capturing.
By mastering manual focus, you can take your photography skills to the next level and capture sharper images with your DSLR camera. With practice and a solid understanding of your camera’s manual focus options and settings, you can achieve stunning results and unlock new creative possibilities in your photography.
How to Use Manual White Balance for Accurate Color Reproduction
As a photographer, I understand the importance of capturing accurate colors in my images. One of the ways to ensure accurate color reproduction is by using the manual white balance setting on my DSLR camera. Manual white balance allows me to set the correct color temperature based on the lighting conditions of my environment. By doing so, I can eliminate any color casts and achieve natural-looking colors in my photographs.
To use manual white balance, I start by finding a neutral gray or white surface in my scene. This could be a piece of white paper, a gray card, or even a white shirt. I then take a photo of this surface, filling the frame completely. Once the photo is taken, I navigate to the white balance settings in my camera’s menu and select the option to set the white balance manually.
Next, I locate the image I just took of the neutral surface and choose it as the reference image for white balance. This allows my camera to analyze the colors in the image and adjust the white balance accordingly. Once this is done, I am ready to shoot. Now, when I take photos in the same lighting conditions, the colors will appear more accurate and true to life.
Using manual white balance may take a bit of extra time and effort, but the results are worth it. It allows me to have full control over the color reproduction in my images and ensures that the colors I capture are faithful to the scene. Whether I am shooting portraits, landscapes, or still life, accurate colors are crucial in creating visually appealing and impactful photographs.
Using Manual ISO Settings to Control Grain and Noise in DSLR Photography
As a photographer who is passionate about achieving the best image quality, I have found that mastering the manual ISO settings on my DSLR camera is essential. By understanding how ISO affects the amount of grain and noise in my photos, I can have full control over the final result.
When shooting in low light situations or with a high shutter speed, it is tempting to increase the ISO to compensate for the lack of available light. However, this often leads to an increase in grain and noise, which can significantly degrade the image quality. To avoid this, I prefer to use a lower ISO setting and make adjustments to other settings, such as aperture and shutter speed, to maintain a well-exposed image.
To determine the best ISO setting for a particular shot, I start by assessing the available light and the desired level of detail in the final image. If I am shooting in a well-lit environment and want to capture fine details, such as in landscape photography, I will typically use a lower ISO setting, such as 100 or 200, to minimize grain and noise.
On the other hand, if I am shooting in a dimly lit location or aiming for a specific artistic effect, such as creating a gritty atmosphere in street photography, I may intentionally increase the ISO to a higher value, such as 800 or even 1600. This can add a certain level of grain and noise, which can be desirable in certain situations.
Overall, mastering the use of manual ISO settings gives me the ability to control the amount of grain and noise in my photos, allowing me to achieve the desired image quality. By understanding when to use a lower ISO setting for maximum detail or when to intentionally increase the ISO for creative purposes, I am able to create stunning images that truly capture the essence of the scene.
Experimenting with Manual Shutter Speeds for Creative Effects
As a photographer, one of the most exciting aspects of using a DSLR camera is the ability to experiment with manual settings, particularly shutter speed. Shutter speed controls the amount of time that the camera’s sensor is exposed to light, and understanding how to manipulate this setting can result in a wide range of creative effects.
When shooting in manual mode, adjusting the shutter speed allows you to control the amount of motion blur in your photos. Slower shutter speeds, such as 1/30s or slower, can create a sense of movement by capturing the path of a moving subject. This technique is often used in sports photography to convey a sense of action and speed. Conversely, faster shutter speeds, such as 1/1000s or faster, can freeze motion and capture a moment in time with sharp precision. This is useful for capturing fast-moving subjects, such as wildlife or sports events, without any blur.
Another creative effect that can be achieved by adjusting the shutter speed is light painting. By using a slow shutter speed, such as a few seconds or even minutes, and a tripod to keep the camera steady, you can capture the movement of light sources, such as car headlights or sparklers, in a unique and artistic way. This technique allows you to create mesmerizing light trails or words written in light in your photographs.
In conclusion, experimenting with different manual shutter speeds can open up a whole new world of creative possibilities in photography. Whether you want to capture motion blur, freeze action, or create light painting effects, understanding how shutter speed works and how to adjust it can greatly enhance your photography skills.
The Benefits of Manual Aperture Settings for Controlling Depth of Field
As a photographer, one of the most important aspects of capturing a great image is controlling the depth of field. Manual aperture settings provide a powerful tool in achieving the desired depth of field in your photographs. By manually adjusting the aperture on your DSLR camera, you have full control over the amount of light entering the lens and the resulting depth of field in your image.
When shooting in manual mode, you have the freedom to choose a wider or narrower aperture, depending on your creative vision. A wider aperture, represented by a lower f-number, such as f/1.8, allows more light to enter the lens and creates a shallow depth of field. This is particularly useful when you want to isolate your subject from the background and create a beautiful bokeh effect. On the other hand, a narrower aperture, represented by a higher f-number, such as f/22, allows less light to enter the lens and results in a larger depth of field. This is ideal for landscape photography or situations where you want to maximize the sharpness and detail throughout the image.
By using manual aperture settings, you also gain greater control over the exposure of your images. When shooting in auto or semi-automatic modes, the camera’s metering system determines the optimal exposure based on the available light. However, this may not always result in the desired outcome. By manually adjusting the aperture, you can fine-tune the exposure to achieve the exact look you want.
In addition to controlling depth of field and exposure, manual aperture settings also allow for greater consistency in your photography. Once you have determined the ideal aperture setting for a certain type of shot, you can reproduce it every time, resulting in a consistent style and aesthetic in your images. This becomes especially important when shooting a series of images for a project or when you want to create a cohesive collection of photographs.
- Manual aperture settings provide control over depth of field
- Wider aperture creates shallow depth of field for subject isolation
- Narrower aperture results in larger depth of field for sharpness throughout the image
- Manual aperture settings offer greater control over exposure
- Allows for consistency and a cohesive style in your photography
How to Achieve Proper Exposure with Manual Settings on Your DSLR Camera
As an avid photographer, I understand the importance of achieving proper exposure when using a DSLR camera. Manual settings give you full control over your camera’s aperture, shutter speed, and ISO, allowing you to capture the perfect shot. However, it can be daunting to navigate through all the options and find the best settings for each situation. Here are some tips to help you achieve proper exposure with manual settings on your DSLR camera.
1. Set the aperture:
The aperture controls the amount of light entering the camera. A wider aperture (smaller f-number) lets in more light, while a smaller aperture (larger f-number) lets in less light. When shooting in manual mode, start by setting the aperture based on the depth of field you want to achieve. A wider aperture (e.g., f/2.8) creates a shallow depth of field with a blurred background, while a smaller aperture (e.g., f/11) produces a greater depth of field with a sharper background.
2. Adjust the shutter speed:
The shutter speed determines the duration of time the camera’s sensor is exposed to light. A faster shutter speed (e.g., 1/1000) freezes motion, while a slower shutter speed (e.g., 1/30) allows for motion blur. In manual mode, adjust the shutter speed based on the amount of light available and the effect you want to achieve. A higher shutter speed is ideal for capturing fast-moving subjects, while a slower shutter speed can create stunning long-exposure shots.
3. Set the ISO:
The ISO determines the camera’s sensitivity to light. In low-light situations, you may need to increase the ISO to capture a properly exposed image. However, higher ISO settings can introduce noise or graininess to your photos. Start with a lower ISO setting (e.g., 100) in well-lit conditions and increase it gradually as needed. Strike a balance between a higher ISO for low-light situations and a lower ISO for better image quality.
By mastering the manual settings on your DSLR camera, you can achieve proper exposure and produce stunning photographs. Experiment with different combinations of aperture, shutter speed, and ISO to achieve the desired effects and capture the perfect shot.
The Best Manual Settings for DSLR Camera: Tips and Recommendations
As a photographer, understanding and mastering the manual settings on your DSLR camera is essential for creating stunning photographs. While automatic settings can be convenient, manual settings allow you to have full control over your camera’s exposure, focus, and other crucial elements. In this article, we have discussed some of the best manual settings for your DSLR camera.
Here are some key tips and recommendations to help you get the most out of your DSLR camera:
1. Aperture Priority Mode (Av or A Mode)
Aperture Priority mode allows you to control the aperture setting while the camera sets the appropriate shutter speed. This setting is ideal when you want to have control over depth of field, especially for portrait photography or capturing breathtaking landscapes. Use a wider aperture (smaller f-number) for a shallow depth of field and a smaller aperture (larger f-number) for a greater depth of field.
2. Shutter Priority Mode (Tv or S Mode)
If freezing or blurring motion is your goal, then the Shutter Priority mode is your best bet. In this mode, you set the desired shutter speed, and the camera adjusts the aperture accordingly. Use a fast shutter speed (1/1000 or higher) for freezing fast-moving subjects, and a slow shutter speed (1/30 or lower) for capturing motion blur or long-exposure shots.
3. Manual Mode (M Mode)
In Manual mode, you have full control over both the aperture and shutter speed. This mode gives you the most creative freedom but requires a good understanding of exposure settings. Manual mode is recommended when shooting in tricky lighting conditions or when you want complete control over the exposure triangle.
4. ISO Settings
The ISO setting determines the sensitivity of your camera’s image sensor. Lower ISO values (e.g., ISO 100) are ideal for capturing sharp and noise-free images in well-lit conditions, while higher ISO values (e.g., ISO 800 or higher) are suitable for low-light conditions but may introduce noise or grain to your photos. Choose the appropriate ISO setting based on the available light and the desired effect.
5. White Balance
White balance refers to the color temperature of the light source. Different lighting conditions can have varying color casts. Your camera offers different white balance presets (such as Daylight, Cloudy, Fluorescent, etc.) to ensure accurate color representation. Adjust the white balance setting according to the lighting conditions or use custom white balance for more accurate color reproduction.
Summary
Mastering the manual settings on your DSLR camera can significantly enhance your photography skills. Aperture Priority mode allows control over depth of field, Shutter Priority mode freezes or blurs motion, and Manual mode provides complete creative freedom. Understanding ISO settings and white balance helps you capture sharp and well-balanced images. Experiment with different settings to unleash your creativity and capture stunning photographs.
Best manual setting for dslr camera
Guide to Nightscape Photography Techniques
Features
| Release Date | 2017-03-15T00:00:00.000Z |
| Edition | 1 |
| Language | English |
| Number Of Pages | 456 |
| Publication Date | 2017-03-15T00:00:00.000Z |
| Format | Kindle eBook |
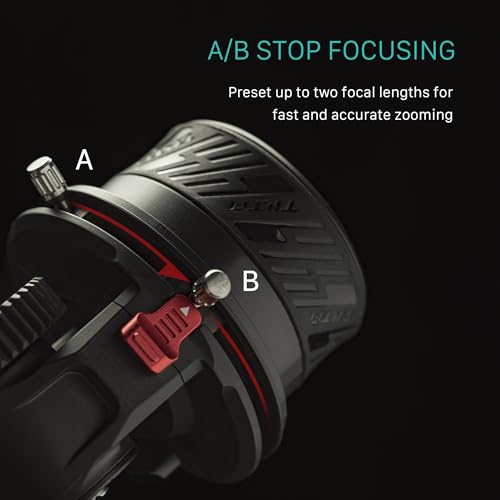
Tilta Pocket Follow Focus System
Features
| Part Number | FF-T07 |
| Model | FF-T07 |
| Warranty | 2 Year Warranty |
| Color | Black |


| Price history for Tilta Pocket Follow Focus System | |
|---|---|
|
Latest updates:
|
|
Calibrite ColorChecker White Balance Tool
Features
| Part Number | CCWB |
| Model | CCWB |
| Warranty | 1 Year Limited |
| Color | Light gray |
| Release Date | 2021-07-01T00:00:01Z |
| Size | White Balance |
| Format | Other Calendar |

| Price history for Calibrite ColorChecker White Balance Tool | |
|---|---|
|
Latest updates:
|
|
Versatile 71" Foldable Camera Tripod
Features
| Part Number | BS-01 |
| Model | 15551 |
| Color | black |


| Price history for Versatile 71" Foldable Camera Tripod | |
|---|---|
|
Latest updates:
|
|
Question and answers:
What is the best manual setting for a DSLR camera?
There is no one-size-fits-all answer to this question, as the best manual settings for a DSLR camera depend on various factors such as lighting conditions, subject, and personal preference. However, a good starting point for many photographers is to use a low ISO setting, a narrow aperture (such as f/8), and a shutter speed that is appropriate for the subject and desired effect.
How do I determine the best manual settings for my DSLR camera?
To determine the best manual settings for your DSLR camera, it is important to understand the exposure triangle, which consists of ISO, aperture, and shutter speed. Experimenting with different combinations of these three settings will allow you to find the optimal settings for the specific shooting situation. Additionally, using the camera’s histogram and evaluating the results on a computer can help in fine-tuning the settings to achieve desired results.