


Greetings fellow photography enthusiasts! Are you tired of capturing blurry and grainy images in low light conditions? Well, fret no more! In this article, I will share with you the best DSLR camera settings to help you achieve stunning low light photos with impeccable clarity and detail.
ISO: The ISO setting plays a crucial role in low light photography. By increasing the ISO sensitivity, you allow your camera’s sensor to capture more light, resulting in brighter images. However, be cautious not to set the ISO too high, as it can introduce noise and grain in your photos. Experiment with different ISO values to find the perfect balance between brightness and image quality.
Aperture: The aperture setting determines the amount of light that enters your camera lens. In low light situations, it’s best to use a wide aperture (low f-number) to maximize the amount of light reaching the sensor. This will help you achieve a shallow depth of field, where your subject is in sharp focus while the background is beautifully blurred.

Shutter Speed: When shooting in low light, it’s important to use a slower shutter speed to allow more light to enter the camera. However, a slow shutter speed can also introduce motion blur if your subject or camera is not steady. To avoid this, consider using a tripod or other stabilization techniques to ensure sharpness in your photos.
So, there you have it! By adjusting these key settings – ISO, aperture, and shutter speed – you can capture breathtaking images even in challenging low light conditions. Don’t be afraid to experiment and find the settings that work best for your shooting style. Happy shooting!
Understanding the Importance of DSLR Camera Settings for Low Light Photography
When it comes to low light photography, understanding the optimal settings for your DSLR camera is crucial. Capturing quality images in low light conditions can be challenging, but with the right camera settings, you can achieve stunning results.
ISO: One of the most important settings for low light photography is the ISO. Increasing the ISO allows your camera to capture more light, but it also introduces digital noise to your images. Finding the right balance between capturing enough light and maintaining image quality is essential. Experimenting with different ISO settings will help you understand what works best for your specific camera.
Aperture: Another crucial setting for low light photography is the aperture. A wider aperture allows more light to enter the camera, but it also affects the depth of field. If you’re shooting in low light conditions and want to maintain a shallow depth of field, using a wider aperture can help achieve that desired effect. However, keep in mind that using a wider aperture may affect the overall sharpness of your image.
Shutter Speed: The shutter speed determines how long the camera’s sensor is exposed to light. In low light conditions, using a slower shutter speed allows more light to enter the camera, resulting in a brighter image. However, using a slower shutter speed can also introduce motion blur, especially if you’re photographing moving subjects. To avoid camera shake, it’s important to use a tripod or stabilize your camera when using a slower shutter speed.
White Balance: The white balance setting ensures accurate color reproduction in your images. In low light conditions, the color temperature may vary, and using the appropriate white balance setting can help you achieve more natural-looking colors. Experimenting with different white balance presets or manually setting the white balance can make a significant difference in the overall look and feel of your low light photos.
Noise Reduction: When shooting in low light, digital noise can be a common issue. Many DSLR cameras offer in-camera noise reduction settings to help minimize noise. It’s worth experimenting with these settings and finding the right balance between noise reduction and image sharpness. Additionally, post-processing software can also be used to further reduce noise in your low light images.
Overall, understanding and mastering your DSLR camera settings for low light photography is essential to capture high-quality images in challenging lighting conditions. It takes practice and experimentation to find the right combination of ISO, aperture, shutter speed, white balance, and noise reduction settings that work best for your specific camera and shooting style.
Tips and Tricks to Master Low Light Photography with Your DSLR Camera
I have always been fascinated by low light photography, as it allows me to capture stunning and unique images in challenging lighting conditions. Over the years, I have learned some valuable tips and tricks to master low light photography with my DSLR camera. In this article, I will share some of my favorite techniques that have helped me capture amazing shots in low light situations.
1. Use a Wide Aperture: One of the most important settings to consider when shooting in low light is the aperture. By using a wide aperture, such as f/2.8 or lower, you can allow more light to enter the camera, resulting in brighter and sharper images. Be aware, however, that using a wide aperture can also result in a shallow depth of field, so it’s important to carefully choose your focal point.
2. Increase ISO: In low light situations, increasing the ISO setting on your DSLR camera can significantly improve the exposure of your images. However, it’s important to note that increasing the ISO can also introduce noise or graininess to your photos. To minimize noise, try to find the balance between a high ISO setting and a low noise level.
3. Use a Tripod: When shooting in low light, it’s essential to keep your camera steady to avoid blurry images. Using a tripod can help stabilize your camera and ensure sharp focus. Additionally, a tripod allows you to use slower shutter speeds without worrying about camera shake, which can result in creative long exposure shots.
4. Experiment with Shutter Speed: Another key setting to consider in low light photography is the shutter speed. Experimenting with longer shutter speeds, such as 1/30s or slower, can help capture more light and create interesting effects, such as light trails or motion blur. However, be cautious of using very slow shutter speeds without a tripod, as even the slightest movement can cause blurriness in your photos.
5. Shoot in RAW Format: Shooting in RAW format allows you to capture more data and details in your images compared to shooting in JPEG format. This is especially beneficial in low light situations, as you can recover more information in post-processing and minimize noise. Although RAW files take up more space on your memory card, the extra flexibility and image quality they provide are worth it.
By following these tips and tricks, I have been able to capture stunning low light images with my DSLR camera. Remember to always practice and experiment with different settings to find the techniques that work best for you and your camera. With time and experience, you’ll become more confident in your low light photography skills and be able to capture beautiful and unique moments, even in the darkest of conditions.
ISO: The Key to Capturing Clear and Bright Low Light Photos
When it comes to taking photos in low light conditions, one of the most important camera settings to consider is the ISO. ISO refers to the sensitivity of the camera’s image sensor to light. By adjusting the ISO setting, you can control the amount of light that the camera captures.
When shooting in low light, it’s crucial to find the right balance between ISO and other camera settings to ensure that your photos are clear and bright. A higher ISO setting allows the camera to capture more light, which can result in brighter photos. However, it can also introduce noise or graininess into the image. On the other hand, a lower ISO setting reduces the amount of light captured, but can produce cleaner and sharper images with less noise.
So, how do you determine the ideal ISO setting for low light conditions? It depends on various factors such as the available light, the subject you are photographing, and your desired outcome. Experimenting with different ISO settings and reviewing the results is the best way to find the perfect balance. Additionally, modern DSLR cameras often have advanced noise reduction features that can help minimize noise in high ISO images.
Ultimately, understanding how ISO works and how it affects your low light photos is crucial for capturing clear and bright images. By carefully adjusting the ISO setting and considering other camera settings, you can achieve stunning results even in challenging lighting conditions.
Adjusting ISO Settings for Low Light Conditions
When shooting in low light conditions, it is crucial to adjust the ISO settings of your DSLR camera in order to capture clear and well-exposed images. ISO refers to the sensitivity of the camera’s image sensor to light, and increasing the ISO value allows you to capture brighter images in low light situations.
Understanding ISO: ISO is measured in numerical values, such as 100, 200, 400, and so on. The lower the ISO value, the less sensitive the camera sensor is to light, resulting in darker images. On the other hand, higher ISO values increase the sensitivity to light, producing brighter images. However, higher ISO values can also introduce grain or noise in the photos.
Choosing the right ISO: To adjust ISO settings for low light conditions, start by selecting an ISO value between 800 and 1600. This range is often a good starting point for low light photography. If the images appear too dark, gradually increase the ISO until you achieve a properly exposed image. However, be mindful of increasing the ISO too much, as it can introduce unwanted noise.
Using Auto ISO: Many DSLR cameras offer an “Auto ISO” feature, which automatically adjusts the ISO based on the lighting conditions. While this can be a convenient option, it may not always produce the desired results. Experiment with both manual and auto ISO settings to see which one works best for your specific low light situation.
Post-processing: In addition to adjusting the ISO settings, you can further enhance low light images by using post-processing software. Programs like Adobe Lightroom or Photoshop allow you to reduce noise and optimize the exposure of your images. This can help improve the overall quality and clarity of your low light photographs.
In conclusion, adjusting the ISO settings is essential for capturing high-quality images in low light conditions. By understanding the ISO values and experimenting with different settings, you can achieve well-exposed photos without compromising on image quality. Remember to keep an eye on the amount of noise introduced by higher ISO values, and consider post-processing for further refinement of your low light images.
Aperture: Controlling Depth of Field in Low Light Situations
In low light situations, controlling the depth of field becomes crucial for capturing sharp and well-exposed photos. One of the key settings to consider is the aperture, which controls the amount of light entering the camera and affects the depth of field. Understanding how to adjust the aperture in low light can greatly enhance your photography skills and help you capture stunning images.
When shooting in low light, it is important to choose a wide aperture to allow more light to reach the camera sensor. This can be achieved by selecting a smaller f-stop number, such as f/1.8 or f/2.8. A wide aperture not only allows more light to enter the camera, but it also reduces the depth of field, resulting in a blurry background and emphasizing the subject. This can be particularly useful when photographing portraits or isolating a specific subject in dimly lit environments.
However, it is important to note that shooting with a wide aperture may result in shallow depth of field, which can lead to the subject being partially out of focus. To overcome this challenge, it is recommended to use a tripod to stabilize the camera and minimize camera shake. Additionally, adjusting the focus point manually can ensure that the subject is in sharp focus, even with a wide aperture setting.
In conclusion, controlling the aperture in low light situations is essential for capturing well-exposed and visually appealing photos. By selecting a wide aperture and understanding the impact on the depth of field, you can effectively control how much light enters the camera and create stunning images in challenging lighting conditions.
Choosing the Right Aperture Settings for Low Light Photography
When it comes to low light photography, selecting the appropriate aperture setting is crucial for capturing the perfect shot. As an avid photographer, I have learned through experience that understanding how different aperture settings affect exposure and depth of field can greatly enhance the quality of my low light images.
Wide Aperture: One of the first things I consider in low light situations is using a wide aperture, such as f/1.8 or f/2.8. This allows more light to enter the camera, resulting in brighter images. Additionally, a wide aperture creates a shallow depth of field, which can help isolate the subject and create a pleasing background blur.
Narrow Aperture: On the other hand, sometimes I want to capture a wider depth of field in low light conditions. In these cases, I choose a narrower aperture, such as f/8 or f/11. While this reduces the amount of light entering the camera, it allows me to achieve a greater depth of field, keeping more of the scene in focus.
Experimenting with different aperture settings is key to finding the optimal balance between exposure and depth of field in low light photography. It’s important to keep in mind that the desired effect may vary depending on the specific situation and the creative vision of the photographer. By understanding the impact of different aperture settings, I am able to capture stunning low light images that truly showcase the beauty of the moment.
Shutter Speed: Balancing Exposure and Avoiding Blurry Photos in Low Light
When shooting in low light conditions, finding the right balance of shutter speed is crucial for achieving well-exposed and sharp photos. Shutter speed refers to the length of time the camera’s shutter is open, allowing light to enter and expose the camera’s sensor. In low light situations, the lack of available light can result in underexposed images, while longer exposure times can introduce blur into the photo.
Understanding the relationship between shutter speed and exposure is key. In low light situations, a longer shutter speed can help capture more light and brighten the image. However, using a longer shutter speed also increases the likelihood of camera shake, leading to blurry photos. To balance exposure and avoid blur, it’s important to choose a shutter speed that is fast enough to freeze motion, yet slow enough to let in sufficient light.
- Using a tripod: One option to combat camera shake is to use a tripod. This allows you to use a slower shutter speed without the risk of introducing camera shake. By stabilizing the camera, you can capture sharp images even in low light conditions.
- Increasing ISO: Another option is increasing the camera’s ISO settings. ISO determines the camera’s sensitivity to light. By increasing the ISO, you can use a faster shutter speed, reducing the risk of blur. However, be aware that higher ISO settings can introduce noise into the image.
- Using image stabilization: Many modern DSLR cameras come equipped with image stabilization technology. This technology helps to reduce camera shake by compensating for movements while the shutter is open. By enabling image stabilization, you can use slower shutter speeds without sacrificing image sharpness.
In conclusion, finding the right shutter speed is essential when shooting in low light. Understanding the relationship between shutter speed and exposure allows you to balance exposure and avoid blurry photos. Whether it’s using a tripod, increasing ISO, or utilizing image stabilization, there are various techniques to ensure sharp and well-exposed images in low light conditions. Experimenting with different settings and practicing will help you develop your skills and capture stunning low light photos.
How to Select the Optimal Shutter Speed for Low Light Conditions
When shooting in low light conditions, selecting the correct shutter speed is crucial to capturing clear and well-exposed photos. The shutter speed determines how long the camera’s sensor is exposed to light, so it directly affects the amount of light that is captured in the image.
One important factor to consider when choosing the optimal shutter speed for low light is the amount of motion in the scene. If you are photographing a stationary subject, you can use a slower shutter speed without worrying about motion blur. However, if there is any movement in the scene, such as a person walking or a car passing by, you will need to use a faster shutter speed to freeze the action and avoid blur.

- Start with a baseline shutter speed: As a general rule, it is recommended to start with a shutter speed of 1/60th of a second or faster when shooting handheld in low light. This will help minimize camera shake and reduce the risk of blurry photos.
- Experiment with longer shutter speeds on a tripod: If you have a stable surface or a tripod, you can try using longer shutter speeds to capture more light in the scene. This can be useful when shooting in extremely low light situations where you need to gather as much light as possible.
- Adjust the shutter speed based on the available light: Pay attention to the lighting conditions and adjust the shutter speed accordingly. If the scene is well-lit, you can use a faster shutter speed to prevent overexposure. On the other hand, if the scene is dimly lit, you may need to decrease the shutter speed to allow more light into the camera.
White Balance: Maintaining Accurate Colors in Low Light Environments
One of the challenges of capturing photos in low light environments is maintaining accurate colors. In these conditions, the lighting may be different from what our eyes perceive, leading to a color cast in our photos. However, by adjusting the white balance setting on our DSLR camera, we can ensure that the colors in our photos appear as close to reality as possible.
The white balance setting on a DSLR camera allows us to adjust the color temperature, which in turn affects the overall color balance of our photos. In low light environments, the color temperature may be warmer or cooler than normal, resulting in an unnatural color cast. By using the white balance setting, we can counteract this and bring the colors back to their natural state.
When shooting in low light, it is important to experiment with different white balance settings to find the most accurate one for the specific lighting conditions. Some DSLR cameras have preset white balance options, such as tungsten or fluorescent, which can be useful in certain low light environments. Additionally, many cameras also offer a custom white balance option, where we can manually set the white balance using a white or neutral gray card.
In conclusion, maintaining accurate colors in low light environments is crucial for capturing high-quality photos. By adjusting the white balance setting on our DSLR cameras, we can ensure that the colors in our photos are true to life. Experimenting with different white balance settings and using custom options can help us achieve the best results in low light conditions.
How to Adjust White Balance Settings for Low Light Photography
When shooting in low light conditions, one of the key challenges is to accurately capture the colors in your scene. This is where the white balance settings on your DSLR camera come into play. Adjusting the white balance correctly can make a significant difference in the overall look and feel of your low light photos.
Here are some tips for adjusting white balance settings for low light photography:
-
Use the “Tungsten” or “Incandescent” preset: These presets are designed for capturing warm colors in artificial lighting, such as indoor light bulbs. They are ideal for low light situations where the light source is mainly incandescent.
-
Manually adjust the white balance: If your camera doesn’t have a specific low light preset, you can manually adjust the white balance by using the Kelvin temperature scale. Lower temperatures around 2500-3000K will give your photos a warmer tone, while higher temperatures around 5500-6500K will produce cooler tones.
-
Shoot in RAW format: When shooting in low light, it’s always recommended to shoot in RAW format. RAW files contain more information and allow for greater flexibility in post-processing, including adjusting white balance.
-
Use a custom white balance: Some DSLR cameras allow you to set a custom white balance by taking a reference photo of a white or gray card in the lighting conditions you will be shooting in. This can help ensure accurate color reproduction in challenging lighting situations.
-
Experiment with different settings: Don’t be afraid to experiment with different white balance settings to achieve the desired look for your low light photos. Each lighting situation is unique, so it may require some trial and error to find the optimal setting.
In conclusion, adjusting white balance settings for low light photography is essential for capturing accurate colors in challenging lighting conditions. Whether using preset modes, manually adjusting the white balance, shooting in RAW format, or using custom white balance, understanding how to fine-tune this setting will greatly enhance the quality of your low light photos.
Best dslr camera settings for low light
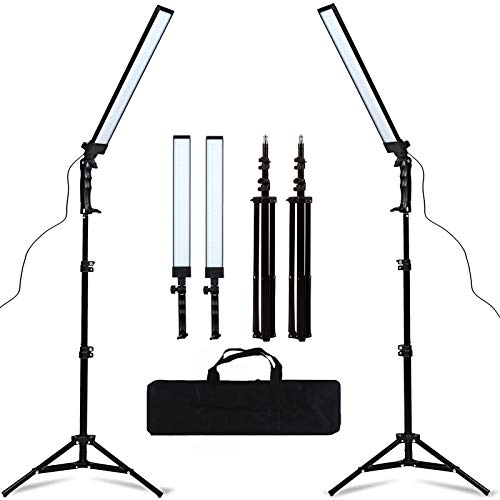
GSKAIWEN LED Studio Photography Lighting Kit
Features
| Part Number | SJ000050 |
| Model | 930065 |
| Is Adult Product |


| Price history for GSKAIWEN LED Studio Photography Lighting Kit | |
|---|---|
|
Latest updates:
|
|
SmallRig Adjustable Camera Tripod/Monopod
Features
| Part Number | BS-01 |
| Model | 15551 |
| Color | black |


| Price history for SmallRig Adjustable Camera Tripod/Monopod | |
|---|---|
|
Latest updates:
|
|
Canon EOS Rebel T7 DSLR Camera Bundle
Features
| Part Number | 2727C002 |
| Model | 2727C002 |
| Warranty | 1 year manufacturer |
| Color | Black |
| Release Date | 2019-03-06T00:00:01Z |
| Size | 55mm |


| Price history for Canon EOS Rebel T7 DSLR Camera Bundle | |
|---|---|
|
Latest updates:
|
|
Nikon D7500 DSLR Camera with High Zoom Lens
Features
| Part Number | D7500 w/ AF-S DX NIKKOR 18-300mm |
| Model | 13532 |
| Color | Black |
| Release Date | 2017-07-21T00:00:01Z |
Canon EF 50mm f/1.8 STM Camera Lens
Features
| Part Number | 0570C002 |
| Model | 0570C005AA |
| Warranty | 1 year coverage for parts |
| Color | Black |
| Is Adult Product | |
| Release Date | 2015-05-21T00:00:01Z |
| Size | Lens Only |
| Language | English |
| Publication Date | 2019-06-17T00:00:01Z |


| Price history for Canon EF 50mm f/1.8 STM Camera Lens | |
|---|---|
|
Latest updates:
|
|
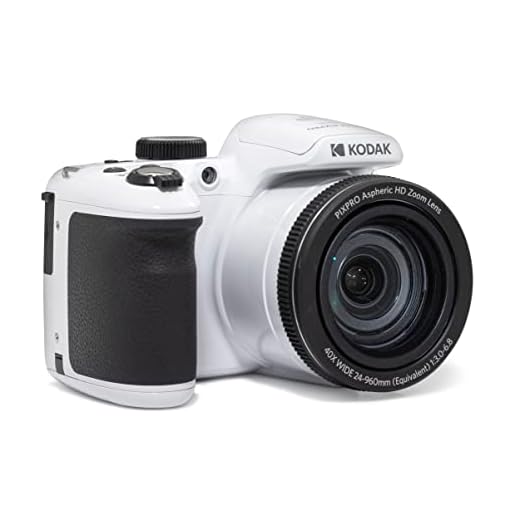
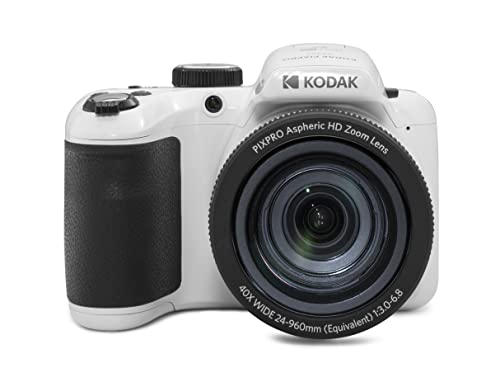
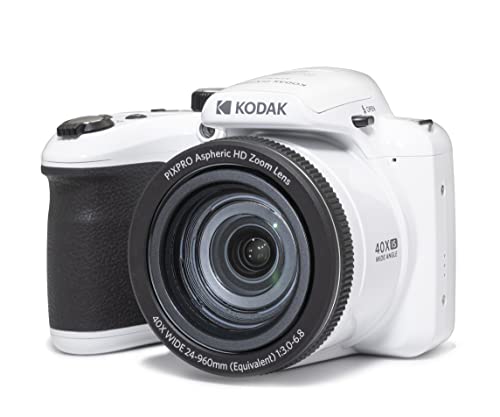
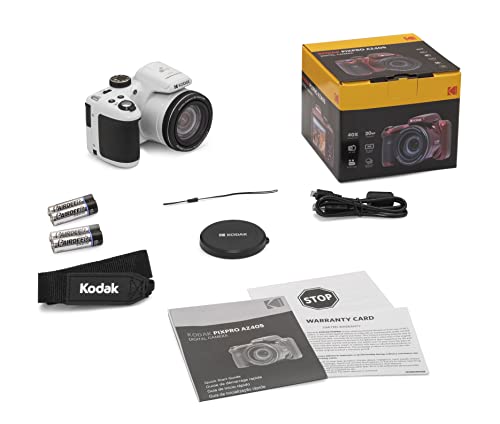
KODAK PIXPRO AZ405: 20MP Digital Camera
Features
| Part Number | AZ405-WH |
| Model | AZ405-WH |
| Warranty | 1 year manufacturer |
| Color | White |
| Release Date | 2022-11-05T00:00:01Z |
| Language | English |
| Price history for KODAK PIXPRO AZ405: 20MP Digital Camera | |
|---|---|
|
Latest updates:
|
|
NEEWER 192 LED Video Light Panel
Features
| Part Number | 10097081 |
| Model | 10097081 |


Question and answers:
What are the best DSLR camera settings for low light?
The best DSLR camera settings for low light conditions would typically include using a wide aperture (low f-number), a high ISO setting, and a slow shutter speed. This combination allows for more light to enter the camera and helps capture brighter images in low light situations.
How do I adjust my DSLR camera settings for low light photography?
To adjust your DSLR camera settings for low light photography, start by setting your camera to manual mode. Then, open up your aperture to the lowest f-number possible, increase your ISO to a high value, and slow down your shutter speed. Be sure to use a tripod to minimize camera shake with slower shutter speeds.


