


Hello, fellow filmmakers and photographers! Today, I want to share with you some of the best camera DSLR settings for interviews. As someone who has conducted numerous interviews and captured countless moments on film, I have realized that having the right camera settings can make all the difference in capturing high-quality footage that truly captures the essence of the interviewee.
First and foremost, let’s talk about aperture. When shooting interviews, it is crucial to have a shallow depth of field to isolate the subject and create that beautiful creamy background blur. To achieve this, set your DSLR camera to a wide aperture, such as f/2.8 or even lower if your lens allows it. This will give your interviews a professional and cinematic look.
Next, let’s discuss ISO. ISO determines the sensitivity of your camera’s sensor to light. For interviews, you want to prioritize having a low ISO to minimize noise and maintain the highest image quality possible. Start with an ISO of 100 and gradually increase it if needed, keeping in mind that higher ISO settings can introduce grain into your footage.
Now, let’s move on to shutter speed. In interview settings, it is essential to have a proper shutter speed to avoid motion blur and keep your shots crisp and clear. A safe bet is to set your shutter speed at double the frame rate you are using. For example, if you are shooting at 24 frames per second, set your shutter speed to 1/50th of a second. This will ensure smooth and natural-looking footage.

Last but not least, let’s talk about white balance. White balance is crucial for maintaining accurate colors in your interviews. While many DSLRs offer an auto white balance setting, I recommend manually setting your white balance to achieve the most accurate colors. Use a white balance card or adjust it based on the lighting conditions of your interview location.
In conclusion, by setting your aperture, ISO, shutter speed, and white balance correctly for interviews, you can capture professional-quality footage that truly represents your interviewee. Experiment with these settings, and don’t be afraid to adjust them based on the specific circumstances of each interview. Happy shooting!
Best Camera DSLR Settings for Interviews
As a professional videographer, I understand the importance of capturing high-quality interviews. The camera settings play a crucial role in achieving a visually appealing and professional-looking final product.
1. Shutter Speed: Setting the right shutter speed is essential for interviews. It should typically be double the frame rate to achieve a natural and smooth motion. For example, if shooting at 24 frames per second, the shutter speed should be set to 1/48 or 1/50.
2. Aperture: Selecting the right aperture setting helps in controlling the depth of field and ensuring that the subject stands out from the background. For interviews, it is advisable to use a wide aperture (low f-number) to achieve a blurred background and emphasize the subject’s presence.
3. ISO: The ISO settings control the camera’s sensitivity to light. It is best to keep the ISO as low as possible to minimize digital noise. However, in low-light situations, a higher ISO may be necessary to maintain proper exposure. Care should be taken not to overexpose the interviewee.
4. White Balance: Adjusting the white balance ensures accurate color representation in the footage. It is recommended to set the white balance manually using a gray card or by adjusting it according to the lighting conditions of the interview location. This helps in maintaining the correct skin tones and overall color balance.
5. Picture Style: Choosing the right picture style helps in achieving the desired look and feel of the interview footage. It is advisable to use a flat or neutral picture style and make adjustments during post-production to ensure maximum flexibility in color grading.
6. Focus: Achieving accurate focus is crucial for interview shots. Utilizing the camera’s autofocus feature can be helpful, but manual focus is often preferred to have complete control over the focus point. Using focus peaking or magnification assistance can assist in achieving precise focus on the subject’s eyes.
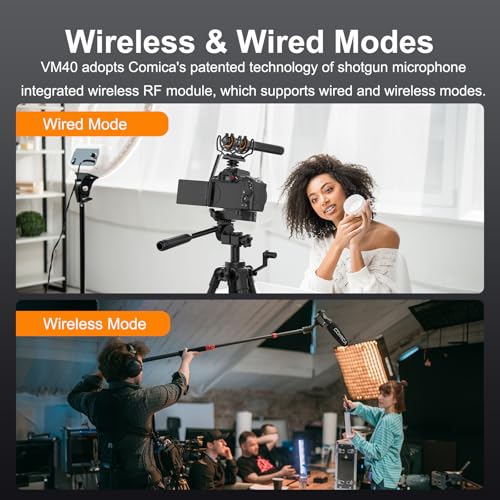
7. Audio: While the focus is on camera settings, it is essential not to neglect audio quality during interviews. Using an external microphone or a lavalier mic connected to a separate audio recorder can help capture clear and crisp audio, enhancing the overall quality of the interview.
By adjusting these camera settings appropriately, I can capture interviews that stand out with excellent visual quality and professionalism.
Understanding the Importance of Camera Settings in Interviews
When it comes to conducting interviews, camera settings play a crucial role in capturing high-quality footage that effectively communicates the message. As a filmmaker, understanding and utilizing the appropriate camera settings can greatly enhance the overall visual appeal and impact of the interview.
Exposure: One of the most important camera settings to consider in interviews is exposure. Proper exposure ensures that the subject in focus is well-lit and clear, avoiding overexposure or underexposure. Experimenting with different aperture, shutter speed, and ISO settings can help achieve the desired exposure levels, depending on the lighting conditions.
Depth of Field: Another aspect to consider is the depth of field. By adjusting the aperture settings, you can control the amount of background blur, or bokeh, in your shots. A wider aperture (lower f/stop) will create a shallow depth of field, focusing attention on the subject and separating them from the background, while a smaller aperture (higher f/stop) will keep more of the scene in focus.
White Balance: Proper white balance is crucial for maintaining accurate color representation in interviews. Different light sources can have different color temperatures, such as warm indoor lighting or cool natural daylight. Adjusting the white balance settings on your camera ensures that the colors appear natural and true to life in the final footage.
Additionally, other camera settings such as frame rate, focus mode, and image stabilization also contribute to the overall quality of interviews. Finding the right camera settings will not only enhance the visual appeal of the footage but also help convey the intended message effectively.
Choosing the Right Shutter Speed for Interview Footage
When it comes to shooting interviews, it is crucial to choose the right shutter speed to ensure that your footage looks professional and visually appealing. The shutter speed refers to the amount of time that the camera’s shutter is open, allowing light to hit the image sensor. It directly affects the way motion is captured in your footage.
Understanding the impact of shutter speed on interviews:
When shooting interviews, you usually want to capture smooth and steady footage, especially when the subject is talking or sitting still. A higher shutter speed can help achieve this by freezing the motion in the frame. However, keep in mind that using a very high shutter speed can make the footage look unnatural and stilted.
Tip: If you are shooting in a well-lit environment, you can use a slower shutter speed to capture a more natural motion blur. This can create a cinematic look and make the footage more visually pleasing. However, be cautious not to use a shutter speed that is too slow, as it can introduce unwanted motion blur and make the image appear blurry.
Choosing the optimal shutter speed:
For most interviews, a shutter speed of 1/50th to 1/100th of a second (or 1/60th to 1/125th for those using a 60Hz system) is commonly used. This allows for a good balance between capturing smooth motion and maintaining a natural look. However, the optimal shutter speed may vary depending on factors such as lighting conditions, subject movement, and personal preference.
Tip: It is always a good idea to test different shutter speeds before the interview to see how they affect the look of your footage. This will help you determine the best settings for capturing interviews in your specific shooting environment.
In conclusion, choosing the right shutter speed is essential for capturing high-quality interview footage. By understanding the impact of shutter speed on motion and experimenting with different settings, you can achieve visually appealing results that enhance the overall quality of your interviews.
Focusing Techniques for Crisp and Clear Interview Shots
As a professional photographer, I understand the importance of capturing crisp and clear shots during interviews. The focus of an image can make or break the overall quality, so it’s crucial to master proper focusing techniques. In this article, I will share some tips and tricks that can help you achieve sharp and professional-looking interview shots.
1. Manual Focus: When shooting interviews, it’s often best to switch to manual focus mode. This gives you full control over the focus and allows you to make precise adjustments. Use the focus ring on your DSLR camera to achieve sharpness on your subject’s eyes or face, as these areas usually require the most attention.
2. Single Point Focus: To ensure your subject stays in focus, set your camera to single point focus mode. This mode allows you to select a specific focus point on your camera’s viewfinder, ensuring that the focus remains locked on your subject throughout the interview. Experiment with different focus points to find what works best for your specific camera and shooting style.
- 3. Use Focus Assist Tools: Many DSLR cameras come with focus assist tools, such as focus peaking or magnification, that can help you achieve precise focus. Focus peaking highlights the areas in your frame that are in focus, while magnification allows you to zoom in on your subject to check for sharpness. Utilize these tools to ensure your focus is spot on.
- 4. Continuous Autofocus: If your camera has a reliable continuous autofocus feature, it can be beneficial to use it during interviews. This mode allows your camera to continuously adjust the focus as your subject moves. However, be cautious when using this mode, as it may cause distractions or noise if the autofocus mechanism is loud.
- 5. Test Your Focus: Before recording an interview, take a few test shots to ensure your focus is accurate. Zoom in on your subject’s eyes or face to check for sharpness. If necessary, make adjustments to your focus settings until you achieve the desired result.
By utilizing these focusing techniques, you can significantly improve the quality of your interview shots. Remember to practice and experiment with different settings to find what works best for you and your equipment. Crisp and clear shots will not only enhance the overall appearance of your interviews but also engage and captivate your audience.
The Role of Aperture in Creating a Professional Look for Interviews
When it comes to capturing interviews, one of the key factors in creating a professional look is the aperture setting on your DSLR camera. Aperture refers to the size of the opening in the lens through which light enters the camera. It plays a crucial role in controlling the depth of field and determining the amount of background blur in your shots.
Choosing the right aperture setting for interviews can make a significant difference in the overall appearance of your footage. A wide aperture, such as f/1.8, allows more light to enter the camera, resulting in a shallow depth of field and a blurred background. This can help to separate your subject from the background and draw the viewer’s attention to the person being interviewed.
On the other hand, a narrow aperture, such as f/8 or higher, reduces the amount of light entering the camera, resulting in a larger depth of field and a sharper background. This can be useful for capturing interviews in environments where you want to include more details in the background without distracting from the main subject.
To achieve the desired professional look for interviews, it’s important to consider the specific context and purpose of the interview. If you want to create a more intimate and focused atmosphere, a wide aperture can help to achieve that effect. On the other hand, if you want to provide more context or capture a larger area, a narrower aperture may be more appropriate.
In conclusion, the aperture setting on your DSLR camera is a powerful tool for creating a professional look for interviews. By understanding how aperture affects the depth of field and background blur, you can choose the right setting to enhance the visual impact of your footage and effectively convey your intended message.
Setting the ISO for Proper Exposure in Interview Situations
When conducting interviews, it is crucial to properly set the ISO on your DSLR camera in order to achieve optimal exposure. ISO, which stands for International Standards Organization, refers to the sensitivity of the camera’s image sensor to light. By adjusting the ISO, you can control the brightness or darkness of your footage.
To ensure proper exposure, it is important to consider the lighting conditions of the interview setting. If you are filming in a well-lit environment, you may be able to set a lower ISO, such as 100 or 200, to capture sharp and detailed footage without introducing unnecessary noise. On the other hand, if the lighting is dim or you are filming in low-light conditions, you will need to increase the ISO to maintain proper exposure, even if it means introducing some noise.
- Assess the lighting conditions: Start by evaluating the available light in the interview setting. Take note of the brightness and any potential sources of light that may impact your exposure.
- Set the ISO accordingly: Based on your assessment, adjust the ISO on your DSLR camera to achieve proper exposure. If the lighting is bright, try setting a lower ISO to keep noise levels to a minimum. If the lighting is low, increase the ISO to maintain proper exposure.
- Test and adjust: Once you have set the ISO, take some test shots or footage to ensure that the exposure looks balanced. Review the footage and make any necessary adjustments to the ISO if the exposure is too bright or too dark.
Keep in mind that increasing the ISO too much can result in significant noise, which can degrade the quality of your footage. It is important to strike a balance between achieving proper exposure and minimizing noise. Experiment with different ISO settings in different lighting conditions to find the sweet spot for your specific camera and lenses.
White Balance: Keeping Colors Accurate in Interview Footage
As a filmmaker, one of the most important aspects of capturing interview footage is ensuring that the colors appear accurate and true to life. This is where white balance comes into play. By adjusting the white balance settings on your DSLR camera, you can ensure that the colors in your footage are not distorted or skewed, resulting in a more professional and polished final product.
White balance refers to the process of calibrating your camera to accurately represent the color temperature of the light source in your environment. Different light sources emit light with different color temperatures, such as natural daylight being cooler and incandescent light being warmer. If your camera’s white balance is not set correctly, it can result in footage that appears too warm or too cool, giving an unnatural or unflattering look to the subject.
To achieve accurate white balance in your interview footage, start by setting a custom white balance using a gray card or other neutral reference object. This involves placing the gray card in the scene and using your camera’s custom white balance function to capture an image of the card. The camera will then use this image to calibrate the color temperature for the rest of the footage. Alternatively, you can use the camera’s preset white balance modes, such as daylight, cloudy, or tungsten, depending on the lighting conditions.
It’s worth noting that while it may seem easier to rely on automatic white balance settings, these settings can often be unreliable in certain lighting conditions. Manual white balance adjustment gives you more control over the final look of your footage and ensures that the colors are accurately represented. Additionally, shooting in a RAW format allows for more flexibility in post-production to adjust the white balance if needed.
In conclusion, white balance is a crucial aspect of capturing interview footage. By properly calibrating your camera’s white balance settings, you can ensure that the colors in your footage are accurate and true to life. Whether you choose to use a custom white balance or the camera’s preset modes, always strive for accuracy to create professional-looking interview videos.
Maximizing Audio Quality: Configuring the Camera’s Microphone
When it comes to capturing high-quality audio for interviews, configuring the camera’s microphone settings is crucial. The microphone is an integral part of the overall video production process, and making the right adjustments can greatly enhance the audio clarity and eliminate unwanted noise.
1. Selecting the right microphone: Before configuring the camera’s microphone, it is important to choose the right type of microphone for your specific needs. Depending on the shooting environment and the desired audio quality, options like shotgun, lavalier, or wireless microphones may be suitable. Each type has its strengths and weaknesses, so it is essential to consider factors such as range, background noise rejection, and directionality when making a selection.

2. Adjusting the microphone levels: Once you have chosen the appropriate microphone, it is essential to properly adjust the audio levels on your camera. This ensures that the microphone is accurately capturing the sound without any distortion or clipping. Start by setting the levels to a moderate gain and then test the audio by recording a short sample. Monitor the levels on the camera’s audio meter and adjust accordingly until you achieve optimal levels and avoid any audio distortion.
- Understand the audio meter: Familiarize yourself with the camera’s audio meter and learn how to interpret the levels displayed. The goal is to keep the audio levels in the green zone, avoiding peaks that could result in distortion.
- Experiment with different mic positions: The position of the microphone can greatly affect the audio quality. Try experimenting with different mic placements, such as placing a lavalier microphone closer to the interviewee’s mouth or angling a shotgun microphone to capture the sound accurately.
- Use windshields and pop filters: External factors like wind and plosive sounds (such as “p” and “b” sounds) can negatively impact the audio quality. Use windshields or foam covers to reduce wind noise, and consider using pop filters to minimize plosive sounds.
3. Utilizing external recording devices: In some cases, utilizing an external audio recorder can significantly improve the audio quality of your interviews. These devices offer greater control over the audio settings and allow for the use of high-quality microphones. By connecting the external recorder to your camera, you can bypass the camera’s internal microphone and achieve superior audio results.
By following these tips and making the necessary adjustments to your camera’s microphone, you can maximize the audio quality of your interviews. Remember to choose the right microphone, adjust the audio levels, and consider additional accessories or external recording devices to further enhance your audio capturing capabilities.
Fine-Tuning Camera Settings for Different Interview Environments
When it comes to capturing interviews, having the right camera settings can make a significant difference in the quality of your footage. In this article, we have discussed some of the best camera DSLR settings for interviews. However, it is important to note that these settings may need to be adjusted depending on the specific environment in which you will be conducting the interview.
Here are some additional tips for fine-tuning your camera settings based on different interview environments:
Indoor Interviews
- ISO: For indoor interviews, you may need to increase your ISO to compensate for lower light conditions. However, be careful not to set it too high, as it can introduce noise into your footage.
- White Balance: Adjust the white balance settings on your camera to match the color temperature of the indoor lighting. This will ensure that the colors in your footage appear natural and accurate.
- Aperture: Depending on the depth of field you want to achieve, adjust the aperture accordingly. A wider aperture (lower f-stop) will create a shallower depth of field, while a narrower aperture (higher f-stop) will result in a deeper depth of field.
- Shutter Speed: Use a fast enough shutter speed to avoid motion blur, especially if the subject is moving or using hand gestures during the interview.
Outdoor Interviews
- ISO: When shooting outdoors, you may need to lower your ISO settings as there is usually more available light. This will help reduce noise in your footage.
- White Balance: Depending on the time of day and weather conditions, choose the appropriate white balance preset or manually adjust it for accurate colors.
- Aperture: Consider the depth of field you want to achieve and adjust the aperture accordingly. A wider aperture can help isolate the subject from the background, while a narrower aperture can keep more of the scene in focus.
- Shutter Speed: Use a fast enough shutter speed to avoid overexposure, especially in bright sunlight. You can also use a neutral density (ND) filter to reduce the amount of light entering the lens.
Remember, these settings are just starting points, and it is important to experiment and adjust them based on the specific conditions of each interview. Regularly review your footage and make adjustments as necessary to ensure the best possible quality.
By fine-tuning your camera settings for different interview environments, you can capture professional-looking footage that enhances the overall impact of your interviews. So, grab your DSLR, apply these settings, and start shooting those compelling interviews!
Best camera dslr settings for interviews
Lightweight Carbon Fiber Microphone Boom Arm
Features
| Part Number | 4332048009 |
| Model | 4332048009 |
| Color | Black |


Canon EOS Rebel T7 DSLR Camera
Features
| Part Number | 2727C002 |
| Model | 2727C002 |
| Warranty | 1 year manufacturer |
| Color | Black |
| Release Date | 2019-03-06T00:00:01Z |
| Size | 55mm |


| Price history for Canon EOS Rebel T7 DSLR Camera | |
|---|---|
|
Latest updates:
|
|
Datacolor SpyderLensCal Calibration Tool
Features
| Part Number | SLC100 |
| Model | SLC100 |
| Warranty | 1 year Hardware Warranty |
| Color | black |
| Language | German |


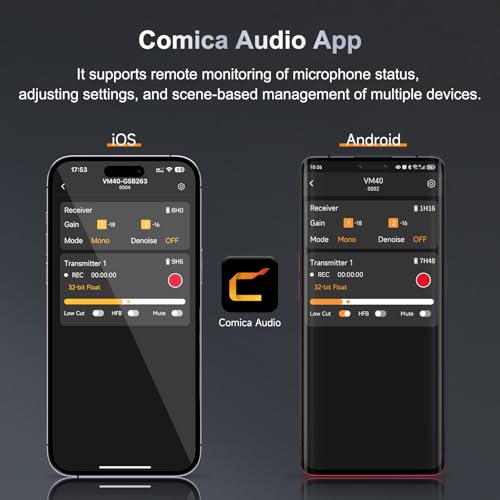
Comica VM40 Shotgun Microphone
Features
| Part Number | VM40 |
| Model | VM40 |
| Warranty | 1 Year Warranty |
| Size | VM40 |


Nikon D7500 DSLR Camera Kit
Features
| Part Number | D7500 w/ AF-S DX NIKKOR 18-300mm |
| Model | 13532 |
| Color | Black |
| Release Date | 2017-07-21T00:00:01Z |
160GB Digital Voice Recorder
Features
| Part Number | Po-V75 |
| Model | Po-V75 |
| Warranty | 2 years |
| Color | Black |
| Size | 160GB |
| Format | WAV |


Question and answers:
What are the best camera DSLR settings for interviews?
The best camera DSLR settings for interviews may vary depending on factors such as lighting conditions, desired depth of field, and personal preferences. However, some recommended settings include using a low aperture (around f/2.8 to f/4) to create a shallow depth of field and blur the background, using a shutter speed of 1/50 or 1/60 to match the frame rate for a natural motion blur, and setting the ISO to the lowest possible value for optimal image quality in well-lit environments.
How can I achieve good lighting for interviews with a DSLR camera?
To achieve good lighting for interviews with a DSLR camera, consider using a combination of natural light and artificial lights. Position the subject facing a window or a well-lit area to benefit from soft, diffused natural light. Use additional artificial lights like softboxes or LED panels to fill in any shadows or provide balanced lighting if needed. It’s important to adjust the intensity and direction of the lights to create a flattering and professional-looking result.


