


A monopod can be a valuable tool for photographers looking to stabilize their shots without the bulk of a tripod. It offers more stability than hand-holding your camera but is easier to transport and set up than a full tripod.
Using a monopod correctly can help you achieve sharper images, especially in low-light situations or when using a telephoto lens. In this guide, we’ll cover the basics of how to properly use a monopod with your digital camera.
From setting up your monopod to adjusting its height and using it with different types of cameras, we’ll walk you through everything you need to know to get the most out of this versatile photography accessory.

Benefits of Using a Monopod
Using a monopod with your digital camera offers several benefits that can improve your photography experience:
- Stability: A monopod provides stability when shooting in low light conditions or with a heavy camera, reducing camera shake and producing sharper images.
- Portability: Unlike a tripod, a monopod is lightweight and easy to carry, making it ideal for travel or outdoor photography where carrying heavy equipment is not practical.
- Flexibility: With a monopod, you can quickly adjust the height and angle of your camera, allowing you to capture shots from various perspectives without the need to reposition the entire setup.
- Support: Using a monopod can help reduce fatigue during long photo sessions by providing additional support for your camera, allowing you to focus on capturing the perfect shot without straining your arms.
- Space-saving: When shooting in crowded or limited space, a monopod takes up less room than a tripod, making it easier to maneuver and set up your camera in tight areas.
Choosing the Right Monopod
When choosing a monopod for your digital camera, there are several factors to consider to ensure you get the best fit for your needs.
1. Weight Capacity
Make sure the monopod you choose can support the weight of your camera and any additional accessories you may use, such as a larger lens or external flash.
2. Height and Size
Consider the height of the monopod when fully extended and collapsed to ensure it meets your shooting requirements. Also, think about the size and weight for portability and ease of use.
- Choose a monopod that is lightweight and compact if you plan to travel frequently.
- If you need extra stability, opt for a taller monopod with a wider base.
By considering these factors, you can select the right monopod to enhance your photography experience with your digital camera.
Setting Up Your Monopod
1. Extend the monopod to your desired height by loosening the locking mechanism and pulling the sections out.
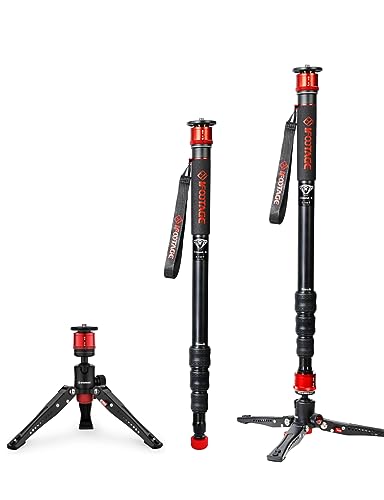
2. Make sure the monopod is stable by adjusting the feet if necessary. Some monopods come with retractable feet for added stability.
3. Attach your digital camera to the monopod’s mounting plate using the screw provided. Make sure it is securely attached.
4. Adjust the angle of the camera by loosening the tilt head and moving it to the desired position. Tighten the tilt head to secure the camera in place.
5. Test the stability of the monopod and camera setup by gently moving it around. Make any necessary adjustments to ensure a stable and secure setup.
Positioning Your Camera on the Monopod
Once you have extended the monopod to the desired height, it’s time to position your camera. Make sure the camera is securely attached to the mounting plate on top of the monopod. Ensure that the camera is properly balanced and stable to prevent any accidental falls or damage.
Adjust the angle of the camera by tilting the monopod slightly or using the tilting mechanism on the head of the monopod if available. This will allow you to frame your shot properly and capture the desired composition.
If you need to change the height or angle of the camera while shooting, do so carefully to avoid any sudden movements that may affect the stability of the monopod. Take your time to adjust the settings and position of the camera to achieve the best results.
Adjusting the Height of Your Monopod
Adjusting the height of your monopod is essential to ensure stability and comfort while using your digital camera. Follow these steps to properly adjust the height:
1. Unlock the Leg Sections
Most monopods have multiple leg sections that can be adjusted independently. To adjust the height, unlock the leg sections by twisting the locking mechanism or releasing the clips.
2. Extend or Retract the Legs
Once the leg sections are unlocked, extend or retract them to reach the desired height. Make sure to extend each leg section evenly to maintain stability.
By adjusting the height of your monopod, you can capture steady and clear photos with your digital camera.
Tips for Using a Monopod Outdoors
When using a monopod outdoors, there are a few tips to keep in mind to ensure you get the best results:
1. Choose the Right Height
Adjust the monopod to the right height for your shooting needs. This will help you stabilize your camera and capture steady shots.
2. Use a Remote Shutter Release
Using a remote shutter release or a timer can help reduce camera shake when taking photos with a monopod. This will result in sharper images.
Remember to practice with your monopod before heading out to ensure you are comfortable using it in different outdoor settings.
Common Mistakes to Avoid When Using a Monopod
Using a monopod can greatly improve the stability of your shots, but there are some common mistakes that can hinder your results. Here are a few things to avoid:
1. Not Adjusting the Monopod Height Properly
One common mistake is not adjusting the height of the monopod to suit your shooting position. Make sure to extend or retract the monopod to the appropriate height to ensure stability and comfort.
2. Holding the Monopod Incorrectly
Another mistake is holding the monopod incorrectly. Make sure to grip the monopod firmly and keep it steady to prevent camera shake. Avoid using a loose grip or letting the monopod wobble during shooting.
By avoiding these common mistakes, you can make the most out of your monopod and capture better photos and videos with your digital camera.
FAQ
What is a monopod and how does it differ from a tripod?
A monopod is a single-legged camera support device that helps stabilize the camera during photography. It differs from a tripod, which has three legs, in that it offers less stability but is more portable and easier to carry around.
How do I attach my digital camera to a monopod?
To attach your digital camera to a monopod, you will need a camera mount or adapter that screws onto the monopod’s mounting plate. Once attached, simply secure your camera onto the mount and make sure it is tightly fastened before use.
What are the benefits of using a monopod for digital photography?
Using a monopod for digital photography offers several benefits, including improved stability and reduced camera shake, especially when shooting in low light conditions or with a telephoto lens. Additionally, monopods are more portable than tripods, making them ideal for shooting on the go.
Can I use a monopod for video recording with my digital camera?
Yes, you can use a monopod for video recording with your digital camera. A monopod can help stabilize your camera during video recording, resulting in smoother and more professional-looking footage. Just make sure to choose a monopod with a fluid head for better control and panning.