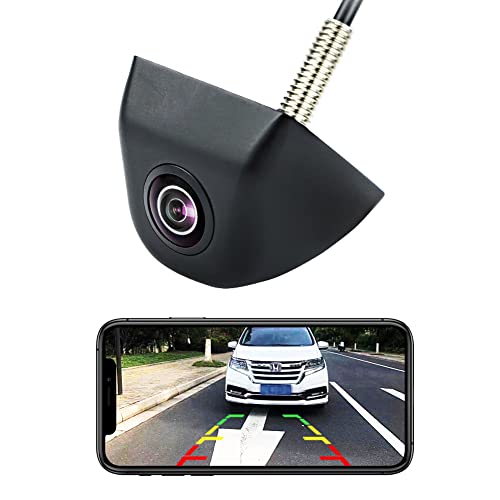
Digital ID view cameras are essential tools for capturing high-quality images in various settings. Whether you are a professional photographer or an amateur enthusiast, knowing how to handle and remove the camera properly is crucial to ensure its longevity and performance. In this guide, we will walk you through the steps to safely take off a digital ID view camera.
First and foremost, it is important to power off the camera before attempting to remove it. This will prevent any accidental damage or data loss. Once the camera is turned off, carefully disconnect any cables or attachments that may be connected to it. Be gentle and avoid pulling on the cables forcefully to prevent any damage to the camera or its components.

Next, locate the release mechanism or button that is designed to unlock the camera from its mount. This may vary depending on the model of the camera, so refer to the user manual if you are unsure. Press the release button or switch and gently lift the camera off its mount. Make sure to support the camera with your other hand to prevent it from falling or sustaining any impact.
Step-by-step guide to removing a digital ID view camera
Removing a digital ID view camera may seem daunting, but with the right steps, it can be done efficiently and safely. Follow these simple steps to take off your digital ID view camera:
- Turn off the power to the camera to avoid any electrical hazards.
- Locate the mounting bracket or screws that are holding the camera in place.
- Use the appropriate tools to unscrew and remove the mounting bracket or screws.
- Gently disconnect any cables connected to the camera.
- Carefully lift the camera off the mounting bracket or surface where it was installed.
- Store the camera in a safe place or pack it securely if you plan to transport it.
By following these steps, you can safely remove your digital ID view camera without causing any damage to the camera or the mounting surface.
Preparation for camera removal
Before removing a digital ID view camera, it is essential to follow some preparation steps to ensure a smooth and safe process.
1. Shut down the camera system
Make sure to power off the camera system and disconnect any cables connected to it. This will prevent any potential damage to the camera or the system during the removal process.
2. Gather necessary tools
Prepare the tools required for removing the camera, such as a screwdriver or any specific tools recommended by the camera manufacturer. Having the right tools will make the removal process easier and prevent any damage to the camera.
Disconnecting cables and power source
Before attempting to remove a digital ID view camera, it is essential to disconnect all cables and power sources to ensure safety and prevent damage to the equipment.
Steps to disconnect cables and power source:
- Turn off the camera and unplug the power adapter from the electrical outlet.
- Disconnect any Ethernet or USB cables connected to the camera.
- If there are any additional cables attached, carefully unplug them from the camera.
- Ensure that all connections are securely disconnected before proceeding with the removal process.
Removing the camera mounting bracket
1. Locate the screws that secure the camera mounting bracket to the surface.
2. Use a screwdriver to carefully loosen and remove the screws from the bracket.
3. Once the screws are removed, gently lift the camera mounting bracket off the surface.
4. Ensure that the camera is securely detached from the bracket before proceeding with any further steps.
5. Store the mounting bracket and screws in a safe place for future use or disposal.
Detaching the camera from the bracket
To take off a digital ID view camera from its bracket, follow these steps:
1. Locate the locking mechanism on the bracket that secures the camera in place.
2. Press the release button or unlock the lever to disengage the camera from the bracket.
3. Carefully lift the camera off the bracket, ensuring not to damage any cables or connectors.
4. Store the camera in a safe place when not in use to protect it from damage.
Securing loose cables and components
When taking off a digital ID view camera, it is important to secure any loose cables and components to prevent damage during the removal process.
Here are some steps to follow:
1. Bundle and tie cables:
Start by bundling any loose cables together using cable ties or Velcro straps. This will help keep the cables organized and prevent them from getting tangled or caught during removal.
2. Secure components:
Make sure all components, such as lenses and mounting brackets, are securely fastened to the camera body. Check for any loose screws or attachments and tighten them as needed to prevent them from coming loose during removal.
| Tip: | Labeling cables and components with tape or markers can help identify them for reinstallation. |
Cleaning the installation area
Before taking off a digital id view camera, it is important to clean the installation area to ensure a smooth removal process. Start by removing any dirt or debris from around the camera using a soft, dry cloth. Make sure to clean the area thoroughly to avoid any damage to the camera or surrounding surfaces.
If the camera is mounted on a surface, carefully remove any screws or brackets holding it in place. Use a screwdriver or appropriate tool to loosen the fasteners without damaging the camera or the mounting surface. Once the camera is free from its mounting, gently lift it off the installation area, taking care not to snag any cables or wires.
After the camera has been removed, clean the installation area again to remove any remaining residue or marks. This will ensure that the area is ready for a new camera or any other installation. Proper cleaning of the installation area will help maintain the integrity of the surface and ensure a professional finish.
Proper disposal or storage of the camera
When it comes to disposing of or storing a digital ID view camera, it’s important to follow these guidelines to ensure proper handling and prevent any damage:
1. Disposal:
- Before disposing of the camera, make sure to remove any batteries or memory cards.
- Check with your local electronic waste disposal facility to properly recycle the camera.
- Do not dispose of the camera in regular household waste as it may contain hazardous materials.
2. Storage:
- If you plan to store the camera for an extended period, remove the batteries to prevent corrosion.
- Store the camera in a cool, dry place away from direct sunlight to prevent damage to the lens or sensor.
- Consider using a protective case or bag to keep the camera safe from dust and scratches.
FAQ
How do I remove a digital ID view camera from its mounting bracket?
To remove a digital ID view camera from its mounting bracket, first, locate the screw or lever that is holding the camera in place. Depending on the model, you may need to use a screwdriver or simply push a lever to release the camera. Once the camera is free from the bracket, gently pull it out and disconnect any cables attached to it.
What should I do if my digital ID view camera is stuck in its mounting bracket?
If your digital ID view camera is stuck in its mounting bracket, try gently wiggling the camera to see if it loosens. If that doesn’t work, check if there are any screws or levers holding the camera in place and try to release them. If all else fails, you may need to consult the camera’s manual or contact customer support for assistance.
Can I reuse the mounting bracket after removing a digital ID view camera?
Yes, you can reuse the mounting bracket after removing a digital ID view camera. Simply make sure that the bracket is still securely attached to the wall or surface and that it is in good condition. Once the camera is removed, you can either install a new camera in the bracket or leave it empty until you need to use it again.
Do I need any special tools to take off a digital ID view camera?
Removing a digital ID view camera typically does not require any special tools. In most cases, a screwdriver or a simple lever is all you need to release the camera from its mounting bracket. However, it’s always a good idea to consult the camera’s manual or contact customer support if you are unsure about the removal process.