


Capturing the beauty of the night sky can be a rewarding and awe-inspiring experience. With the advancement of digital camera technology, it is now more accessible than ever to take stunning photos of the stars, planets, and galaxies.
However, shooting the night sky requires some specialized knowledge and techniques to ensure your photos turn out clear and vibrant. In this article, we will guide you through the essential steps to help you master the art of night sky photography with your digital camera.

Mastering Night Sky Photography: A Comprehensive Guide
Photographing the night sky can be a challenging yet rewarding experience for any photographer. Capturing the beauty of the stars, galaxies, and celestial objects requires a combination of technical skill and artistic vision. With the right equipment and techniques, you can create stunning images that showcase the wonder of the universe.
Choosing the Right Equipment
When photographing the night sky, having the right equipment is crucial. You will need a digital camera with manual settings, a sturdy tripod to keep your camera steady, and a wide-angle lens with a fast aperture to capture as much light as possible. Additionally, consider investing in a remote shutter release to minimize camera shake and a headlamp or flashlight for navigating in the dark.
Before heading out to photograph the night sky, make sure to familiarize yourself with your camera’s settings and experiment with different exposure times and ISO settings. By adjusting these parameters, you can capture the stars in all their glory and create stunning images that will leave viewers in awe of the beauty of the cosmos.
Choosing the Right Camera for Night Sky Photography
When it comes to photographing the night sky, having the right camera is essential to capture stunning images of the stars, planets, and galaxies. Here are some key factors to consider when choosing a camera for night sky photography:
1. Low Light Performance
A camera with good low light performance is crucial for capturing clear and detailed images of the night sky. Look for a camera with a large sensor size and high ISO capabilities to minimize noise and produce sharp images in low-light conditions.
2. Manual Settings
Having manual settings on your camera allows you to have full control over exposure, shutter speed, and aperture, which are essential for capturing the beauty of the night sky. Make sure your camera has manual modes to adjust settings according to the lighting conditions.
Understanding Camera Settings for Astrophotography
When capturing the night sky with a digital camera, it is crucial to understand the camera settings that will help you achieve stunning astrophotography results. Here are some key settings to consider:
- ISO: Set a high ISO (usually between 800-3200) to capture more light in low-light conditions without introducing too much noise.
- Aperture: Use a wide aperture (low f-stop number) to gather more light and create a shallow depth of field for sharp stars.
- Shutter Speed: Experiment with long exposure times (15-30 seconds) to capture the movement of the stars and avoid star trails.
- White Balance: Adjust the white balance to a cooler setting (around 4000-5000K) to enhance the blue tones in the night sky.
- Focusing: Switch to manual focus and set the focus to infinity to ensure sharp and clear starry images.
By mastering these camera settings, you can create breathtaking astrophotography images that showcase the beauty of the night sky.
Essential Equipment for Capturing the Night Sky
1. DSLR Camera: A digital single-lens reflex (DSLR) camera with manual settings is essential for capturing the night sky. Look for a camera with good low-light performance and the ability to adjust settings such as aperture, shutter speed, and ISO.
2. Sturdy Tripod: To capture sharp images of the night sky, a sturdy tripod is a must. This will help eliminate camera shake and ensure your photos are clear and focused.
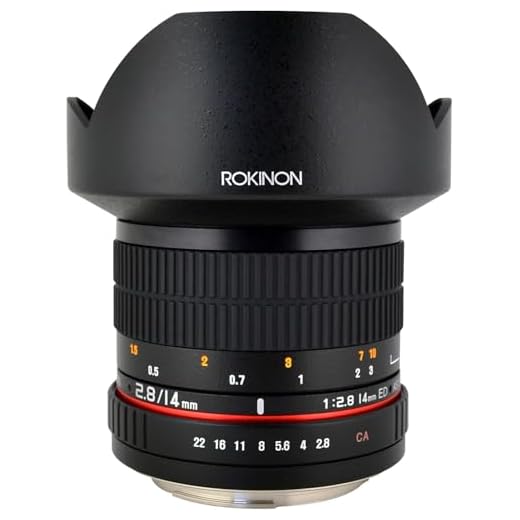
3. Wide-Angle Lens: A wide-angle lens with a fast aperture (f/2.8 or lower) is ideal for capturing the vast expanse of the night sky. This type of lens allows more light to enter the camera, making it easier to capture stars and other celestial objects.
4. Remote Shutter Release: Using a remote shutter release or timer will help reduce camera shake when capturing long exposure shots of the night sky. This accessory allows you to trigger the camera without touching it, resulting in sharper images.
5. Red Light Headlamp: When photographing the night sky, a red light headlamp is essential for maintaining your night vision. This will help you navigate in the dark without disrupting your ability to see the stars and capture stunning photos.
Tips for Finding the Best Location for Night Sky Photography
When it comes to capturing stunning night sky photos with your digital camera, choosing the right location is key. Here are some tips to help you find the best spot for your night sky photography adventures:
1. Light Pollution
Look for a location with minimal light pollution to ensure clear and vibrant night sky photos. Avoid areas with bright city lights or street lamps that can wash out the stars.

2. Scenic Background
Find a location with a scenic background that complements the night sky. Consider capturing the stars above a picturesque landscape or iconic landmark for added visual interest in your photos.
By scouting out the perfect location for your night sky photography, you can enhance the beauty of your images and create captivating photos that showcase the wonders of the night sky.
Mastering Long Exposure Techniques for Astrophotography
Long exposure photography is essential for capturing stunning images of the night sky with a digital camera. By using this technique, you can capture the beauty of the stars and galaxies in ways that are not possible with shorter exposures. Here are some tips to help you master long exposure techniques for astrophotography:
1. Use a Sturdy Tripod
When shooting long exposure photos of the night sky, it is crucial to use a sturdy tripod to keep your camera stable. This will help prevent any camera shake and ensure sharp images.

2. Set a Low ISO
For astrophotography, it is best to set your camera’s ISO to a low value (usually between 100-400) to reduce noise in your images. This will help you capture clearer and more detailed photos of the night sky.
- Keep your camera’s ISO low to reduce noise in your images.
- Experiment with different ISO settings to find the best balance between noise reduction and image quality.
By following these tips and practicing your long exposure techniques, you can improve your astrophotography skills and capture breathtaking images of the night sky.
Post-Processing Tips for Enhancing Night Sky Photos
Once you’ve captured your photos of the night sky with your digital camera, it’s time to enhance them through post-processing. Here are some tips to help you make your night sky photos even more stunning:
| 1. Adjust the Exposure: | Use software like Adobe Lightroom or Photoshop to adjust the exposure of your photos. You can bring out the details in the stars and the Milky Way by tweaking the exposure settings. |
| 2. Reduce Noise: | Noise can be a common issue in night sky photos. Use noise reduction tools in your editing software to reduce noise and make your photos clearer. |
| 3. Enhance Colors: | Boost the colors in your night sky photos to make them more vibrant. Adjust the saturation and vibrance levels to make the stars and the Milky Way stand out. |
| 4. Sharpen Details: | Sharpening the details in your photos can make the stars and the night sky appear crisper. Use the sharpening tools in your editing software to enhance the details. |
| 5. Crop and Straighten: | Cropping your photos can help remove any distractions and focus on the main elements of the night sky. Straighten the horizon line to make your photos more visually appealing. |
Common Mistakes to Avoid in Night Sky Photography
1. Not using a tripod: One of the most common mistakes in night sky photography is not using a tripod. A stable base is essential for long exposure shots to avoid blurriness.
2. Overexposing the image: Overexposure can wash out the details of the night sky. Make sure to adjust your camera settings to avoid this mistake.
3. Using high ISO settings: While it may seem like a good idea to increase the ISO settings to capture more light, it can result in noisy and grainy images. Opt for lower ISO settings and longer exposure times instead.
4. Ignoring the focus: Achieving sharp focus is crucial in night sky photography. Make sure to set your focus manually on a bright star or use the infinity focus setting.
5. Light pollution: Avoid shooting in areas with high light pollution as it can affect the quality of your night sky photos. Choose locations with minimal light pollution for better results.
6. Not planning ahead: Planning your night sky photography session in advance can help you capture the best shots. Check the weather forecast, moon phase, and location to ensure optimal conditions.
Inspiring Night Sky Photography Ideas and Projects
When capturing the beauty of the night sky, there are endless possibilities for creative and inspiring photography projects. Here are some ideas to spark your imagination:
| 1. Star Trails: | Use a long exposure to capture the movement of stars across the sky, creating mesmerizing trails. |
| 2. Milky Way Panorama: | Stitch together multiple photos of the Milky Way to create a stunning panoramic view of the galaxy. |
| 3. Light Painting: | Add creative light sources to your night sky photos by painting with flashlights or LED lights. |
| 4. Moonlit Landscapes: | Capture the beauty of a landscape illuminated by the moon for a unique nighttime photo. |
| 5. Silhouettes: | Use the night sky as a backdrop to create striking silhouettes of trees, buildings, or people. |
Experiment with different techniques and settings to create your own unique night sky photography projects. Let your creativity and passion for astrophotography shine through in every photo you take!
FAQ
What equipment do I need to photograph the night sky with a digital camera?
To photograph the night sky with a digital camera, you will need a camera that allows manual control of settings such as aperture, shutter speed, and ISO. A tripod is essential to keep your camera steady during long exposures. A wide-angle lens with a large aperture is recommended to capture more of the night sky and allow more light into the camera. Additionally, a remote shutter release or timer can help minimize camera shake during long exposures.
What settings should I use on my digital camera for night sky photography?
For night sky photography, set your camera to manual mode and select a wide aperture (such as f/2.8 or wider) to let in more light. Use a high ISO (such as 1600 or higher) to capture the faint light of the stars. Experiment with different shutter speeds, but generally, start with a 15-30 second exposure to avoid star trails. Adjust your white balance to a cooler setting to enhance the night sky’s colors. Finally, focus your lens to infinity for sharp star images.