


Passport photos are a necessary requirement for various official documents, including passports, visas, and identity cards. Traditionally, people would visit a professional photographer to have their passport photo taken. However, with the advent of digital cameras, it is now possible to take your passport photo at home. This can save time and money, as well as give you more control over the final result.
In this article, we will guide you through the process of making a passport photo with a digital camera. We will provide you with tips and tricks to ensure that your photo meets all the necessary requirements, such as size, background, and lighting. By following these steps, you can create a professional-looking passport photo from the comfort of your own home.

Step-by-Step Guide: How to Take a Passport Photo
Step 1: Find a plain white or off-white background to stand against. Make sure there are no shadows or patterns behind you.
Step 2: Set up your digital camera on a tripod or a stable surface. Ensure the camera is at eye level and facing you directly.
Step 3: Adjust the camera settings to the recommended passport photo specifications: a resolution of 600 x 600 pixels, a white balance setting, and a neutral color profile.
Step 4: Position yourself in the frame with your face centered and looking straight at the camera. Keep a neutral expression and ensure your eyes are open.
Step 5: Take multiple photos to ensure you have options to choose from. Make any necessary adjustments to the lighting and positioning as needed.
Step 6: Transfer the photos to your computer and use photo editing software to crop and resize the image to meet the passport photo requirements.
Step 7: Print the photo on high-quality photo paper at the correct size (usually 2 x 2 inches) with a white background.
Step 8: Review the printed photo to ensure it meets all the passport photo guidelines, including size, composition, and quality.
Step 9: Submit the printed passport photo with your passport application or renewal form, following the specific instructions provided by your country’s passport office.
Prepare Your Digital Camera for the Shoot
Before you start taking photos for your passport, make sure your digital camera is set up correctly. Follow these steps to ensure the best results:
- Check the battery level and make sure it’s fully charged to avoid running out of power during the shoot.
- Set your camera to the highest resolution possible to ensure clear and high-quality photos.
- Adjust the white balance setting to avoid any color casts in your photos.
- Use a tripod or stable surface to prevent camera shake and ensure sharp images.
Set Up the Right Lighting for Your Passport Photo
When taking a passport photo with a digital camera, lighting is crucial. Here are some tips to ensure you have the right lighting:
- Use natural light if possible, as it provides the most flattering and even illumination.
- Avoid direct sunlight, as it can create harsh shadows on your face. Opt for indirect natural light instead.
- If shooting indoors, position yourself near a window to take advantage of natural light.
- If natural light is not available, use soft, diffused artificial light to illuminate your face evenly.
- Avoid using the camera’s built-in flash, as it can create unflattering reflections on your face.
Choose the Best Background for Your Passport Photo
When taking a passport photo with a digital camera, choosing the right background is crucial to ensure your photo meets the requirements. Here are some tips to help you select the best background:
1. Use a Plain White or Off-White Background
For most passport photos, a plain white or off-white background is recommended. This helps create a clear contrast between your face and the background, making it easier for the photo to be processed.
2. Avoid Patterns or Textured Backgrounds
Avoid using backgrounds with patterns or textures, as they can interfere with the facial recognition software used in passport processing. Stick to a simple, solid-colored background to ensure your photo meets the necessary standards.
| Background | Recommendation |
| Plain White | Highly recommended for most passport photos |
| Off-White | Acceptable alternative to plain white |
| Patterns/Textures | Avoid using for passport photos |
Position Yourself Correctly in Front of the Camera
When taking a passport photo with a digital camera, it’s crucial to position yourself correctly in front of the camera to ensure a clear and accurate image. Follow these steps to get the right position:
- Stand in front of a plain, light-colored background: Choose a well-lit area with a light-colored wall or backdrop to minimize distractions in the photo.
- Face the camera directly: Position yourself so that your face is directly facing the camera without tilting your head up or down.
- Stay centered in the frame: Make sure your face is centered in the frame of the camera to avoid any cropping or distortion in the final image.
- Keep your shoulders straight: Stand with your shoulders relaxed and straight to maintain a natural posture in the photo.
- Look straight at the camera: Focus your gaze directly at the camera lens and avoid any tilting or turning of your head.
By following these positioning tips, you can capture a professional-looking passport photo with your digital camera.
Adjust the Camera Settings for the Perfect Shot
Before taking your passport photo with a digital camera, it’s important to adjust the camera settings to ensure the best results. Here are some tips to help you get the perfect shot:
- Resolution: Set your camera to the highest resolution possible to ensure clear and detailed photos.
- White Balance: Adjust the white balance settings to match the lighting conditions to avoid color casts in your photo.
- Exposure: Ensure the exposure is set correctly to avoid underexposed or overexposed photos. Use the camera’s exposure compensation feature if needed.
- Focusing: Make sure the camera is focused correctly on your face to capture sharp and clear details.
- Composition: Position yourself in the frame according to the passport photo guidelines, with a neutral expression and facing the camera directly.
By adjusting these settings, you can improve the quality of your passport photo and ensure it meets the necessary requirements.
Take Multiple Shots to Ensure You Have Options
When taking passport photos with a digital camera, it’s important to take multiple shots to ensure you have options. This way, you can choose the best photo that meets all the required specifications.
Make sure to take several shots in different lighting conditions, angles, and poses. This will give you a variety of options to choose from, ensuring that you end up with a high-quality passport photo.
Review all the photos you’ve taken and select the one that best represents you and meets the necessary guidelines. It’s always better to have more options than to be stuck with a single photo that doesn’t meet the requirements.
Review and Edit Your Passport Photos on Your Computer
Once you have taken your passport photos with your digital camera, it’s time to review and edit them on your computer to ensure they meet the required specifications.
Transfer the photos from your camera to your computer using a USB cable or a memory card reader. Once the photos are on your computer, open them in a photo editing software such as Adobe Photoshop or GIMP.
Reviewing the Photos
Check the photos for any imperfections such as red-eye, glare, or shadows. Make sure the background is plain and light-colored, and that your face is clearly visible without any obstructions.
Editing the Photos
Use the editing tools in the software to crop the photos to the correct size (usually 2×2 inches), adjust the brightness and contrast, and remove any imperfections. Make sure to save the edited photos in the required file format (usually JPEG) and resolution.
Print Your Passport Photos According to Official Guidelines
Once you have taken your passport photo with your digital camera and edited it to meet the specifications, it’s time to print it out. Make sure you follow the official guidelines for printing passport photos to ensure they are accepted.
Here are some tips for printing your passport photos:
- Use high-quality photo paper to ensure clarity and durability.
- Print the photos in color on a professional photo printer.
- Ensure the photos are printed at the correct size as per the guidelines (usually 2×2 inches).
- Make sure the background of the photo is plain white or off-white without any shadows or patterns.
- Print the photos with a high resolution to capture all the details and avoid pixelation.
By following these guidelines, you can be confident that your printed passport photos will meet the requirements and be accepted for your passport application.
FAQ
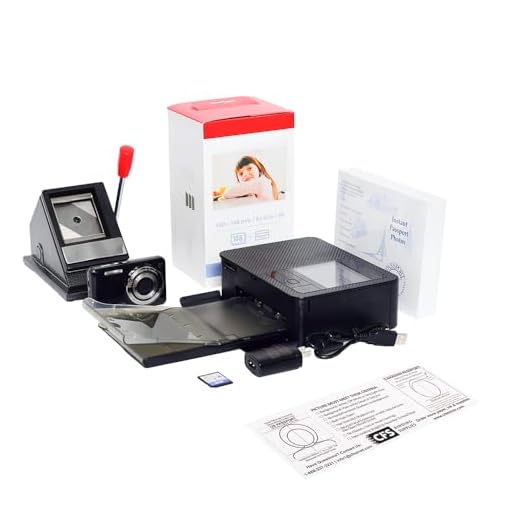
What equipment do I need to make a passport photo with a digital camera?
To make a passport photo with a digital camera, you will need a digital camera with a high resolution, a tripod to keep the camera steady, proper lighting equipment, a white backdrop, and photo editing software to adjust the photo to meet the specific passport photo requirements.
What are the specific requirements for a passport photo?
The specific requirements for a passport photo may vary depending on the country you are applying to. Generally, the photo should be in color, have a plain white or off-white background, be printed on high-quality photo paper, have a specific size (usually 2 x 2 inches or 35 x 45 mm), show a full face and be taken in front of a neutral background with no shadows.

Can I take my own passport photo at home with a digital camera?
Yes, you can take your own passport photo at home with a digital camera as long as you ensure that it meets the specific requirements set by the passport issuing authority. Make sure to follow guidelines for lighting, background, facial expression, and head size to ensure your photo is accepted.
How do I ensure my passport photo is of high quality when taken with a digital camera?
To ensure your passport photo is of high quality when taken with a digital camera, make sure to use a camera with a high resolution, proper lighting to avoid shadows, a plain white or off-white background, and adjust the photo using photo editing software to meet the specific requirements for passport photos.
What are some common mistakes to avoid when taking a passport photo with a digital camera?
Some common mistakes to avoid when taking a passport photo with a digital camera include using a low-resolution camera, having shadows in the background, using a non-neutral background, not following the specific size and format requirements, and not having a clear, full-face image with a neutral expression.


