

Have you ever wanted to create your own digital camera from scratch? Building a digital camera can be a rewarding and educational project that allows you to understand the inner workings of digital imaging technology. In this article, we will guide you through the process of making your own digital camera step by step.
From selecting the right image sensor to designing the camera body and assembling the components, we will cover everything you need to know to create a fully functional digital camera. Whether you are a photography enthusiast or a DIY hobbyist, this project will give you a hands-on experience in building a device that captures images digitally.
Step-by-Step Guide to Creating a DIY Digital Camera
Creating your own digital camera from scratch can be a rewarding and educational experience. Follow these steps to make your own DIY digital camera:
Gather Materials
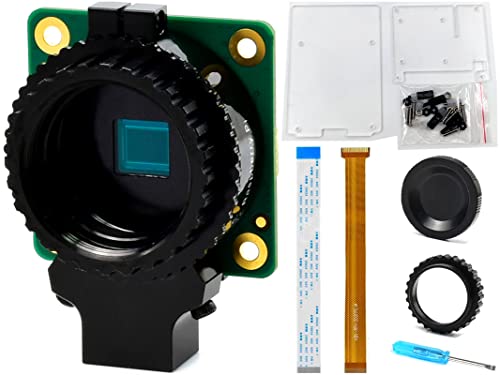
Start by gathering all the necessary materials for building your DIY digital camera. You will need:
| 1. Raspberry Pi | 6. Camera lens |
| 2. Camera sensor module | 7. Battery pack |
| 3. LCD screen | 8. SD card |
| 4. Camera body (can be 3D printed) | 9. Wires and soldering tools |
| 5. Camera buttons and controls | 10. Micro USB cable |
Assemble the Camera
Now, follow these steps to assemble your DIY digital camera:

- Install the camera sensor module onto the Raspberry Pi.
- Connect the LCD screen to the Raspberry Pi.
- Mount the camera lens onto the camera body.
- Attach the camera buttons and controls to the camera body.
- Connect the battery pack to power the camera.
- Insert the SD card into the Raspberry Pi.
- Use wires and soldering tools to make necessary connections.
- Connect the Raspberry Pi to a computer using a Micro USB cable for programming.
Once you have assembled your DIY digital camera, you can program it to capture images and videos, adjust settings, and even add additional features to customize your camera.
Gather Necessary Materials
Before you start building your own digital camera, make sure you have all the necessary materials ready. Here is a list of items you will need:
Materials:
- Image sensor
- Lens
- Camera body
- Microcontroller
- Display screen
- Battery
- Memory card
- Buttons or switches for controls
- Wires and soldering tools
Once you have gathered all these materials, you can proceed to the next steps of assembling your digital camera.
Choose a Camera Body
When building a digital camera from scratch, one of the most important decisions you will need to make is choosing the camera body. The camera body is the frame that houses all the essential components of the camera, such as the image sensor, processor, and memory card slot.
There are various options to consider when selecting a camera body. You can choose to use a pre-made camera body or design and build your own custom body. If you decide to go with a pre-made body, make sure it is compatible with the components you plan to use in your camera.
Considerations when choosing a camera body:
- Size and Shape: The size and shape of the camera body will affect the overall design and usability of your camera.
- Material: Choose a material that is durable and lightweight for the camera body.
Once you have selected the camera body, you can move on to choosing other components such as the image sensor, lens, and display screen to complete your digital camera build.
Select a Lens
One of the most important components of a digital camera is the lens. The lens determines the quality of the images you capture, so selecting the right lens is crucial for achieving the desired results.
Factors to consider when selecting a lens:
- Aperture: The aperture of the lens determines how much light can pass through to the sensor. A wider aperture allows more light in, making it ideal for low-light conditions.
- Focal length: The focal length of the lens determines how much of the scene will be in focus. A shorter focal length is ideal for wide-angle shots, while a longer focal length is better for capturing distant subjects.
When choosing a lens for your DIY digital camera, consider the type of photography you plan to do and the desired outcome. Research different lens options and select one that best fits your needs and budget.
Install the Image Sensor
Once you have chosen the image sensor for your digital camera, it’s time to install it. Follow the steps below to properly install the image sensor:
| Step 1: | Prepare the image sensor by checking for any dust or debris on its surface. Use a clean, lint-free cloth to gently wipe the sensor if necessary. |
| Step 2: | Locate the sensor mount on the camera body where the image sensor will be placed. Ensure that the mount is clean and free from any obstructions. |
| Step 3: | Carefully insert the image sensor into the mount, making sure to align it properly with the connectors on the camera body. Be gentle and avoid applying excessive force. |
| Step 4: | Secure the image sensor in place using the appropriate screws or fasteners. Make sure that the sensor is firmly attached to prevent any movement or misalignment. |
| Step 5: | Double-check the connections between the image sensor and the camera body to ensure that they are properly aligned and secure. Test the camera to verify that the sensor is functioning correctly. |
Connect the Circuit Board
Once you have all the necessary components, it’s time to connect the circuit board. Follow these steps:
- Identify the main circuit board and locate the connection points for each component.
- Start by connecting the image sensor to the appropriate input on the circuit board.
- Connect the lens to the image sensor, ensuring a secure connection.
- Attach the LCD screen to the circuit board, making sure it is properly aligned.
- Connect the power source to the circuit board to provide the necessary power.
- Double-check all connections to ensure they are secure and properly aligned.
Once the circuit board is fully connected, you can move on to testing the camera to ensure everything is functioning correctly.
Program the Camera Software
Once you have assembled the hardware components of your digital camera, the next step is to program the camera software. This software will control the camera functions, such as taking pictures, adjusting settings, and storing images.
Start by writing the code that will interface with the camera’s image sensor. This code will capture the image data and process it before storing it on the camera’s memory.
Next, develop the user interface for the camera software. This interface will allow users to interact with the camera, change settings, view images, and perform other functions.
Finally, test the camera software thoroughly to ensure that it functions correctly and reliably. Debug any issues that arise and make any necessary adjustments to the code.
Assemble the Camera Components
Once you have all the necessary components ready, it’s time to start assembling your digital camera. Follow these steps to put everything together:
Step 1: Mount the image sensor
Carefully place the image sensor in the designated slot on the camera body. Make sure it is securely attached and aligned properly.
Step 2: Connect the lens
Attach the lens to the camera body by aligning the lens mount with the camera mount. Twist the lens gently until it locks into place.
Continue to follow the manufacturer’s instructions to complete the assembly process. Be gentle and precise to ensure all components are properly connected and functioning.
Test the Camera Functionality
Before finalizing your DIY digital camera, it’s crucial to test its functionality to ensure it’s working properly. Here are some steps you can follow to test your camera:
1. Insert a memory card into the camera and turn it on.
2. Check if the camera’s display screen turns on and displays the camera settings.
3. Press the shutter button to see if the camera captures images and saves them to the memory card.
4. Test different camera modes, such as auto mode, manual mode, and scene modes, to ensure they work correctly.
5. Take a few test shots in various lighting conditions to evaluate the camera’s image quality and exposure settings.
6. Connect the camera to a computer using a USB cable to transfer images and check if the camera is recognized by the computer.
By following these steps, you can ensure that your DIY digital camera is fully functional and ready to capture stunning images.
Customize Your Camera Design
Once you have assembled the basic components of your digital camera, you can start customizing the design to make it unique and personal. Here are some ideas to help you get started:
| 1. Custom Enclosure: | Consider 3D printing a custom enclosure for your camera to give it a unique look and feel. |
| 2. Button Layout: | Adjust the placement and design of the buttons on your camera to make it more intuitive and convenient to use. |
| 3. Color Scheme: | Choose a color scheme that reflects your personal style and preferences. You can paint or decorate the camera body accordingly. |
| 4. Accessories: | Add accessories such as straps, grips, or lenses to enhance the functionality and aesthetics of your camera. |
| 5. Custom Firmware: | If you have programming skills, you can customize the camera’s firmware to add new features or functionalities. |
FAQ
What are the basic components needed to make a digital camera from scratch?
To make a digital camera from scratch, you will need a sensor, a lens, a processor, a display, a power source, and a housing to hold everything together. These components work together to capture, process, and display images.
Is it difficult to make a digital camera from scratch?
Making a digital camera from scratch can be a challenging project, especially if you are not familiar with electronics and optics. It requires knowledge of sensors, processors, lenses, and programming. However, with dedication and research, it is possible to build a basic digital camera from scratch.
Can I customize the features of a digital camera I make from scratch?
Yes, one of the advantages of building a digital camera from scratch is that you can customize the features according to your preferences. You can choose different sensors, lenses, processors, and displays to create a camera that suits your specific needs and style.
What are the benefits of making a digital camera from scratch?
Making a digital camera from scratch allows you to learn about the inner workings of cameras, gain valuable engineering skills, and create a camera that is tailored to your unique requirements. It can be a rewarding and educational experience that gives you a deeper understanding of photography and technology.


