


Are you looking to set up a jam digital camera in your home or office? With the advancements in technology, installing a digital camera has become easier than ever. In this guide, we will walk you through the step-by-step process of installing a jam digital camera to enhance your security and surveillance system.
Before you begin the installation process, it is important to gather all the necessary equipment and tools required for the job. Make sure you have the camera, power adapter, mounting screws, and a screwdriver handy. Once you have everything ready, you can proceed with the installation.
Follow the instructions carefully and ensure that the camera is positioned correctly to capture the desired area. Proper installation of the camera will ensure optimal performance and coverage. Let’s get started on setting up your jam digital camera!
Step-by-Step Guide to Installing a Jam Digital Camera
Installing a Jam digital camera can be a straightforward process if you follow these steps:
Step 1: Unbox the camera and check if all the components are included.
Step 2: Insert the batteries into the camera and turn it on to check if it functions properly.
Step 3: Connect the camera to your computer using the provided USB cable.
Step 4: Install the camera’s software on your computer by following the instructions in the user manual.
Step 5: Once the software is installed, you can transfer photos from the camera to your computer and manage them using the software.
Step 6: Test the camera by taking a few photos to ensure everything is working correctly.
Step 7: You’re all set! Enjoy using your Jam digital camera to capture your favorite moments.
Gather Necessary Tools and Equipment
Before you start the installation process of a jam digital camera, it is important to gather all the necessary tools and equipment. Make sure you have the following items on hand:
| 1. Jam digital camera |
| 2. Mounting bracket |
| 3. Power adapter |
| 4. Ethernet cable (if applicable) |
| 5. Screwdriver |
Having all the required tools and equipment ready will make the installation process smoother and more efficient.
Prepare the Installation Area
Before installing your jam digital camera, it’s important to prepare the area where you will be mounting it. Follow these steps to ensure a smooth installation process:
1. Choose a Suitable Location
Find a location for your camera that provides a clear view of the area you want to monitor. Make sure the camera is positioned at the right angle and height to capture the desired footage.
2. Check for Power Source
Ensure that there is a power source nearby where you plan to install the camera. If the camera requires a power outlet, make sure it is within reach and that the cord is long enough to reach the outlet.
Mount the Camera Bracket
Once you have chosen the location for your digital camera, you will need to mount the camera bracket securely. Use the provided screws and a screwdriver to attach the bracket to the desired surface. Make sure the bracket is level and stable to ensure the camera will be securely mounted.
After the bracket is securely in place, attach the digital camera to the bracket using the screw provided. Make sure the camera is facing the desired direction and is securely attached to the bracket.
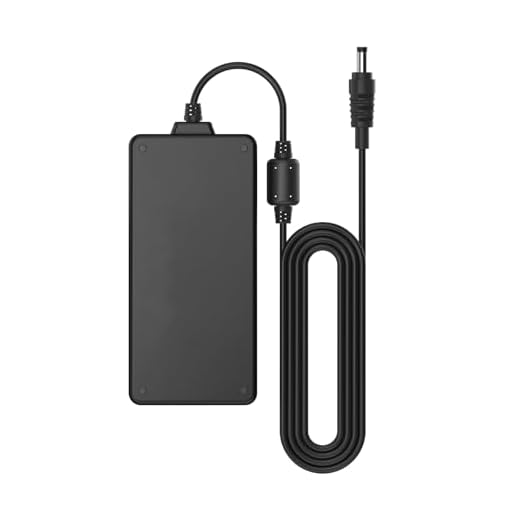
Connect Power Supply
Before installing your jam digital camera, make sure to connect the power supply properly. Follow these steps:
| 1. | Locate the power adapter that came with your camera. |
| 2. | Plug the power adapter into a nearby power outlet. |
| 3. | Connect the other end of the power adapter to the camera’s power input port. |
| 4. | Ensure that the power connection is secure. |
Once the power supply is connected, you can proceed with the installation of your jam digital camera.
Configure Camera Settings
After installing your jam digital camera, it’s important to configure the camera settings to ensure optimal performance. Follow these steps to set up your camera:
1. Access Camera Menu
Turn on your camera and navigate to the settings menu. This can usually be accessed by pressing the menu button on the camera.
2. Adjust Settings
Once in the settings menu, you can adjust various camera settings such as resolution, white balance, exposure, and shooting mode. Experiment with different settings to find the configuration that best suits your needs.
Test the Camera
After installing the jam digital camera, it is important to test it to ensure that it is working properly. Follow these steps to test the camera:
- Turn on the camera by pressing the power button.
- Check the display screen to see if it lights up and shows the camera settings.
- Point the camera at a subject and press the shutter button to take a test photo.
- Review the test photo on the camera’s display screen to check the quality and clarity of the image.
- Zoom in and out using the camera’s zoom function to test the camera’s zoom capabilities.
- Connect the camera to a computer using a USB cable to transfer the test photo and ensure that the camera is recognized by the computer.
Additional Tips:
- Ensure that the camera’s battery is fully charged before testing.
- Adjust the camera settings to your preference and test different modes (e.g., portrait, landscape) to check the camera’s versatility.
Secure Camera Installation
When installing a jam digital camera, it is important to ensure that the camera is securely mounted to prevent tampering or theft. Follow these steps to securely install your camera:
1. Choose a Secure Location
Place the camera in a location that is out of reach and not easily accessible to potential intruders. Consider mounting the camera high up on a wall or ceiling to deter tampering.
2. Use Tamper-Proof Mounting Hardware
Secure the camera using tamper-proof mounting hardware to prevent unauthorized removal. Make sure the mounting hardware is strong and durable to withstand attempts to dislodge the camera.
FAQ
What are the basic steps to install a jam digital camera?
The basic steps to install a jam digital camera include unpacking the camera, installing the batteries, inserting the memory card, connecting the camera to a computer or a power source, setting up the camera settings, and testing the camera to ensure it is functioning correctly.
Is it difficult to install a jam digital camera?
Installing a jam digital camera is not difficult if you follow the instructions provided by the manufacturer. The process usually involves simple steps like unpacking the camera, inserting batteries, and connecting it to a computer or power source. If you encounter any difficulties, you can refer to the user manual or contact customer support for assistance.


