


Passport size photos are a common requirement for various official documents and applications. While many people still opt to visit a professional photographer or a photo booth to get their passport size photos taken, it is also possible to take them at home using a digital camera. This can be a convenient and cost-effective option, especially if you need multiple copies or if you’re in a hurry.
Getting a passport size photo from a digital camera involves following certain guidelines to ensure that the photo meets the required specifications. These specifications typically include specific dimensions, background color, and facial expression. By following these guidelines and using the right tools and techniques, you can easily capture a passport size photo that meets the necessary criteria.

In this article, we will discuss the step-by-step process of taking a passport size photo from a digital camera. We will provide tips on framing the shot, adjusting the lighting, and editing the photo to meet the required specifications. By following these instructions, you can save time and money by taking your own passport size photos at home.
How to Take Passport Size Photo from Digital Camera
If you need a passport size photo and have a digital camera, you can easily take one at home. Here’s a step-by-step guide to help you get the perfect passport size photo:
Step 1: Set Up Your Camera
Make sure your camera is set to the highest resolution possible to ensure a clear and sharp image. Set the camera to portrait mode for better results.
Step 2: Frame Your Shot
Position yourself in front of a plain, light-colored background. Ensure good lighting and stand about 3-4 feet away from the camera. Keep your head straight and facing the camera.
| Requirement | Specification |
| Size | 2×2 inches (51×51 mm) |
| Background | Plain white or off-white |
| Expression | Neutral face with closed mouth |
| Quality | High resolution, clear and sharp |
Follow these guidelines to ensure your passport size photo meets the requirements.
Step-by-Step Guide for Perfect Photos
Step 1: Set your camera to the highest resolution setting for the best quality passport size photo.
Step 2: Choose a plain background with good lighting to ensure a clear and professional-looking photo.
Step 3: Position yourself in front of the camera, facing directly towards it, and ensure your face is well-lit with no shadows.
Step 4: Follow the guidelines for passport photos, including no smiling, neutral expression, and eyes open and visible.
Step 5: Use a tripod or stable surface to prevent any blurriness in the photo.
Step 6: Take multiple shots to ensure you have a variety to choose from, and select the best one for printing.
Step 7: Use photo editing software to crop and resize the image to meet the specific dimensions required for a passport size photo.
Step 8: Print the photo on high-quality photo paper for the best results.
Step 9: Check the printed photo against the guidelines to ensure it meets all the necessary requirements.
Choosing the Right Background and Lighting
When taking a passport size photo with a digital camera, it is important to choose the right background and lighting to ensure a clear and professional-looking image.
Background:
Opt for a plain, light-colored background such as white or light grey to avoid distractions and ensure that your face is the focal point of the photo. Make sure the background is smooth and free of any creases or patterns that could interfere with the clarity of the image.
Lighting:
Good lighting is crucial for a passport size photo. Natural light is ideal, so try to take the photo near a window or outdoors in soft, diffused light. Avoid harsh overhead lighting or direct sunlight, as this can create unflattering shadows on your face. If natural light is not available, use a soft, indirect light source to illuminate your face evenly.
Setting Up Your Camera for Passport Photos
When taking passport photos with a digital camera, it’s important to set up your camera properly to ensure the photos meet the required specifications.
Here are some tips for setting up your camera:
- Choose a plain white or off-white background to ensure contrast with your face.
- Set your camera to the highest resolution possible to capture clear and detailed images.
- Adjust the camera settings to portrait mode to focus on the subject’s face.
- Use natural lighting or a soft, diffused light source to avoid harsh shadows on the face.
- Position the camera at eye level and ensure the subject is facing the camera directly.
- Frame the shot according to passport photo guidelines, with the subject’s face centered and within the required dimensions.
By following these steps and adjusting your camera settings accordingly, you can capture high-quality passport photos using a digital camera.
Posing Tips for Professional-Looking Shots
When taking a passport size photo with your digital camera, it’s essential to pay attention to your pose to ensure a professional-looking result. Here are some posing tips to help you achieve the perfect shot:

| 1. | Stand or sit up straight to maintain good posture. |
| 2. | Face the camera directly with your shoulders squared. |
| 3. | Keep a neutral expression on your face with a relaxed jaw. |
| 4. | Avoid tilting your head or looking away from the camera. |
| 5. | Ensure good lighting on your face to avoid shadows. |
By following these posing tips, you can capture a passport size photo that looks professional and meets the necessary requirements.
Editing and Cropping Your Photos
Once you have taken the passport size photos with your digital camera, you may need to edit and crop them to meet the specific requirements. Here are some steps you can follow:
1. Use photo editing software: Transfer the photos from your camera to your computer and open them in a photo editing software like Photoshop or GIMP. These tools allow you to adjust the size, lighting, and color of your photos.
2. Crop the photos: Use the cropping tool in your editing software to cut out unnecessary parts of the photo and focus on the face. Make sure to follow the guidelines for passport size photos, such as having a clear head and shoulders shot with a plain background.
3. Resize the photos: Adjust the dimensions of the photos to meet the specific requirements for passport size photos. Typically, passport size photos are around 2×2 inches or 35×45 millimeters.
4. Save and print: Once you are satisfied with the edited and cropped photos, save them in the appropriate format (JPEG is commonly used) and print them on photo paper. Make sure to print multiple copies in case you need them for different applications.
Printing Your Passport Size Photos
Once you have taken the perfect passport size photo with your digital camera, the next step is to print it out. Here is a step-by-step guide on how to print your passport size photos:

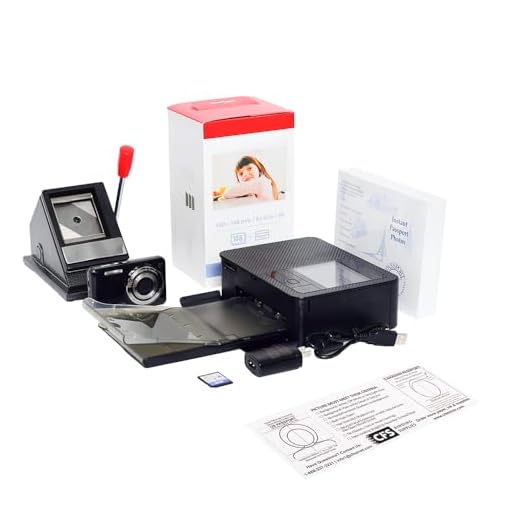
1. Transfer the photo from your digital camera to your computer using a USB cable or memory card reader.
2. Open the photo in a photo editing software like Photoshop or GIMP to adjust the size and crop it to meet the passport size specifications.
3. Save the edited photo in a high resolution format like JPEG or PNG to ensure good quality when printed.
4. Print the photo on a high-quality photo paper using a printer. Make sure to set the correct paper size and print settings to ensure the photo is printed at the right dimensions.
5. Cut out the printed photo along the edges to get the exact passport size photo.
6. Your passport size photo is now ready to be used for your application or any other purpose.
By following these steps, you can easily print your passport size photos from your digital camera at home.
Common Mistakes to Avoid
When trying to get a passport size photo from a digital camera, there are some common mistakes that you should avoid to ensure you get the best results:
1. Using a low-resolution camera
Make sure to use a camera with a high enough resolution to capture clear and detailed images. Using a low-resolution camera can result in blurry or pixelated photos, which may not meet the requirements for a passport size photo.
2. Ignoring the lighting
Proper lighting is crucial when taking a passport size photo. Avoid harsh shadows or bright glares on the face, as this can affect the quality of the photo. Make sure the lighting is even and flattering to ensure a professional-looking result.
Final Tips for Great Passport Photos
When taking passport photos with a digital camera, follow these tips to ensure the best results:
- Use a plain, light-colored background to avoid distractions.
- Ensure good lighting to prevent shadows on your face.
- Position yourself directly facing the camera for a clear, centered image.
- Wear clothing that contrasts with the background for better visibility.
- Avoid excessive makeup or accessories that may obscure your features.
Additional Tips:
- Check the photo requirements of your specific passport application to ensure compliance.
- Take multiple photos to have options and choose the best one.
FAQ
Can I use a digital camera to take passport size photos?
Yes, you can use a digital camera to take passport size photos. Make sure to set the camera to the appropriate resolution and lighting conditions for a clear and high-quality image.
What are the requirements for a passport size photo taken with a digital camera?
The requirements for a passport size photo taken with a digital camera include a plain white or light-colored background, a full-face view with a neutral facial expression, and specific dimensions as per the guidelines provided by the passport issuing authority.
How can I ensure my digital camera captures a perfect passport size photo?
To ensure your digital camera captures a perfect passport size photo, carefully follow the guidelines for background, lighting, and dimensions. Use a tripod for stability, set the camera to the appropriate resolution, and adjust the settings to achieve a sharp and well-exposed image.


