


If you’re a Macbook user looking to transfer photos from your digital camera to your laptop, one of the easiest ways is to insert the camera’s memory stick directly into your Macbook. While this process may seem straightforward, it can be confusing for those who are new to Macbooks or digital cameras. This guide will walk you through the steps to safely and correctly insert a digital camera memory stick into your Macbook.
Step 1: Locate the memory card slot on your Macbook. Depending on the model of your Macbook, the memory card slot may be on the side or front of the laptop. It is usually a small rectangular slot with an icon indicating the type of memory card it accepts.

Step 2: Remove the memory card from your digital camera. Most digital cameras have a slot for a memory card that is typically located near the battery compartment. Carefully remove the memory card from your camera, being sure not to touch the metal contacts on the card.
Step-by-Step Guide: Inserting Memory Stick into MacBook
To insert a memory stick into your MacBook, follow these simple steps:
Step 1: Locate the Memory Card Slot
Locate the memory card slot on your MacBook. It is usually located on the side or back of the laptop, depending on the model.
Step 2: Insert the Memory Stick
Insert the memory stick into the memory card slot with the metal contacts facing down. Make sure to insert it gently and carefully to avoid any damage to the memory stick or the laptop.
| Memory Stick Insertion Tips: |
|---|
| – Do not force the memory stick into the slot. |
| – Make sure the memory stick is inserted in the correct orientation. |
| – If the memory stick does not go in smoothly, double-check the orientation and try again. |
Locate Memory Stick Slot on MacBook
Before inserting the memory stick into your MacBook, you need to locate the memory stick slot. Different models of MacBook may have the memory stick slot in different locations, so it’s essential to know where to find it.
Steps to locate the memory stick slot:
| 1. | Look for a slot on the side of your MacBook. The slot may be located on the left or right side of the device, depending on the model. |
| 2. | Check for any icons or labels near the slot that indicate it is for a memory stick. |
Prepare Memory Stick for Insertion
Before inserting the memory stick into your MacBook, it’s important to ensure that it is properly prepared and ready for use.
1. Check Compatibility
Make sure that the memory stick you are using is compatible with your MacBook. Check the specifications of your MacBook to ensure that the memory stick is the right type and capacity.
2. Backup Data
Before inserting the memory stick, it’s a good idea to back up any important data that is already on it. This will prevent data loss in case of any issues during the insertion process.
Tip: It’s always a good practice to regularly back up your data to prevent loss.
Turn Off MacBook Before Insertion
Before inserting the digital camera memory stick into your MacBook, it is crucial to ensure that your MacBook is turned off. This simple precaution can help prevent any potential issues or data loss during the insertion process.
By turning off your MacBook, you reduce the risk of damaging the memory stick or the MacBook itself. To turn off your MacBook, simply click on the Apple menu in the top-left corner of the screen and select “Shut Down.” Wait for the MacBook to completely power off before proceeding with inserting the memory stick.
Insert Memory Stick into MacBook Slot
To insert a memory stick into your MacBook, follow these steps:
- Locate the memory card slot on your MacBook. It is usually located on the side of the laptop.
- Gently insert the memory stick into the slot, making sure it is oriented correctly. Do not force it in.
- Once the memory stick is fully inserted, you should see a notification on your MacBook indicating that a new device has been detected.
Removing the Memory Stick:
To remove the memory stick, make sure any data transfer or access is complete, then gently push the memory stick in until you hear a click. The MacBook will then eject the memory stick, and you can safely remove it.
Check MacBook for Memory Stick Recognition
After inserting the memory stick into the appropriate slot on your MacBook, check if the system recognizes it. Look for the memory stick icon on your desktop or in the Finder window sidebar. If you don’t see the icon, try restarting your MacBook and reinserting the memory stick.
If the memory stick icon still doesn’t appear, go to the Apple menu > About This Mac > Storage to see if the memory stick is recognized under the External Drives section. If it’s listed there, you may need to manually mount the memory stick by clicking on it.
If your MacBook still doesn’t recognize the memory stick, it could be a compatibility issue or a problem with the memory stick itself. Try using a different memory stick or connecting the current one to another device to troubleshoot the issue.
Safely Eject Memory Stick from MacBook
When you have finished using your memory stick on your MacBook, it’s important to safely eject it to avoid data corruption and potential damage to the device. Follow these steps to safely remove your memory stick:
- Locate the memory stick icon on your desktop or in the Finder window.
- Click on the memory stick icon to select it.
- Right-click on the memory stick icon and select “Eject” from the dropdown menu.
- Wait for the MacBook to finish ejecting the memory stick. You will see a message indicating that it is safe to remove the device.
Alternatively:
If you prefer using the keyboard shortcut, you can press Command + E after selecting the memory stick icon to eject it quickly.
| Note: | Never remove the memory stick while data is being read or written to it, as this can cause data loss or damage to the device. |
FAQ
How do I insert a digital camera memory stick into a MacBook?
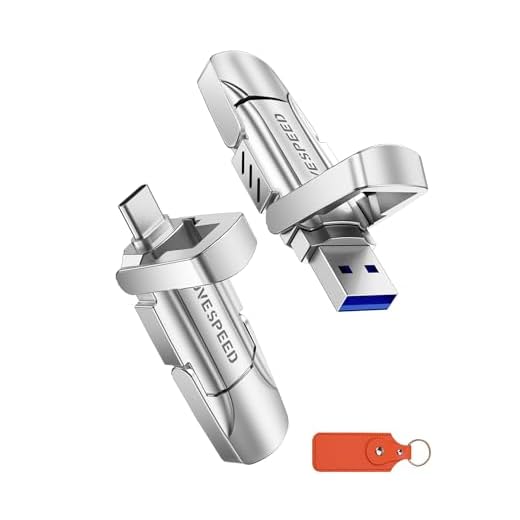
To insert a digital camera memory stick into a MacBook, you will need an external card reader that is compatible with your memory stick. Connect the card reader to your MacBook using a USB port, insert the memory stick into the card reader, and then access the files on the memory stick through your MacBook.
Can I directly insert a digital camera memory stick into a MacBook?
No, you cannot directly insert a digital camera memory stick into a MacBook as MacBooks do not have memory stick slots. You will need to use an external card reader that is compatible with your memory stick to access the files on the memory stick.
What is the easiest way to transfer photos from a digital camera memory stick to a MacBook?
The easiest way to transfer photos from a digital camera memory stick to a MacBook is to use an external card reader. Connect the card reader to your MacBook, insert the memory stick into the card reader, and then you can easily transfer the photos from the memory stick to your MacBook.
Are there any specific steps I need to follow to access a digital camera memory stick on a MacBook?
Yes, to access a digital camera memory stick on a MacBook, you will need to connect an external card reader that is compatible with your memory stick to your MacBook. Insert the memory stick into the card reader, and then you can access the files on the memory stick through your MacBook.
What are the recommended external card readers for connecting a digital camera memory stick to a MacBook?
There are various external card readers available that are compatible with different types of memory sticks. Some popular options include the Anker 8-in-1 USB C Hub with card reader, the Transcend USB 3.0 card reader, and the SanDisk ImageMate Pro card reader. Make sure to choose a card reader that is compatible with your specific memory stick and MacBook model.


