
 Carmen J. Moore

Downloading pictures from your digital camera to your Windows 10 computer is a simple process that allows you to easily transfer and access your photos. Whether you’re a professional photographer or just someone looking to save your memories, it’s important to know how to efficiently transfer your images.
Step 1: Connect your camera to your computer
First, connect your digital camera to your Windows 10 computer using a USB cable. Make sure your camera is turned on and set to the appropriate mode for transferring photos. Your computer should automatically detect the camera and install any necessary drivers.
Step 2: Open the Photos app




Once your camera is connected, open the Photos app on your Windows 10 computer. This app is a built-in tool for managing and viewing your photos. It should automatically recognize your camera and prompt you to import your photos.
Step-by-step guide for transferring photos from digital camera to Windows 10
Transferring photos from your digital camera to a Windows 10 computer is a simple process that can be done in a few steps. Here is a step-by-step guide to help you transfer your photos:
| Step 1: | Connect your digital camera to your Windows 10 computer using a USB cable. Make sure your camera is turned on and set to the appropriate mode for transferring photos. |
| Step 2: | Once connected, your computer should recognize the camera as a removable storage device. A notification may pop up on your screen indicating that a new device has been connected. |
| Step 3: | Open File Explorer on your Windows 10 computer. You should see your digital camera listed as a removable storage device. Click on the camera to open it. |
| Step 4: | Within the camera folder, you should see a folder containing your photos. Select the photos you want to transfer to your computer by clicking and dragging them to a folder on your computer. |
| Step 5: | Once you have transferred the photos, you can disconnect your digital camera from your computer. Safely eject the camera from your computer to ensure no data is lost. |
Following these steps will allow you to easily transfer photos from your digital camera to your Windows 10 computer. You can then view, edit, and share your photos as needed.
Connect your digital camera to the computer
Before you can download pictures from your digital camera to Windows 10, you need to establish a connection between the camera and the computer. Follow these steps:
Step 1: Turn off your digital camera and your computer.
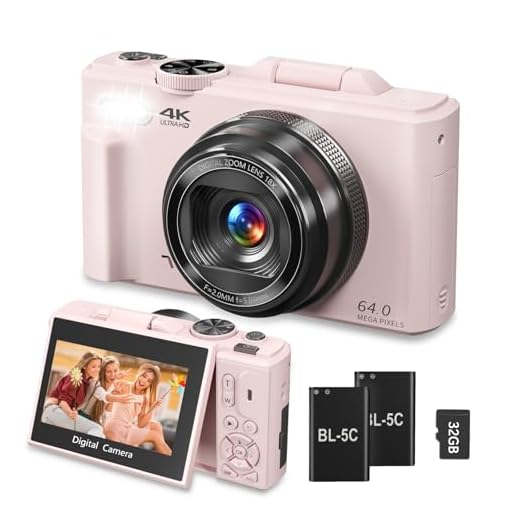
Step 2: Locate the USB cable that came with your camera. It usually has a small USB connector on one end and a larger USB connector on the other end.
Step 3: Connect the smaller end of the USB cable to the port on your digital camera. The port is typically located on the side or back of the camera.
Step 4: Connect the larger end of the USB cable to an available USB port on your computer. Make sure to use a high-quality USB port for a stable connection.
Step 5: Turn on your digital camera. Some cameras may have a specific setting for transferring files, so check your camera’s manual for instructions.
Step 6: Once the camera is connected and turned on, your computer should recognize it as a new device. You may see a notification or pop-up window indicating a new device has been detected.

Step 7: Now you are ready to download pictures from your digital camera to Windows 10 using the built-in photo import feature or third-party software.
Locate the photos on your camera
Before transferring the photos from your digital camera to your Windows 10 computer, you need to locate where the photos are stored on your camera.
1. Turn on your digital camera and connect it to your computer using a USB cable.
2. Access the files on your camera by navigating to the “My Computer” or “This PC” section on your computer.
3. Look for a removable storage device or camera icon that represents your digital camera. Double-click on it to open.

4. Inside the camera storage, search for a folder named “DCIM” (Digital Camera Images) or a similar folder that contains your photos.
5. Open the folder and you will see all the photos and videos stored on your camera.
Once you have located the photos on your camera, you can proceed to transfer them to your Windows 10 computer.
Select the photos you want to transfer
Before transferring photos from your digital camera to your Windows 10 computer, you need to select the photos you want to transfer. Here’s how:
- Turn on your digital camera and connect it to your computer using a USB cable.
- Open File Explorer on your Windows 10 computer.
- Locate your digital camera in the list of connected devices.
- Open the folder containing your photos on your camera.
- Click and drag to select the photos you want to transfer. You can also use keyboard shortcuts like Ctrl + A to select all photos.
Once you have selected the photos you want to transfer, you can proceed with copying them to your Windows 10 computer.

Copy the selected photos to your computer
Once you have selected the photos you want to download, you can easily copy them to your computer using the following steps:
| 1. | Right-click on the selected photos. |
| 2. | Choose the “Copy” option from the context menu. |
| 3. | Navigate to the folder on your computer where you want to save the photos. |
| 4. | Right-click in the folder and select “Paste” to transfer the photos from your camera to your computer. |
Once the photos have been copied, you can access them on your computer and view or edit them as needed.
Use the Windows 10 Photos app to import photos
To import photos from your digital camera to your Windows 10 computer, you can use the built-in Photos app. Here’s how:
- Connect your digital camera to your computer using a USB cable.
- Open the Photos app by searching for it in the Start menu.
- Click on the “Import” button in the Photos app.
- Select your digital camera from the list of devices.
- Choose the photos you want to import and click on the “Import selected” button.
- Wait for the Photos app to transfer the photos from your camera to your computer.
Once the import is complete, you can view and organize your photos in the Photos app or move them to a folder on your computer.
Transfer photos using a USB cable
To transfer photos from your digital camera to Windows 10 using a USB cable, follow these steps:

- Connect your digital camera to your computer using a USB cable.
- Turn on your camera and set it to the appropriate mode (e.g., “transfer” or “PC”).
- Windows 10 should automatically detect your camera and display a prompt asking what action you want to take. Select “Import photos and videos” to begin the transfer process.
- Follow the on-screen instructions to choose the destination folder for your photos and customize any import settings.
- Once the transfer is complete, you can access your photos in the destination folder on your computer.
Remember to safely eject your camera from your computer before disconnecting the USB cable to avoid any data corruption.
Utilize a memory card reader to transfer photos
If your digital camera uses a memory card to store photos, you can easily transfer them to your Windows 10 PC using a memory card reader. Here’s how:
- Remove the memory card from your camera.
- Insert the memory card into the memory card reader.
- Connect the memory card reader to your PC’s USB port.
- Open File Explorer on your Windows 10 PC.
- Locate the memory card reader in the list of drives.
- Double-click to open the memory card and access the photos stored on it.
- Select the photos you want to transfer to your PC.
- Copy the selected photos and paste them into a folder on your PC.
- Once the transfer is complete, safely eject the memory card reader from your PC.
Safely eject your digital camera from the computer
Once you have transferred all the pictures from your digital camera to your Windows 10 computer, it’s important to safely eject the camera to avoid any data loss or damage.
To safely eject your digital camera:
- Locate the digital camera icon in the notification area on the taskbar.
- Click on the icon to open the “Safely Remove Hardware and Eject Media” menu.
- Find your digital camera in the list of devices and click on it.
- Click on the “Eject” button to safely disconnect your camera from the computer.
Why is it important to safely eject your digital camera?
By safely ejecting your digital camera, you ensure that all data transfers are complete and that the camera is properly disconnected from the computer. This helps prevent data corruption and potential damage to your camera or files.

FAQ
How can I transfer photos from my digital camera to Windows 10?
To transfer photos from your digital camera to Windows 10, you can use a USB cable to connect your camera to your computer. Then, open the Photos app on your Windows 10 PC and follow the prompts to import the photos from your camera.
Is it possible to download pictures from a digital camera to Windows 10 without using any special software?
Yes, it is possible to download pictures from a digital camera to Windows 10 without using any special software. You can simply connect your camera to your computer using a USB cable and then access the photos directly through the Windows File Explorer.
What if my digital camera is not recognized by Windows 10 when I connect it?
If your digital camera is not recognized by Windows 10 when you connect it, you may need to install the necessary drivers for your camera. You can usually find these drivers on the manufacturer’s website. Once the drivers are installed, Windows 10 should be able to recognize your camera.
Can I download pictures from a digital camera to Windows 10 wirelessly?
Yes, you can download pictures from a digital camera to Windows 10 wirelessly if your camera supports Wi-Fi connectivity. You can connect your camera and your computer to the same Wi-Fi network and then use the manufacturer’s software or a third-party app to transfer the photos wirelessly.
What are some alternative methods to transfer photos from a digital camera to Windows 10?
In addition to using a USB cable or Wi-Fi connection, you can also use a memory card reader to transfer photos from a digital camera to Windows 10. Simply remove the memory card from your camera, insert it into the card reader, and then connect the card reader to your computer to access the photos.


