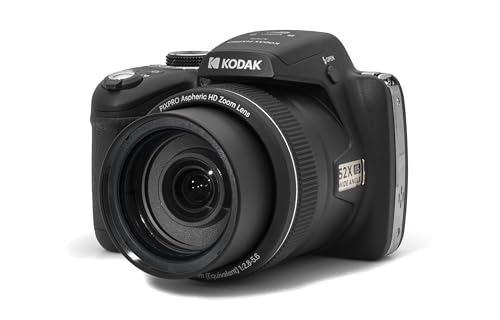
Skype has become a popular platform for video calls, whether for work meetings or keeping in touch with loved ones. If you want to improve the video quality of your Skype calls, you may consider using a digital camera as your webcam. This can provide higher resolution and better image quality compared to most built-in laptop webcams.
Connecting a digital camera to your computer for Skype is not as difficult as it may seem. In this guide, we will walk you through the steps to set up your digital camera as a webcam for Skype calls.

Before you begin, make sure your digital camera has a USB connection or HDMI output that can be connected to your computer. You may also need to install specific drivers for your camera if they are not already included in your computer’s operating system.
Step-by-Step Guide to Connecting Digital Camera to Computer for Skype
Skype allows you to make video calls using your digital camera. Follow these steps to connect your digital camera to your computer for Skype:
Step 1: Check Camera Compatibility
Make sure your digital camera is compatible with your computer and Skype. Check the specifications of your camera and computer to ensure they can work together.
Step 2: Connect Camera to Computer
Use a USB cable to connect your digital camera to your computer. Insert one end of the USB cable into the camera and the other end into a USB port on your computer. Make sure the camera is powered on.
| Step 3: | Configure Camera Settings |
| Step 4: | Set Up Skype |
| Step 5: | Start Video Call |
Check Camera Compatibility with Computer
Before connecting your digital camera to your computer for Skype, it’s important to ensure that your camera is compatible with your computer. Here are a few steps to check compatibility:
1. Operating System Compatibility
Make sure that your digital camera is compatible with the operating system of your computer. Check the manufacturer’s website or user manual for information on compatible operating systems.
2. Connection Type
Check the connection type of your digital camera. Most cameras use USB connections to connect to computers. Make sure that your computer has the necessary ports to connect your camera.
| Camera Brand: | [Enter Camera Brand Here] |
| Computer Operating System: | [Enter Operating System Here] |
| Connection Type: | [Enter Connection Type Here] |
Install Camera Software on Computer
Before connecting your digital camera to your computer for Skype, make sure you have the necessary camera software installed on your computer. This software is usually provided by the camera manufacturer and allows your computer to recognize and communicate with the camera.
To install the camera software, insert the installation CD that came with your camera into your computer’s CD drive. Follow the on-screen instructions to install the software. If you don’t have the installation CD, you can usually download the software from the manufacturer’s website.
Connect Camera to Computer Using USB Cable
To connect your digital camera to your computer for Skype, you will need a USB cable that is compatible with your camera. Follow these steps to connect your camera:
| 1. | Turn off your camera. |
| 2. | Locate the USB port on your camera. It is usually located on the side or the bottom of the camera. |
| 3. | Plug one end of the USB cable into the USB port on your camera. |
| 4. | Plug the other end of the USB cable into a USB port on your computer. |
| 5. | Turn on your camera. Your computer should detect the camera and install any necessary drivers. |
| 6. | Open Skype on your computer and go to the settings to select your camera as the video input device. |
| 7. | You can now use your digital camera for Skype video calls. |
Configure Camera Settings for Skype
Once you have connected your digital camera to your computer for Skype, it’s important to configure the camera settings to ensure a smooth video call experience. Here are some steps to help you with this:
1. Open Skype Settings: Launch the Skype application on your computer and go to the settings menu. Look for the video settings option.
2. Select Camera: In the video settings, choose your digital camera from the list of available cameras. Make sure it is selected as the default camera for Skype.
3. Adjust Camera Settings: Depending on your camera model, you may have the option to adjust settings such as brightness, contrast, and resolution. Experiment with these settings to find the best configuration for your video calls.
Open Skype Application on Computer
Before starting a video call with your digital camera, you need to open the Skype application on your computer. Follow these steps to open Skype:
- Launch Skype: Double-click on the Skype icon on your desktop or search for Skype in your computer’s application menu to open the program.
- Sign In: Enter your username and password to sign in to your Skype account. If you don’t have an account, you can create one by following the on-screen instructions.
- Check Settings: Once you are signed in, make sure your camera and microphone are properly connected and selected in the Skype settings. You can access these settings by clicking on your profile picture and selecting “Settings” from the drop-down menu.
Now that Skype is open and your settings are configured correctly, you are ready to connect your digital camera to your computer for a video call.
Select Camera as Video Input in Skype Settings
Once you have connected your digital camera to your computer, you need to set it as the video input device in Skype. Here’s how you can do it:
- Open Skype on your computer.
- Go to the “Settings” or “Preferences” section.
- Look for the “Audio & Video” settings.
- Under the “Video” section, you should see an option to select your camera. Click on it.
- Choose your digital camera from the list of available devices.
- Adjust any additional settings like resolution or frame rate if needed.
Once you have selected your digital camera as the video input in Skype settings, you should be able to use it for video calls and conferences within the application.
Test Camera Connection and Quality in Skype Call
Once you have connected your digital camera to your computer and set it up as the video input device in Skype, it’s important to test the camera connection and quality before starting a call. Here’s how you can do that:
| 1. | Open Skype on your computer and go to the settings menu. |
| 2. | Select “Audio & Video” from the settings options. |
| 3. | Under the “Video” section, you should see your digital camera listed as the video input device. |
| 4. | Click on “Test video” to check the camera connection and quality. |
| 5. | You should see a live video feed from your digital camera in the test window. |
| 6. | Make sure the video quality is clear and that there are no issues with the connection. |
| 7. | If everything looks good, you are ready to start your Skype call with your digital camera. |
FAQ
How do I connect my digital camera to my computer for Skype?
To connect your digital camera to your computer for Skype, you will need a USB cable that is compatible with your camera. Connect one end of the USB cable to your camera and the other end to a USB port on your computer. Make sure your camera is turned on and set to the appropriate mode for transferring files. Once connected, your computer should recognize the camera as a removable storage device, allowing you to access the photos and videos on the camera for use in Skype.

Can I use a digital camera as a webcam for Skype?
Yes, you can use a digital camera as a webcam for Skype. To do this, you will need to connect your digital camera to your computer using a USB cable. Once connected, you can set up the camera as a webcam in the Skype settings. Make sure your camera is compatible with your computer and that you have the necessary drivers installed. This can be a great way to improve the video quality of your Skype calls.
What if my digital camera is not recognized by my computer when connected for Skype?
If your digital camera is not recognized by your computer when connected for Skype, there may be several reasons for this. First, make sure the USB cable is properly connected and that the camera is turned on. Check if the camera is set to the correct mode for transferring files. If the camera is still not recognized, try using a different USB port on your computer or a different USB cable. You may also need to install drivers for the camera on your computer before it can be recognized.
Is it possible to use a wireless connection to connect a digital camera to a computer for Skype?
Yes, it is possible to use a wireless connection to connect a digital camera to a computer for Skype. Some cameras have built-in Wi-Fi capabilities that allow them to connect wirelessly to a computer. In this case, you can set up the wireless connection between the camera and computer and use the camera as a webcam for Skype. Make sure both devices are on the same network and follow the instructions provided by the camera manufacturer for setting up the wireless connection.
Can I connect multiple digital cameras to my computer for Skype?
It is possible to connect multiple digital cameras to your computer for Skype, but it may require additional hardware or software to do so. You can use a USB hub to connect multiple cameras to your computer if you have limited USB ports. Alternatively, you can use software that allows you to switch between different camera inputs during a Skype call. Make sure your computer and Skype are compatible with multiple camera inputs before attempting to connect more than one camera.