

Transferring pictures from your digital camera to your computer is a simple process that allows you to easily access and edit your photos. Whether you’re a professional photographer or just someone who loves taking pictures, knowing how to transfer your images is essential for managing your photo library.
In this article, we will explore the different methods you can use to transfer pictures from your digital camera to your computer, including using a USB cable, memory card reader, or wireless connection. By following these steps, you’ll be able to quickly and efficiently transfer your photos to your computer for safekeeping and sharing with others.
Step-by-Step Guide: Transferring Pictures from Digital Camera to Computer
Transferring pictures from your digital camera to your computer is a simple process that allows you to easily access and organize your photos. Follow these steps to transfer your pictures:
Step 1: Connect your camera to the computer
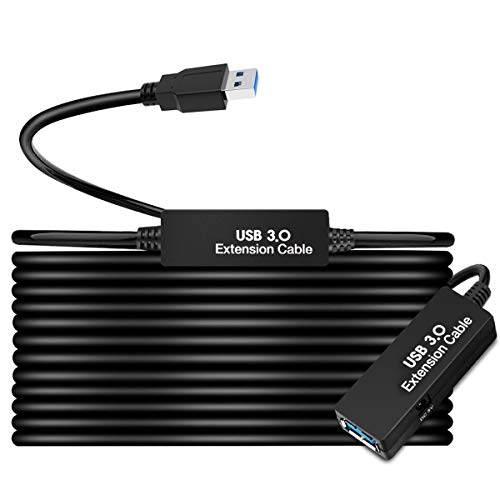
Use the USB cable that came with your camera to connect it to your computer. Make sure your camera is powered on and set to the correct mode for transferring photos.
Step 2: Access the photos on your camera
Once connected, your camera should appear as a removable drive on your computer. Open the folder to access your photos.
Note: Some cameras may require you to install software provided by the manufacturer to transfer photos. Follow the instructions that came with your camera if this is the case.
Once you have accessed your photos, you can select and copy them to a folder on your computer for easy organization and editing.
Prepare Your Equipment
Before you transfer pictures from your digital camera to your computer, make sure you have the necessary equipment ready. Here are the things you will need:
- A digital camera with a memory card containing the pictures you want to transfer
- A USB cable or memory card reader to connect your camera to the computer
- A computer with a USB port or memory card reader slot
- A fully charged camera battery to prevent any interruptions during the transfer process
Connect Your Camera to the Computer
Transferring pictures from your digital camera to your computer is a simple process that allows you to easily access and manage your photos. To begin, you’ll need to connect your camera to your computer using a USB cable. Follow these steps:
Step 1: Check Camera Compatibility
Before connecting your camera, ensure that it is compatible with your computer. Most digital cameras come with a USB cable that can be used to establish a connection.
Step 2: Connect the Camera
Locate the USB port on your camera and plug one end of the USB cable into the port. Next, plug the other end of the cable into a USB port on your computer.
| USB Port on Camera | USB Port on Computer |
| [Image of USB Port on Camera] | [Image of USB Port on Computer] |
Once the camera is connected, turn it on and set it to “transfer” or “PC” mode to allow the computer to recognize it.
Turn on Your Camera
Before you can transfer pictures from your digital camera to your computer, you need to make sure your camera is turned on and ready to connect. Locate the power button on your camera and press it to turn the device on. Some cameras may also require you to switch to a specific mode, such as “playback” or “transfer,” to enable the transfer process.
Select the Pictures to Transfer
Before transferring pictures from your digital camera to your computer, you need to select the photos you want to transfer. This step is important if you have a large number of pictures on your camera and only want to transfer specific ones.
On your digital camera, navigate to the folder or album where the pictures you want to transfer are located. Use the camera’s display screen to scroll through the images and select the ones you want to transfer.
You can typically select pictures on a digital camera by using the arrow keys or touchscreen to highlight the desired image. Some cameras also have a “select” or “mark” option that allows you to mark multiple images for transfer.
Once you have selected the pictures you want to transfer, you are ready to connect your camera to your computer and start the transfer process.
Choose the Transfer Method
When transferring pictures from your digital camera to your computer, you have several options to choose from. Here are some common methods:
- USB Cable: Connect your camera to your computer using a USB cable. Most cameras come with a USB cable that can be used for this purpose. Once connected, your computer should recognize the camera as a storage device, allowing you to transfer the pictures easily.
- Memory Card Reader: If your computer has a memory card reader, you can remove the memory card from your camera and insert it directly into the reader. This is a convenient way to transfer pictures without needing to connect your camera to the computer.
- Wireless Transfer: Some cameras offer wireless transfer capabilities, allowing you to transfer pictures to your computer over a Wi-Fi network. This can be a convenient option if you prefer a wireless connection.
Choose the transfer method that best suits your needs and preferences to easily transfer pictures from your digital camera to your computer.
Transfer Pictures Using a USB Cable
To transfer pictures from your digital camera to your computer using a USB cable, follow these simple steps:
- Turn off your camera and locate the USB port on the camera.
- Connect one end of the USB cable to the camera’s USB port and the other end to a USB port on your computer.
- Turn on your camera. Your computer should recognize the device and automatically open a window to view the files.
- Locate the folder where your pictures are stored on the camera and select the files you want to transfer.
- Copy the selected files and paste them into a folder on your computer to save them.
- Once the transfer is complete, safely disconnect the camera from your computer by ejecting it properly.
That’s it! You have successfully transferred pictures from your digital camera to your computer using a USB cable.
Use a Memory Card Reader
If your computer doesn’t have a built-in card reader, you can use an external memory card reader to transfer pictures from your digital camera to your computer. Simply remove the memory card from your camera and insert it into the card reader. The card reader will then appear as a removable drive on your computer.
Step 1: Insert the memory card into the memory card reader.
Step 2: Plug the memory card reader into a USB port on your computer.
Step 3: Open the removable drive to access the files on the memory card.
Step 4: Copy and paste the pictures from the memory card to a folder on your computer.
Step 5: Safely eject the memory card reader from your computer.
Using a memory card reader is a convenient way to transfer pictures from your digital camera to your computer without the need for any special software or cables.
Utilize Wireless Transfer Options
If your digital camera and computer both support wireless connectivity, you can transfer pictures without the need for cables. Most modern cameras have built-in Wi-Fi or Bluetooth capabilities, allowing you to connect them to your computer wirelessly. Follow the instructions in your camera’s manual to set up the wireless connection.
Once the connection is established, you can use software provided by the camera manufacturer or third-party apps to transfer photos wirelessly. Simply select the pictures you want to transfer on your camera and initiate the transfer process. Make sure your computer is connected to the same Wi-Fi network as your camera for a smooth transfer.
| Pros: | Convenient and cable-free transfer |
| Cons: | Dependent on wireless network stability |
Safely Eject Your Camera
Once you have finished transferring your pictures to your computer, it is important to safely eject your camera to avoid any data corruption or damage to the files on your camera.
To safely eject your camera, first make sure that all file transfers are complete and that no programs are accessing the camera. Then, locate the “Safely Remove Hardware” icon on your computer’s taskbar. Click on the icon and select your camera from the list of devices. Follow the on-screen instructions to safely disconnect your camera from the computer.
It is important to wait until you receive confirmation that it is safe to remove your camera before physically disconnecting it from the computer. Failure to safely eject your camera may result in data loss or damage to the files on your camera.
FAQ
How can I transfer pictures from my digital camera to my computer?
There are several ways to transfer pictures from a digital camera to a computer. The most common method is to use a USB cable to connect the camera to the computer. Once connected, the computer will recognize the camera as a storage device, and you can then navigate to the camera’s storage to copy the pictures to your computer. Another method is to remove the memory card from the camera and insert it into a card reader connected to the computer. You can then transfer the pictures directly from the memory card to the computer.
What software do I need to transfer pictures from my digital camera to my computer?
Most digital cameras come with software that allows you to transfer pictures from the camera to the computer. This software is usually included on a CD that comes with the camera. If you don’t have the CD or the software is outdated, you can also use third-party software like Adobe Lightroom, Google Photos, or Windows Photos app to transfer pictures from your camera to your computer. Some computers may also automatically detect the camera and prompt you to import the pictures using built-in software.
Can I transfer pictures wirelessly from my digital camera to my computer?
Yes, you can transfer pictures wirelessly from some digital cameras to your computer. Many modern cameras have built-in Wi-Fi or Bluetooth connectivity that allows you to transfer pictures without the need for cables. To do this, you need to connect your camera and computer to the same Wi-Fi network, enable wireless transfer on your camera, and use the manufacturer’s software or mobile app to transfer the pictures. Keep in mind that not all cameras support wireless transfer, so it’s important to check your camera’s specifications or manual to see if this feature is available.


