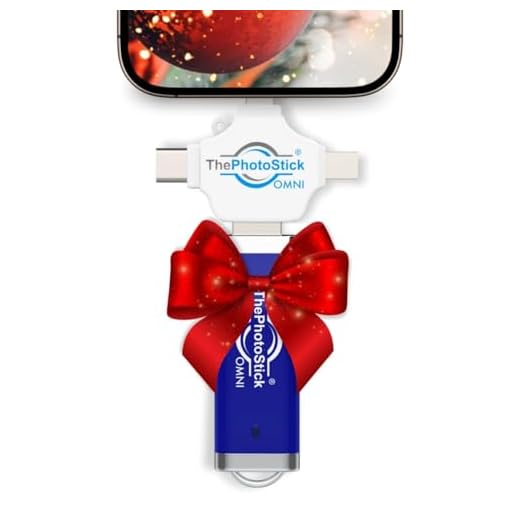


Are you wondering how to transfer your photos from your digital camera to your iPad? It’s actually quite simple and can be done in just a few easy steps. Whether you want to share your favorite snapshots on social media or edit them using your iPad’s photo editing apps, transferring photos from your camera to your iPad is a convenient way to access and manage your images on the go.
Step 1: The first thing you need to do is connect your digital camera to your iPad. You can do this using a USB cable that came with your camera or by using a memory card reader that is compatible with your iPad. Make sure your camera is turned on and unlocked before connecting it to your iPad.
Step 2: Once your camera is connected to your iPad, open the Photos app on your iPad. You should see your camera listed as a device under the “Import” tab. Tap on your camera’s name to view the photos stored on your camera.
How to Transfer Photos from Digital Camera to iPad
Transferring photos from your digital camera to your iPad is a simple process that can be done in a few easy steps. Here’s how you can do it:
Step 1: Connect your Camera to iPad
Use the USB cable that came with your digital camera to connect it to your iPad. Make sure the camera is turned on and in the correct mode for transferring photos.
Step 2: Import Photos to iPad
Once connected, your iPad should recognize the camera and prompt you to import photos. Follow the on-screen instructions to select the photos you want to transfer and import them to your iPad’s Photos app.
Alternatively, you can use a third-party app or a memory card reader to transfer photos from your camera to your iPad if the direct connection method does not work.
Check camera compatibility with iPad
Before downloading photos from your digital camera to your iPad, it is important to ensure that your camera is compatible with your iPad. Not all cameras are compatible with all versions of the iPad, so it is essential to check the specifications of your camera and your iPad to make sure they can work together.
One way to check compatibility is to consult the user manual of your camera and iPad. The user manual should provide information on whether the camera can connect to the iPad and what accessories or cables are needed for the connection.
Another option is to visit the official website of your camera manufacturer or Apple to see if they have any information on camera compatibility with the iPad. They may have a list of supported cameras or FAQs that address this issue.
If you are still unsure about compatibility, you can also reach out to customer support for your camera or Apple for assistance. They should be able to provide you with the information you need to determine if your camera can be used with your iPad for downloading photos.
Using a USB adapter for direct transfer
If your digital camera uses a standard USB cable for data transfer, you can easily connect it to your iPad using a USB adapter. Follow these steps to transfer photos and videos directly:
- First, make sure your digital camera is turned off.
- Connect the USB cable from your camera to the USB adapter.
- Plug the USB adapter into the charging port on your iPad.
- Turn on your digital camera.
- Open the Photos app on your iPad.
- Your iPad should detect the camera and prompt you to import photos and videos.
- Follow the on-screen instructions to select and import the desired files.
- Once the transfer is complete, you can view and edit the photos and videos on your iPad.
Using a USB adapter is a convenient way to transfer files directly from your digital camera to your iPad without the need for a computer or internet connection.
Wireless transfer via Wi-Fi or Bluetooth
If your digital camera supports Wi-Fi or Bluetooth connectivity, you can easily transfer photos and videos to your iPad wirelessly. Follow these steps:
1. Enable Wi-Fi or Bluetooth on your digital camera: Turn on the Wi-Fi or Bluetooth feature on your camera. Refer to your camera’s manual for specific instructions on how to do this.
2. Connect your iPad to the same network: Make sure your iPad is connected to the same Wi-Fi network as your camera or paired with your camera via Bluetooth.
3. Transfer photos and videos: Open the camera’s app on your iPad (if available) or use a third-party app that supports wireless transfer. Follow the on-screen instructions to select and transfer the files from your camera to your iPad.
Note: The transfer speed may vary depending on the file size and the strength of the wireless connection between your camera and iPad.
Using a Memory Card Reader for iPad
If you want to transfer photos or videos from your digital camera to your iPad without using a computer, you can use a memory card reader. This method allows you to directly access the files on your camera’s memory card and transfer them to your iPad quickly and easily.
Steps to use a memory card reader for iPad:
| 1. | Insert the memory card from your digital camera into the memory card reader. |
| 2. | Connect the memory card reader to your iPad using the appropriate adapter (e.g., Lightning to USB adapter). |
| 3. | Open the Photos app on your iPad and select the option to import photos from the connected device. |
| 4. | Choose the photos or videos you want to transfer and import them to your iPad’s camera roll. |
| 5. | Once the transfer is complete, you can view and edit the photos or videos on your iPad. |
Importing photos through iCloud or Dropbox
If you have photos stored in iCloud or Dropbox, you can easily import them to your iPad. Simply open the iCloud or Dropbox app on your iPad and log in with your account credentials. Then, navigate to the folder where your photos are stored and select the photos you want to import. You can then choose to download the photos directly to your iPad’s camera roll or save them to a specific folder on your device.
Syncing with iTunes for photo transfer
If you want to transfer photos from your digital camera to your iPad, you can use iTunes to sync the images. Follow these steps to easily transfer photos:
Step 1: Connect your digital camera to your computer
First, connect your digital camera to your computer using a USB cable. Make sure your camera is turned on and recognized by your computer.
Step 2: Import photos to iTunes
Open iTunes on your computer and select your iPad. Go to the “Photos” tab and check the box next to “Sync Photos”. Choose the folder where your photos are stored on your computer and select the photos you want to transfer to your iPad.
| Option | Description |
|---|---|
| Sync Photos | Check this box to enable photo syncing |
| Choose folder | Select the folder containing your photos |
| Select photos | Choose the specific photos you want to transfer |
Once you have selected the photos, click the “Apply” button to start the syncing process. iTunes will transfer the photos from your computer to your iPad.
Using third-party apps for photo transfer
If you want to transfer photos from your digital camera to your iPad, you can use third-party apps that make the process easier and more convenient. These apps offer various features to help you transfer photos quickly and efficiently. Here are some popular apps you can consider:
- PhotoSync: PhotoSync is a user-friendly app that allows you to wirelessly transfer photos from your digital camera to your iPad. It supports a wide range of file formats and offers fast transfer speeds.
- Dropbox: Dropbox is a cloud storage service that also allows you to transfer photos between devices. You can upload photos from your camera to Dropbox and then access them on your iPad using the Dropbox app.
- Google Photos: Google Photos is another cloud-based service that offers automatic photo backup and sync across devices. You can upload photos from your camera to Google Photos and view them on your iPad.
These apps provide convenient ways to transfer photos from your digital camera to your iPad, giving you more flexibility and control over your photo library.
Troubleshooting common transfer issues
If you are experiencing issues transferring photos from your digital camera to your iPad, here are some common troubleshooting steps you can try:
1. Check the connection
Make sure that the cable you are using to connect your digital camera to your iPad is securely plugged in. Try using a different cable or port to see if that resolves the issue.
2. Restart your devices
Sometimes a simple restart can fix connectivity issues. Turn off both your digital camera and iPad, then turn them back on and attempt the transfer again.
| Issue | Solution |
| Device not recognized | Try connecting the devices again and make sure they are compatible. |
| Slow transfer speed | Check the file size of the photos and consider transferring smaller batches at a time. |
| Photos not showing up | Check the camera’s settings to ensure photos are set to be transferred. |
FAQ
How do I download photos from a digital camera to my iPad?
To download photos from a digital camera to your iPad, you can use a USB cable to connect the camera to the iPad. Alternatively, you can remove the memory card from the camera and use a card reader to transfer the photos to the iPad. Once connected, you can import the photos using the Photos app on your iPad.
Can I download photos directly from my digital camera to my iPad without a computer?
Yes, you can download photos directly from your digital camera to your iPad without using a computer. You can connect the camera to the iPad using a USB cable or transfer the photos from the camera’s memory card to the iPad using a card reader. The Photos app on the iPad allows you to import the photos easily.
Is it possible to download videos from a digital camera to my iPad?
Yes, it is possible to download videos from a digital camera to your iPad. You can connect the camera to the iPad using a USB cable or transfer the videos from the camera’s memory card using a card reader. The Photos app on the iPad supports importing both photos and videos, making it easy to transfer your media files.
What is the best way to transfer photos from a digital camera to an iPad wirelessly?
To transfer photos wirelessly from a digital camera to an iPad, you can use a Wi-Fi enabled SD card in your camera. With this type of SD card, you can connect your iPad to the card’s Wi-Fi network and transfer photos directly without the need for cables or card readers. Another option is to use a wireless file transfer app that allows you to send photos from your camera to your iPad over a Wi-Fi connection.


