

As a photography enthusiast, one of the key aspects I always consider when using my digital camera is the image quality setting. The image quality setting determines the level of detail, sharpness, and overall clarity of the photos I capture. With numerous options available on digital cameras, finding the best image quality setting can be a daunting task. In this article, I will explore different image quality settings and share my insights on the one that delivers the best results.
The first image quality setting to consider is the image resolution. Higher resolution photos deliver greater detail and are perfect for printing or cropping without losing quality. However, higher resolution images also mean larger file sizes, which can quickly fill up memory cards. It is essential to find a balance between resolution and storage space, ensuring you have enough room for all your photos.
Another important aspect of image quality settings is the file format. Most digital cameras offer two primary file formats: JPEG and RAW. JPEG files are compressed and smaller in size, making them ideal for sharing and storing numerous images. However, the compression process may result in some loss of image quality. On the other hand, RAW files are uncompressed and retain all the original data captured by the camera’s sensor. While they take up more space, shooting in RAW allows for greater flexibility in post-processing and offers the best image quality.
Determining the Best Image Quality Setting for Your Digital Camera
When it comes to digital photography, finding the best image quality setting for your camera can greatly enhance your photography experience. The image quality setting determines the level of detail, sharpness, and color accuracy in your photos. However, finding the right setting can be overwhelming, as most cameras offer a range of options to choose from.
First and foremost, it’s important to understand the different image quality settings available on your camera. Most digital cameras offer options such as RAW, JPEG, and Fine JPEG. RAW files capture all the data from the camera’s sensor, providing the highest level of detail and flexibility for post-processing. On the other hand, JPEG files are compressed and processed by the camera, resulting in smaller file sizes but potentially sacrificing some image quality. Fine JPEG offers a balance between file size and image quality.
When determining the best image quality setting for your digital camera, consider the purpose of your photos. If you’re a professional photographer or looking to do extensive post-processing, shooting in RAW format can provide the most flexibility and control. On the other hand, if you’re simply capturing everyday moments or sharing photos online, shooting in JPEG or Fine JPEG can yield satisfactory results while keeping file sizes manageable.
It’s also important to consider the storage capacity of your memory card. RAW files are significantly larger than JPEG files, meaning they will take up more space on your memory card. If you choose to shoot in RAW format, make sure you have ample storage to accommodate the larger file sizes.
Ultimately, determining the best image quality setting for your digital camera is a matter of personal preference and balancing your specific needs. Experimenting with different settings and understanding the impact they have on your photos will help you make an informed decision based on your shooting style and objectives. Remember, it’s always a good idea to shoot in the highest quality setting possible and adjust it accordingly as you become more familiar with your camera and its capabilities.
Understanding the Different Image Quality Settings on Digital Cameras
As a photography enthusiast, it is crucial to understand the various image quality settings on digital cameras. These settings determine the level of detail and file size of the captured photos, allowing you to choose the best setting for different scenarios.
1. RAW: The RAW setting captures all the data from the camera’s sensor without compression or processing. This format provides the highest level of image quality because it preserves all the details and allows for more flexibility during post-processing. However, RAW files are larger in size and require specialized software for editing and conversion.
2. JPEG: JPEG is the most common image format used by digital cameras. It applies compression to the image to reduce file size, resulting in a loss of some image data. However, the loss is generally not noticeable, and JPEG files are more easily sharable and accessible across various devices and platforms.
3. TIFF: TIFF is a file format that offers lossless compression, meaning it maintains the image quality without losing any details. It is commonly used in professional photography but results in larger file sizes compared to JPEG. TIFF files are often used for archiving purposes or when the highest level of image quality is required.
4. Fine/High/Normal: Some cameras offer different image quality settings within the JPEG format. These settings allow you to choose the level of JPEG compression and determine the trade-off between file size and image quality. The “Fine” or “High” setting usually results in less compression and better image quality, while the “Normal” setting reduces file size but may result in a slight loss of detail.
5. Resolution: Along with the image quality settings, digital cameras also provide options for selecting the resolution of the captured images. Higher resolution settings result in larger file sizes but also provide more detail and allow for larger prints. Lower resolution settings can be chosen to save storage space or when smaller prints or web sharing will be the primary use of the photos.
Understanding these image quality settings will help you make informed decisions when capturing and processing your photographs. Consider the specific requirements of your photography projects and choose the setting that balances image quality, file size, and storage requirements effectively.
Factors to Consider When Choosing the Best Image Quality Setting
When it comes to capturing the best possible images with a digital camera, selecting the right image quality setting is crucial. There are several factors to consider to ensure you get the best results for your specific needs.
Resolution: One of the key factors to consider is the resolution of the image. Higher resolution settings will result in larger image files but offer more detail and sharpness. However, keep in mind that higher resolution images will also take up more storage space on your camera’s memory card.
Compression: Another important factor is the level of compression applied to the image. Higher compression levels can result in smaller file sizes but may also lead to a loss of image quality. When choosing the best image quality setting, it’s important to strike a balance between file size and image clarity.
- Subject matter: Different types of photography may require different image quality settings. For example, if you’re capturing landscapes or highly detailed subjects, using a higher image quality setting will allow you to capture more detail and produce sharper images. On the other hand, if you’re taking casual snapshots or shooting in low light conditions, you may want to use a lower image quality setting to reduce noise and graininess.
- Intended use: Consider how you plan to use the images. If you’re printing them in large formats or using them for professional purposes, you’ll want to prioritize image quality and choose the highest setting available. If, however, you’re only sharing them on social media or viewing them on a computer screen, a lower image quality setting may be sufficient.
- Available storage: Consider the amount of storage space you have available on your camera’s memory card. Higher image quality settings will take up more space, so if you have limited storage, you may need to compromise on image quality to ensure you have enough space to capture all the images you want.
By considering these factors and testing different image quality settings, you can find the optimal setting that meets your specific needs and ensures you capture the best possible images with your digital camera.
How Image Quality Settings Affect File Size and Storage
When it comes to photography, achieving the best image quality is a top priority for many photographers. However, it’s important to understand that the image quality settings you choose can greatly affect the file size and storage requirements of your photos. As a photographer, I have learned that finding the right balance between image quality and file size is crucial.
One of the main factors that determine the file size of an image is the level of compression applied. Higher image quality settings generally result in less compression and thus larger file sizes. On the other hand, lower quality settings apply more compression and produce smaller file sizes. This means that when shooting in RAW or high-quality JPEG formats, the images will take up more space on your memory card or storage device.
However, it’s important to note that higher image quality settings also provide more detailed and accurate representations of the subjects being photographed. This is especially important for professional photographers who need to capture every nuance and detail in their images. Although it may result in larger file sizes, the increased image quality can be worth the additional storage space required.
On the other hand, if you’re shooting casual or non-professional photos that won’t be printed in large sizes, lower image quality settings may be sufficient. By reducing the compression and choosing a lower quality setting, you can significantly decrease the file sizes and save valuable storage space. This is particularly useful when shooting multiple photos or videos in a single session, as it allows you to capture more content without constantly worrying about running out of storage.
In conclusion, the image quality settings you choose on your digital camera play a significant role in determining the file size and storage requirements of your photos. By finding the right balance between image quality and file size, you can ensure optimal results while efficiently managing your storage space.
The Impact of Image Quality Settings on Printing and Display
When it comes to photography, capturing high-quality images is crucial. However, it’s important to note that the image quality settings on your digital camera not only affect the file size but also the way your images appear when printed or displayed on various devices. Understanding the impact of these settings can help you make informed decisions when choosing the optimal image quality for your specific needs.
One of the main factors influenced by image quality settings is file size. Higher quality settings typically result in larger file sizes, which can be beneficial when you require detailed prints or want to retain as much information as possible for post-processing. However, larger file sizes can also slow down your camera’s performance and take up more storage space.
Moreover, image quality settings directly affect the resolution and level of detail in your photos. Higher quality settings capture more information and result in sharper and more vibrant images. This is particularly important when you need to print large-sized images or when displaying them on high-resolution screens.
On the other hand, lower quality settings can be suitable for situations where file size and speed are prioritized over detail. These settings result in smaller file sizes, making them ideal for sharing images online or storing them with limited storage capacity. However, it’s important to consider that lowering the image quality too much can lead to loss of detail and decreased overall visual impact.
In conclusion, the image quality settings on your digital camera play a crucial role in the final output of your photos. Higher settings result in larger file sizes, better resolution, and more detail, which are important for printing or displaying on high-resolution screens. On the other hand, lower settings can be useful for sharing images online or when storage capacity is limited. Understanding the impact of these settings allows you to make informed decisions and adjust them according to your specific needs and preferences.
Comparing Image Quality Settings: JPEG vs. RAW
In my experience as a photographer, I have found that the image quality settings on a digital camera can greatly impact the final result of a photo. Two of the most common image quality settings are JPEG and RAW. While both formats have their advantages, they also have their differences when it comes to image quality.
JPEG:
- Compression: One of the key differences between JPEG and RAW is the compression of the image. JPEG files are compressed, which means that some of the image data is discarded to reduce file size. This compression can result in a loss of image quality, especially when editing or enlarging the photo.
- Color and Contrast: Another factor to consider with JPEG is that the camera applies color and contrast adjustments to the image before saving it. While this can be convenient for quick snapshots, it can limit the flexibility for post-processing and fine-tuning the colors and tones in the image.
- Smaller File Size: One advantage of JPEG is that the files are generally smaller in size compared to RAW. This can be beneficial for storing and sharing images, especially when dealing with limited storage space or slower internet connections.
RAW:
- Uncompressed: Unlike JPEG, RAW files are not compressed. This means that all of the original image data captured by the camera’s sensor is retained, allowing for maximum image quality and detail. This can be particularly advantageous for photographers who want to have full control over the post-processing of their images.
- Flexible Editing: RAW files offer a wide range of editing options as they preserve more information and allow for adjustments like exposure, white balance, and noise reduction without sacrificing image quality. This flexibility enables photographers to fine-tune their photos to achieve the desired look and feel.
- Larger File Size: Due to the lack of compression, RAW files are larger in size compared to JPEG. This can require more storage space and may result in slower file transfers, but it is a trade-off for the superior image quality and editing capabilities.
In conclusion, when it comes to image quality settings, the choice between JPEG and RAW ultimately depends on the specific needs and preferences of the photographer. While JPEG offers smaller file sizes and convenience, RAW provides uncompressed image data and greater flexibility for post-processing. It’s important to weigh the pros and cons of each option and consider how they align with your intended use for the photos before making a decision.
Pro Tips for Maximizing Image Quality in Different Shooting Scenarios
As a photographer, I am always striving to capture the best possible image quality in any shooting scenario. Whether I am shooting landscapes, portraits, or street photography, there are several pro tips I have learned along the way that can help maximize image quality.
1. Adjusting the ISO: One of the key factors that affect image quality is the ISO setting. In low-light situations, it can be tempting to increase the ISO to capture more light. However, higher ISO settings can introduce noise and reduce image sharpness. It is important to find a balance and choose the lowest possible ISO setting that still allows for proper exposure.
2. Choosing the Right Aperture: The aperture setting plays a major role in determining the depth of field and sharpness of an image. For landscape photography, using a smaller aperture (e.g., f/11 or f/16) can help achieve a greater depth of field and ensure that the entire scene is in focus. On the other hand, for portraits or close-up shots, using a wider aperture (e.g., f/2.8 or f/4) can create a beautiful background blur while keeping the subject sharp.
3. Considering the Shutter Speed: The shutter speed setting is crucial for capturing sharp images, especially when photographing moving subjects. To freeze motion and avoid blur, a faster shutter speed should be used. On the other hand, when photographing stationary subjects or capturing long-exposure shots, a slower shutter speed can be employed to create interesting motion blur or light trails.
4. Utilizing Proper White Balance: The white balance setting is often overlooked but plays a significant role in determining the overall color temperature and accuracy in images. It is important to adjust the white balance according to the lighting conditions to avoid improper color casts. Using a custom white balance setting or shooting in RAW format can provide more flexibility for adjusting the white balance during post-processing.
5. Paying Attention to Composition and Lighting: Finally, the composition and lighting of a scene can greatly impact the image quality. Paying attention to the placement of subjects, the use of leading lines, and the balance of light and shadow can help create visually pleasing and high-quality images. It is also important to experiment with different angles, perspectives, and natural lighting conditions to capture unique and captivating shots.
By following these pro tips and experimenting with different settings and techniques, you can significantly enhance the image quality in various shooting scenarios. Remember, practice and experimentation are key to mastering the art of photography and creating stunning images.
The Role of Post-Processing in Enhancing Image Quality
While capturing images using a high-quality camera and the right settings can significantly improve image quality, post-processing also plays a crucial role in enhancing and refining the final result. Post-processing involves editing and enhancing the image using photo editing software such as Adobe Photoshop, Lightroom, or other similar tools. Here are some key reasons why post-processing is important for optimizing image quality:
1. Correcting Exposure and White Balance:
Post-processing allows photographers to correct any exposure or white balance issues that may have occurred while capturing the image. Adjusting the exposure can help in brightening or darkening the image to ensure it has the desired level of brightness. Correcting the white balance ensures that the colors in the image appear natural and accurate.
2. Sharpening and Detail Enhancement:
Post-processing tools provide options to sharpen the image, enhancing the details and overall clarity. This can greatly improve the sharpness of the subject and make it visually appealing. Additionally, post-processing techniques like noise reduction can minimize any digital noise present in the image, resulting in a cleaner and more refined final product.
3. Color Adjustments and Enhancements:
Through post-processing, photographers have complete control over adjusting and enhancing the colors in their images. This includes altering the saturation, brightness, contrast, and hue of specific colors, allowing for creative freedom and the ability to create a desired visual aesthetic.
4. Cropping and Composition Refinement:
Post-processing enables photographers to crop and adjust the composition of the image. This can be helpful in removing unwanted elements or distractions from the frame, improving the overall composition and focus of the image. It also allows for experimentation with different cropping ratios to create a desired visual impact.
5. Creative Effects and Manipulation:
Post-processing provides photographers with the opportunity to add creative effects and manipulate the image to create a unique and artistic interpretation. This can include applying filters, adjusting textures, adding vignettes, or even creating composite images by combining multiple photos.
Overall, post-processing is an essential step in the digital photography workflow. It empowers photographers to refine and enhance their images, transforming them into visually compelling and impactful works of art. While capturing the best image quality through camera settings is crucial, post-processing allows photographers to further optimize and tailor the final result to their vision and creative intent.
Best image quality setting digital camera
Features
| Part Number | illustrations |
| Edition | 2 |
| Language | English |
| Number Of Pages | 321 |
| Publication Date | 2015-09-06T00:00:00Z |
| Price history for The Digital Negative for Photographers | |
|---|---|
|
Latest updates:
|
|
Features
| Part Number | 26532 |
| Model | 26532 |
| Warranty | 1 year manufacturer |
| Color | Black |
| Release Date | 2020-02-06T00:00:01Z |
| Price history for Nikon COOLPIX P950 Superzoom Camera | |
|---|---|
|
Latest updates:
|
|
Features
| Number Of Pages | 0 |
| Publication Date | 1907T |
Features
| Part Number | DC101 |
| Model | DC101 |
| Warranty | 1 |
| Color | Black |
Features
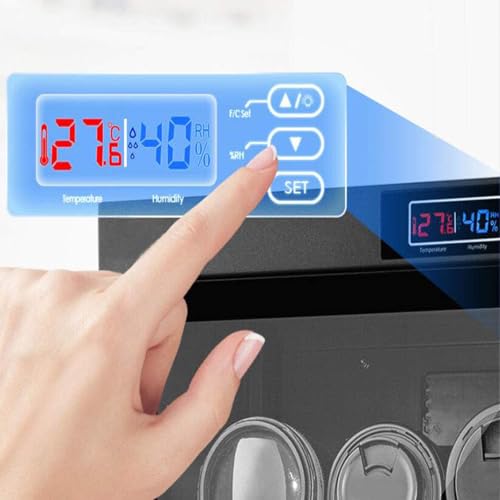
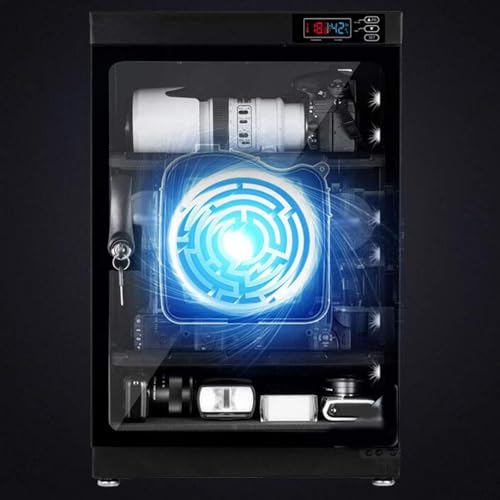
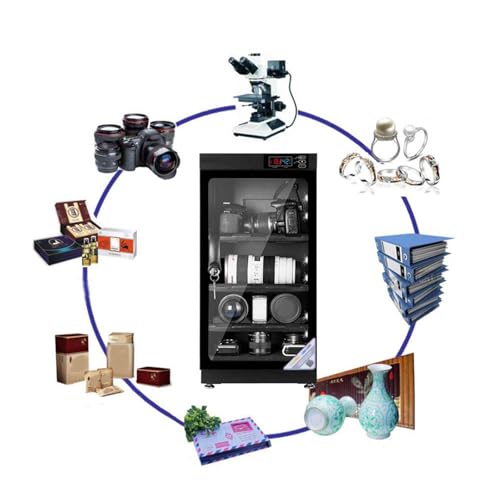
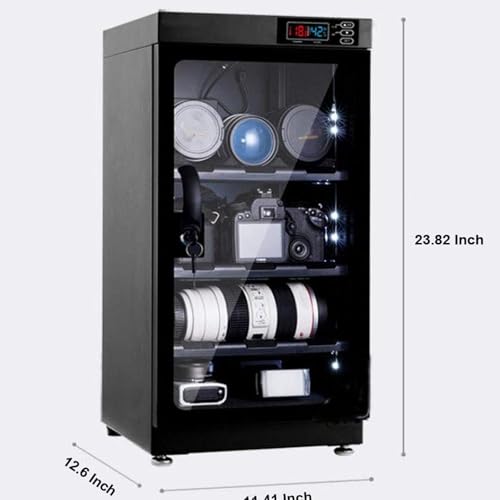
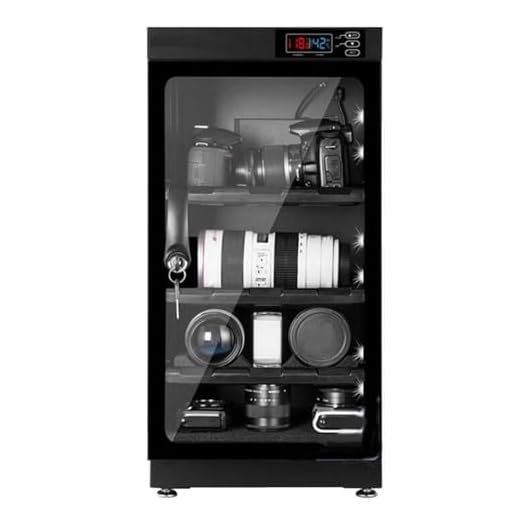
| Part Number | T154017FBA |
| Model | Camera Dry Cabinet |
| Color | Black |
| Price history for INTBUYING 50L Camera Lens Storage Box | |
|---|---|
|
Latest updates:
|
|
Features
| Part Number | ASP3MLDLCAM |
| Model | ASP3MLDLCAM |
| Release Date | 2016-05-18T00:00:01Z |
| Edition | Pro |
| Language | English |
| Publication Date | 2016-05-18T00:00:01Z |
| Format | CD-ROM |
| Price history for Corel AfterShot Pro 3 Editing Software | |
|---|---|
|
Latest updates:
|
|
Question and answers:
What is the best image quality setting for a digital camera?
The best image quality setting for a digital camera typically depends on the specific camera model and the intended use of the photos. However, generally speaking, it is recommended to set the camera to the highest image quality setting available, such as RAW or the highest resolution JPEG. This ensures that the camera captures and stores the maximum amount of detail and color information in the photos.
What is the difference between RAW and JPEG image quality settings?
The main difference between RAW and JPEG image quality settings is the level of compression and processing applied to the photos. RAW files contain unprocessed and uncompressed image data captured by the camera’s sensor, providing the highest level of image quality and flexibility for post-processing. On the other hand, JPEG files are compressed and processed by the camera, resulting in smaller file sizes but slightly reduced image quality and less flexibility for editing.
Can I change the image quality setting after taking a photo?
The image quality setting of a digital camera cannot be changed after taking a photo. Once a photo is captured, it is saved in the format and quality setting that was set at the time of capture. If you want to change the image quality, you will need to adjust the settings before taking the photo. However, it is possible to convert a RAW file to JPEG or adjust the image quality during post-processing using software.
Does the image quality setting affect the file size of the photos?
Yes, the image quality setting of a digital camera affects the file size of the photos. Higher image quality settings, such as RAW or high-resolution JPEG, generally result in larger file sizes due to the amount of detail and color information captured and stored. On the other hand, lower image quality settings, such as low-resolution JPEG or heavy compression, can significantly reduce the file size but may also result in a loss of image quality.


