

Welcome to my guide on finding the best digital camera settings for capturing stunning portrait photographs! As a professional photographer with years of experience, I have learned that the secret to amazing portraits lies in mastering your camera settings. By knowing which settings to use and when, you can elevate your portraits from good to extraordinary.
The first setting to consider is the aperture, or f-stop. This setting controls the depth of field in your portraits, determining how much of the image is in focus. For a classic, beautifully blurred background, I recommend using a wide aperture, such as f/2.8 or lower. This will create a shallow depth of field, allowing your subject to stand out and creating a pleasing bokeh effect.
Next, let’s talk about shutter speed. This setting determines how long your camera’s sensor is exposed to light, and it plays a crucial role in capturing sharp portraits. To freeze motion and minimize blur, I suggest using a shutter speed of at least 1/200th of a second. However, keep in mind that if you are shooting in low light, you may need to lower your shutter speed to allow more light into the camera.
Finally, let’s not forget about ISO. This setting controls the sensitivity of your camera’s image sensor to light. For portraits, it’s best to use a low ISO, such as 100 or 200, to minimize noise and maintain image quality. However, in low-light situations where you need to capture more light, you can increase the ISO. Just be aware that higher ISO settings can introduce grain or noise into your images.
By understanding and mastering these camera settings, you will be well on your way to capturing breathtaking portraits. Remember, practice makes perfect, so don’t be afraid to experiment and find the settings that work best for your unique style and subjects. Happy shooting!
How to Choose the Best Digital Camera for Portrait Photography
When it comes to capturing beautiful portraits, having the right digital camera is crucial. The camera you choose can greatly impact the quality and overall look of your portraits. Here are some factors to consider when selecting the best digital camera for portrait photography.
1. Sensor Size: The size of the camera’s sensor can greatly affect the quality of your portraits. A larger sensor typically produces higher image quality and better low-light performance. Look for a camera with a larger sensor size for better portrait results.
2. Megapixel Count: While megapixels are not the only factor to consider, they do play a role in the level of detail and sharpness in your portraits. A camera with a higher megapixel count will allow for larger prints and more cropping flexibility.
3. Lens Compatibility: Consider the range of lenses available for the camera you are interested in. Different lenses offer different focal lengths, which can greatly affect the composition and depth of field in your portraits. Choose a camera that has a wide range of lens options for versatility in your portrait photography.
4. Autofocus System: The autofocus system of a camera is essential for capturing sharp and well-focused portraits. Look for a camera that has a reliable and fast autofocus system, with advanced features such as face detection and eye tracking.
5. ISO Performance: Good low-light performance is important for portrait photography, as it allows you to capture well-exposed images in various lighting conditions. Look for a camera that has good ISO performance, with low noise levels at high ISO settings.
In conclusion, choosing the best digital camera for portrait photography involves considering factors such as sensor size, megapixel count, lens compatibility, autofocus system, and ISO performance. By finding a camera that excels in these areas, you can ensure that your portraits will be of the highest quality and capture the essence of your subjects.
The Importance of Aperture and Depth of Field in Portrait Photography
As a photographer, understanding and utilizing aperture and depth of field is essential when capturing beautiful and impactful portraits. Aperture refers to the size of the opening in the lens that allows light to enter the camera. It is measured in f-stops, with smaller numbers indicating a larger aperture and vice versa. Depth of field, on the other hand, refers to the range of distance within which objects appear acceptably sharp in an image.
Aperture plays a crucial role in portrait photography as it directly affects the depth of field. By using a wide aperture (small f-stop number), such as f/1.8 or f/2.8, you can achieve a shallow depth of field. This means that the subject in focus will be sharp and clear, while the background will be blurred, creating a pleasing and visually appealing effect. This shallow depth of field is often used in portrait photography to draw attention to the subject and separate them from the background.
On the other hand, if you want more of the image to be in focus, using a narrower aperture (larger f-stop number) is recommended. This will result in a larger depth of field, where both the subject and the background will be relatively sharp. This technique is often used in environmental portraits or when you want to capture a detailed background that adds context to the image.
Ultimately, the choice of aperture and depth of field in portrait photography depends on the creative vision and desired effect of the photographer. Experimenting with different aperture settings and understanding how they impact depth of field can greatly enhance the overall aesthetic and storytelling elements of your portraits.
Shutter Speed: A Vital Setting for Capturing Portraits
When it comes to capturing stunning portraits, one vital camera setting that should never be overlooked is the shutter speed. Shutter speed refers to the amount of time that the camera’s shutter remains open while taking a photo. It plays a crucial role in determining the sharpness and clarity of the subjects in your portraits.
Adjusting the shutter speed can help you achieve different effects in your portraits. A faster shutter speed, such as 1/1000th of a second, freezes the motion, resulting in crisp and sharp images. This is ideal for capturing portraits of subjects in action or when shooting in outdoor environments with a lot of movement. On the other hand, a slower shutter speed, like 1/30th of a second, creates a sense of motion and can convey a feeling of movement or flow in your portraits.
It’s important to consider the conditions in which you’re shooting when choosing the appropriate shutter speed for your portraits. For instance, if you’re shooting in low light, using a slower shutter speed can help capture more light and prevent underexposure. However, using a slower shutter speed may also increase the risk of camera shake, leading to blurry images. In this case, using a tripod or image stabilization can help minimize the impact of camera shake and allow for a longer exposure without compromising image quality.
In conclusion, shutter speed is a vital camera setting that can greatly impact the outcome of your portrait photographs. It allows you to control the sharpness, motion, and overall aesthetic of your portraits. Experimenting with different shutter speeds and understanding how they affect your images is key to capturing stunning and captivating portraits.
ISO Settings: Balancing Sensitivity and Noise in Portraits
When it comes to taking portraits, finding the right ISO settings is crucial for achieving high-quality images. ISO determines the camera’s sensitivity to light, and finding the right balance between sensitivity and noise level is key.
Choosing a lower ISO setting, such as ISO 100 or 200, is preferable when shooting in well-lit environments. These settings result in less noise and produce sharper images with more accurate colors. However, in low-light situations, increasing the ISO can help capture more light and ensure a properly exposed portrait.
It’s important to keep in mind that higher ISO settings, such as ISO 800 or higher, can introduce more noise into the image. Noise appears as grainy specks and can decrease the overall quality of the portrait. To reduce noise, it’s recommended to shoot in RAW format, as it allows for better noise reduction during post-processing.
Experimenting with different ISO settings and understanding their impact on image quality is essential for capturing stunning portraits. By finding the right balance between sensitivity and noise, photographers can achieve clear and sharp portraits with accurate colors, regardless of the lighting conditions.
Understanding White Balance for Natural Skin Tones in Portraits
As a photographer who specializes in portraits, one of the most important aspects of capturing natural-looking skin tones is understanding the concept of white balance. White balance refers to the color temperature of the light in a photograph and plays a crucial role in determining how the skin tones appear in the final image.
When it comes to achieving natural skin tones, it’s essential to set the correct white balance before starting the photoshoot. Different lighting conditions, such as natural daylight, fluorescent lights, or tungsten bulbs, have different color temperatures that can affect how skin tones appear. Adjusting the white balance ensures that the colors in the photograph appear as they do in real life.
Here are a few tips for understanding and adjusting white balance for natural skin tones in portraits:
- Auto White Balance: Most digital cameras have an auto white balance feature that automatically adjusts the color temperature based on the lighting conditions. While this can be convenient, it’s not always reliable and may result in inaccurate skin tones. It’s recommended to use a preset white balance mode or manually adjust the white balance for better control.
- Preset White Balance: Many digital cameras come with preset white balance options such as daylight, cloudy, shade, fluorescent, and tungsten. These presets are designed to compensate for different lighting conditions and can provide a good starting point for achieving natural skin tones. It’s important to choose the preset that matches the lighting conditions of the photoshoot.
- Manual White Balance: For more precise control over the white balance, manually setting it is the best option. This can be done by using a gray card or a neutral reference object in the scene. Simply place the gray card in the same lighting as the subject, take a photo of it, and then use that photo as a reference to manually adjust the white balance. This ensures accurate color representation and natural-looking skin tones.
Understanding white balance and its impact on skin tones is essential for capturing high-quality and natural-looking portraits. By adjusting the white balance correctly, you can ensure that the colors in your photographs accurately represent the true skin tones of your subjects.
Using the Histogram: Exposing Portraits Properly
When it comes to capturing portraits, the proper exposure is key to achieving the desired result. By utilizing the histogram, I can ensure that I expose my portraits correctly, capturing all the necessary details and avoiding underexposed or overexposed areas.
The histogram is a graphical representation of the tonal range in an image, displaying how many pixels fall into each tonal value. By analyzing the histogram, I can determine if my portrait is properly exposed or if adjustments need to be made.
Understanding the Histogram: The histogram is divided into different tonal zones, ranging from shadows on the left to highlights on the right. If the graph is pushed to the left, it means the image is underexposed, while a push to the right indicates overexposure. A balanced histogram with a smooth distribution across the tonal range indicates a well-exposed portrait.
Using the Histogram to Adjust Exposure: To ensure proper exposure, I adjust my camera settings based on the histogram feedback. If the graph is skewed to the left, indicating underexposure, I can increase the exposure by adjusting the aperture, shutter speed, or ISO. If the graph is skewed to the right, indicating overexposure, I can decrease the exposure by making similar adjustments. By fine-tuning the exposure settings based on the histogram, I can capture portraits with accurate and balanced tonal values.
Overall, the histogram serves as a valuable tool for properly exposing portraits. By monitoring the histogram and making adjustments as needed, I can ensure that my portraits have the desired level of detail and tonal range, resulting in visually pleasing and well-exposed images.
Focus Modes and Points: Ensuring Sharper Portraits
In order to capture sharp and focused portraits, it is important to understand and utilize the different focus modes and points available on your digital camera. These settings determine how your camera will focus on the subject and can greatly affect the overall sharpness of your images.
One of the most commonly used focus modes for portraits is the autofocus (AF) mode. This mode automatically adjusts the focus based on the distance between the camera and the subject. It is ideal for capturing portraits where the subject is in motion or when shooting in low light conditions.
Another useful focus mode for portraits is the manual focus (MF) mode. This mode allows you to manually adjust the focus by rotating the focus ring on the lens. Manual focus gives you full control over where you want to focus and can be particularly useful when shooting portraits with a shallow depth of field.
When it comes to focus points, most digital cameras have multiple focus points that can be selected. These focus points determine where the camera will focus within the frame. It is recommended to use a single focus point when shooting portraits to ensure that the focus is accurately placed on the subject’s eyes, which are often the most important part of a portrait.
Furthermore, it is also important to ensure that the selected focus point is placed over a high-contrast area of the subject. This will help the camera to quickly and accurately lock focus on the subject. Additionally, using a smaller aperture (higher f-number) can help increase the depth of field and ensure that the subject remains in focus from front to back.
By understanding and utilizing the different focus modes and points on your digital camera, you can ensure that your portraits are sharp and focused, capturing the intricate details and expressions of your subjects. Experiment with these settings to find the combination that works best for your style of portraiture.
Utilizing Portrait Lighting Techniques to Enhance Your Photos
As a photographer, understanding how to use different lighting techniques is essential for capturing stunning portraits. By utilizing various lighting setups, you can enhance the mood and overall quality of your photos.
1. Natural Light: One of the most popular lighting options for portraits is natural light. This soft, diffused light can create a flattering and natural look on your subject’s face. To take advantage of natural light, position your subject near a window or shoot outdoors during the golden hour, which is the hour after sunrise or before sunset when the sunlight is softer and warmer.
2. Studio Lighting: Studio lighting provides you with complete control over the light source and allows you to create a wide range of effects. Consider using a three-light setup, including a key light, a fill light, and a hair light. The key light is the main light source, while the fill light helps reduce shadows, and the hair light adds dimension to the subject’s hair. Experiment with different positions and intensities of the lights to achieve the desired look.
3. Rembrandt Lighting: Rembrandt lighting is a classic technique named after the famous painter, Rembrandt van Rijn. It involves positioning the key light at a 45-degree angle and slightly above the subject’s eye level. This creates a distinct triangle-shaped highlight on one side of the face, along with soft shadows on the other. Rembrandt lighting adds depth and drama to your portraits.
4. Butterfly Lighting: Butterfly lighting, also known as paramount lighting, is widely used in fashion and beauty photography. It involves positioning the key light above and directly in front of the subject’s face, creating a slight shadow under the nose that resembles a butterfly shape. This technique produces a glamorous and flattering look, particularly for female subjects.
5. Outdoor Lighting: When shooting portraits outdoors, you can make use of various outdoor lighting techniques. For example, backlit portraits create a halo effect around the subject and emphasize their silhouette. Silhouette portraits utilize the strong backlighting to darken the subject’s outline, creating a dramatic effect. Golden hour lighting during sunrise or sunset casts warm, golden tones on your subject, resulting in a soft and romantic feel.
Experimenting with different portrait lighting techniques can help you develop your own unique style and create captivating portraits. Remember to consider the mood and desired effect you want to achieve when choosing your lighting setup, and don’t be afraid to think outside the box and try new techniques.
Post-Processing Tips for Perfecting Portrait Shots
After capturing your portrait shots, the post-processing stage allows you to enhance and refine the images further. Here are some post-processing tips to help you achieve stunning and professional-looking portrait shots:
1. Import and Organize
Start by importing your portrait shots into a photo editing software like Adobe Lightroom or Photoshop. Create a new catalog or folder to organize your images to ensure easy access and management.
2. Basic Adjustments
Begin the post-processing process by making basic adjustments to your portrait shots. This may include adjusting the exposure, contrast, and white balance to achieve the desired tone and color temperature.
3. Retouch Skin Imperfections
Portraits often involve close-ups of faces, which can reveal minor skin imperfections. Use retouching tools, such as the healing brush or clone stamp tool, to remove blemishes, wrinkles, or other skin imperfections while maintaining a natural look.
4. Enhance Eyes and Teeth
The eyes and teeth are important focal points in portrait shots. Use the adjustment brush or targeted tools to enhance the brightness, sharpness, and color of the eyes. Additionally, brighten and whiten teeth for a flawless smile.
5. Adjust Skin Tone
If the skin tone appears too red, yellow, or pale, use the color adjustment tools to correct it. Aim for a natural-looking and well-balanced skin tone by adjusting the saturation, hue, and luminance of the skin tones.
6. Fine-tune Overall Colors
After addressing individual elements, fine-tune the overall colors and tones of the portrait shot. Use tools like split toning or selective color adjustments to create a cohesive and visually appealing color scheme.
7. Sharpen and Noise Reduction
To enhance the overall clarity and sharpness of your portrait shots, apply a slight amount of sharpening. Additionally, reduce any noise or grain that may be present in the image, especially in low light or high ISO situations.
8. Cropping and Composition
Consider cropping your portrait shots to improve the composition or remove distracting elements. Experiment with different aspect ratios and composition rules, such as the rule of thirds, to create a visually pleasing final image.
9. Save and Export
Once you are satisfied with the post-processing adjustments, save your final portrait shots. Export them in a high-resolution format suitable for printing or sharing online, and consider creating backups to ensure their long-term preservation.
Conclusion
Post-processing is a crucial step in perfecting portrait shots. By following these tips and techniques, you can transform your raw images into stunning portraits that showcase the true beauty of your subject. Remember to strike a balance between enhancing the image while maintaining its natural look, and let your creativity and personal style shine through in the final result.
Best digital camera settings for portraits
Features
| Part Number | DC226 |
| Model | DC226 |
| Warranty | 1 year |
| Color | Black |
| Size | Full-Size |
Features
| Part Number | DC101 |
| Model | DC101 |
| Color | Black |
| Is Adult Product |
Features
| Part Number | 0570C002 |
| Model | 0570C005AA |
| Warranty | 1 year coverage for parts |
| Color | Black |
| Is Adult Product | |
| Release Date | 2015-05-21T00:00:01Z |
| Size | Lens Only |
| Language | English |
| Publication Date | 2019-06-17T00:00:01Z |
| Price history for Canon EF 50mm f/1.8 STM Lens | |
|---|---|
|
Latest updates:
|
|
Features
| Part Number | MT-02S |
| Model | MT-02 |
| Warranty | 1 year manufacturer |
| Color | Red |
| Size | 102inch |
Features
| Edition | Standard |
| Language | Chinese |
| Number Of Pages | 0 |
| Publication Date | 1991-01-01T00:00:00Z |
Features
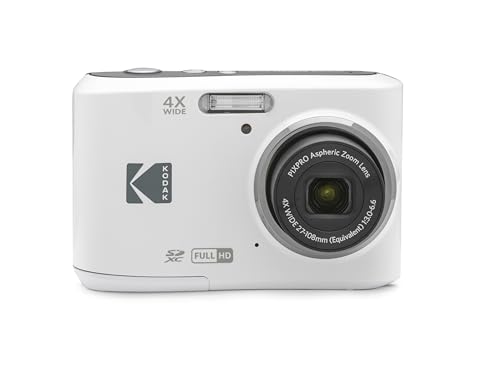
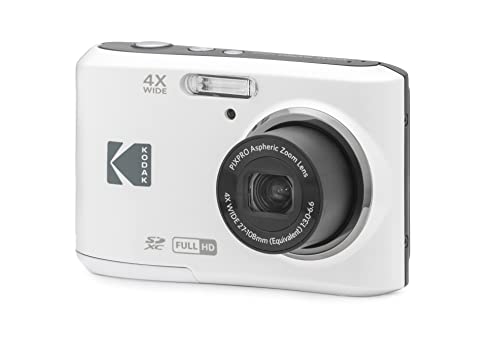
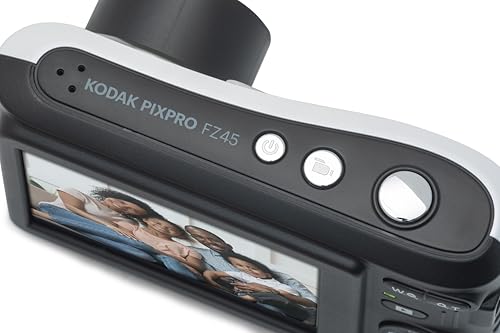
| Part Number | FZ45WH |
| Model | FZ45WH |
| Warranty | Limited 1-Year Warranty |
| Color | White |
| Release Date | 2022-10-03T00:00:01Z |
| Price history for KODAK PIXPRO FZ45 Digital Camera | |
|---|---|
|
Latest updates:
|
|
Features
| Model | W08 |
| Color | YL15-W08-C-Black |
| Is Adult Product |
Features
| Part Number | IO3518-E |
| Model | IO3518-E |
| Warranty | 1 Year Manufacturer |
| Release Date | 2020-11-11T00:00:01Z |
Question and answers:
What are the best digital camera settings for portraits?
The best digital camera settings for portraits typically involve using a wide aperture (low f-stop number) to create a shallow depth of field and blur the background, capturing the subject in sharp focus. Additionally, using a relatively low ISO setting can help reduce noise in the image, while choosing the appropriate white balance can ensure accurate color reproduction.
Should I use natural light or artificial light for portrait photography?
Both natural light and artificial light can be used effectively for portrait photography, depending on the desired look and the available resources. Natural light can create a soft and flattering effect, especially during golden hour (the period of soft warm light shortly after sunrise or before sunset). On the other hand, artificial light, such as studio strobes or continuous lights, provides more control over the lighting conditions, allowing for precise shaping and sculpting of the subject’s features.
How can I achieve a blurred background in my portrait photos?
To achieve a blurred background, also known as shallow depth of field, you can use a wide aperture (low f-stop number) on your digital camera. This will create a narrow plane of focus, keeping your subject sharp while blurring the background. Additionally, using a lens with a longer focal length and shooting from a closer distance to the subject can also help to increase the amount of background blur in your portrait photos.


