


The moon is a beautiful and fascinating subject to capture with your digital camera. Whether you’re an amateur photographer or a professional, knowing the best camera settings for capturing the moon can help you take stunning photographs.
One of the most important factors to consider when photographing the moon is its brightness. As the moon is a relatively bright object in the night sky, it’s important to adjust your camera’s exposure settings accordingly. To capture the details of the moon’s surface, set your camera to manual mode and adjust the ISO settings to a low value, such as 100 or 200. This will help reduce the overall brightness of the image and prevent overexposure.
In addition to ISO, the aperture and shutter speed settings also play a crucial role in capturing the moon. The aperture determines the amount of light that enters the camera lens, while the shutter speed controls the amount of time the camera’s sensor is exposed to light. For shooting the moon, it’s recommended to use a small aperture (a high f-number, such as f/11 or f/16) to ensure a larger depth of field and sharpness throughout the image. As for the shutter speed, a faster speed (around 1/250th of a second or higher) is usually preferred to freeze the moon’s motion and avoid any blurriness.
Lastly, don’t forget to use a tripod or other stable surface to keep your camera steady during long exposures. The moon may appear to be still, but any slight movement of the camera can result in a blurry image. Additionally, consider using a telephoto lens to zoom in on the moon and capture its intricate details.
By experimenting with different camera settings and techniques, you can capture breathtaking images of the moon and showcase its beauty in your photography. Remember to be patient and persistent, as capturing the perfect shot may require multiple attempts. Happy shooting!
Why choosing the right camera settings is crucial for capturing the moon
As a photography enthusiast, I have always been captivated by the beauty of the moon. Its luminous glow against the night sky is a sight that always leaves me in awe. However, capturing the moon in all its glory can be quite challenging. This is why choosing the right camera settings is crucial to achieve stunning moon photographs.
The moon is a distant object, and capturing its details requires precise camera settings. One of the most important settings to consider is the shutter speed. A fast shutter speed is essential to freeze the moon’s motion and capture its fine details. However, it’s important to strike a balance between a fast shutter speed and proper exposure, as an overly fast shutter speed can result in an underexposed image.
- Aperture: Another crucial camera setting for capturing the moon is the aperture. A narrow aperture, such as f/11 or higher, is recommended to ensure a larger depth of field and sharpness throughout the image. This helps in capturing the intricate details on the moon’s surface.
- ISO: The ISO setting determines the camera’s sensitivity to light. When shooting the moon, it’s best to keep the ISO as low as possible to minimize noise in the image. A lower ISO value, such as ISO 100 or 200, is ideal for capturing the moon’s smooth texture and minimizing any unwanted graininess.
- Manual focus: Lastly, using the manual focus mode is essential for capturing sharp moon images. The autofocus system may struggle to lock onto the moon due to its low contrast. By switching to manual focus mode, you can precisely adjust the focus to ensure the moon appears crisp and clear in your photographs.
Capturing the beauty of the moon requires careful consideration of camera settings. By selecting the right shutter speed, aperture, ISO, and focusing mode, you can capture stunning moon photographs that showcase its intricate details and unique allure.
Understanding the importance of ISO and its impact on moon photography
When it comes to capturing stunning shots of the moon, understanding the importance of ISO settings is crucial. ISO, which stands for International Organization for Standardization, is a measure of a camera’s sensitivity to light. In moon photography, the right ISO setting can make a significant impact on the overall quality of the image.
Choosing the appropriate ISO setting for moon photography is important because it directly affects the amount of light that reaches the camera’s sensor. A higher ISO setting allows the camera to capture more light, resulting in a brighter image. However, using a high ISO setting can also introduce unwanted noise or graininess to the image. On the other hand, a lower ISO setting reduces noise but requires a longer exposure time to capture enough light.
When photographing the moon, a mid-range ISO setting, such as ISO 400 or 800, is often recommended. This allows for a balance between capturing enough light and minimizing noise. However, it’s important to experiment with different ISO settings to find the one that works best for your specific camera and lighting conditions. Additionally, shooting in RAW format can give you more flexibility in post-processing to fine-tune the ISO and reduce noise.
Overall, understanding the impact of ISO settings on moon photography is essential for capturing high-quality images. By finding the right balance between capturing sufficient light and minimizing noise, you can capture the awe-inspiring beauty of the moon with your digital camera.
The role of aperture in achieving sharp and detailed moon images
When it comes to capturing the moon in all its glory, the aperture setting on your digital camera plays a crucial role in achieving sharp, detailed images. The aperture refers to the size of the opening in the camera lens through which light enters. By adjusting the aperture, you can control the amount of light that reaches the camera’s sensor, ultimately affecting the depth of field and overall image quality.
To capture sharp and detailed moon images, it is generally recommended to use a smaller aperture setting, such as f/11 or higher. This helps to increase the depth of field, meaning more of your image will be in focus. A smaller aperture also helps to reduce lens aberrations, such as distortion or chromatic aberration, resulting in cleaner and sharper images.
Keep in mind that using a smaller aperture may require a longer exposure time to compensate for the reduced amount of light entering the camera. To avoid camera shake and ensure crisp images, consider using a tripod or other stabilization techniques when shooting the moon. Additionally, adjusting the ISO setting on your camera can help to achieve the correct exposure while using a smaller aperture.
In conclusion, selecting the appropriate aperture setting is crucial when it comes to capturing sharp and detailed moon images. By using a smaller aperture, you can increase the depth of field and reduce lens aberrations, resulting in cleaner and sharper images. Remember to use a tripod or other stabilization techniques to avoid camera shake, and consider adjusting the ISO setting to achieve the correct exposure. With the right settings and techniques, you’ll be able to capture stunning images of the moon that showcase its intricate details.
How to Adjust Your Shutter Speed for the Perfect Moon Photograph
When it comes to capturing the moon in all its glory, getting the right shutter speed is crucial. Adjusting your shutter speed allows you to control the amount of light that enters your camera, and this can greatly impact the quality of your moon photograph. Here are a few tips on how to adjust your shutter speed for the perfect shot:
1. Start with a slow shutter speed
When shooting the moon, it’s best to start with a slow shutter speed, such as 1/125 or 1/250 of a second. This allows more light to enter your camera, resulting in a brighter and more detailed image. You may need to use a tripod to stabilize your camera and avoid any blurriness caused by camera shake.
2. Experiment with different speeds
Once you have a baseline shutter speed, don’t be afraid to experiment with different settings to find the perfect balance. You can try increasing the shutter speed to capture more details on the moon’s surface, or decrease it for a brighter overall image. Keep in mind that faster shutter speeds will require more light, so you may need to adjust other settings like ISO and aperture accordingly.
- 3. Pay attention to the moon’s brightness
The brightness of the moon can vary depending on various factors such as its phase and the weather conditions. If the moon appears too bright in your photograph, you can try increasing the shutter speed to darken the image. On the other hand, if the moon appears too dark, you may need to decrease the shutter speed to let in more light. Keep experimenting and adjusting until you achieve the desired result.
Remember, capturing the perfect moon photograph is a combination of skill and practice. Don’t be discouraged if your first few attempts don’t turn out as expected. Keep learning, experimenting, and adjusting your camera settings, and soon enough, you’ll be taking breathtaking shots of the moon.
Tips for selecting the right lens for capturing the moon
When it comes to capturing the moon with your digital camera, selecting the right lens is essential for getting those stunning shots. Here are some tips to help you choose the perfect lens for photographing the moon:
- Long focal length: Look for a lens with a long focal length, preferably over 200mm. This is because the moon is relatively far away, and a longer focal length will allow you to capture more detail.
- Fast aperture: A lens with a wide aperture, such as f/2.8 or larger, is beneficial for capturing the moon’s brightness and enhancing the contrast between the moon and the night sky.
- Image stabilization: Since you’ll be shooting with a long focal length, having an image stabilization feature in your lens can help you avoid camera shake and capture sharper images of the moon.
- Telephoto or zoom lens: Opt for a telephoto or zoom lens, as they allow you to adjust the focal length and frame the moon in different ways. This flexibility can be useful for capturing different compositions and creating unique shots.
- Quality glass: Invest in a lens with high-quality glass elements to ensure sharpness and minimize image distortion. Look for lenses with special coatings that reduce flare and ghosting, as these issues can be more pronounced when photographing the moon due to its brightness.
By considering these factors, you can select a lens that is well-suited to capturing the moon and get the most out of your lunar photography. Remember to experiment with different settings and compositions to truly capture the beauty and mystique of the moon.
The benefits of using a tripod for moon photography
When it comes to capturing the beauty of the moon through photography, using a tripod can make a significant difference. As an aspiring photographer, I have realized the numerous benefits that come with using a tripod for moon photography.
Stability: One of the main advantages of using a tripod is the stability it provides. When shooting the moon, even the slightest camera shake can result in a blurry image. By using a tripod, I can ensure that my camera remains steady throughout the exposure, resulting in sharp and clear moon photos.
Long exposures: Moon photography often requires long exposure times to capture the intricate details on the moon’s surface. Handholding the camera for extended periods can be challenging and lead to shaky images. With a tripod, I can set longer exposure times without worrying about camera shake, allowing me to capture stunning details on the moon.
Composition: The use of a tripod enables me to carefully compose my shots. Since moon photography often involves capturing both the moon and the surrounding landscape, having a stable platform to adjust the framing and composition is crucial. A tripod allows me to position the camera exactly as I envision, ensuring that the moon is positioned perfectly in relation to the other elements in the frame.
Ease of use: While handholding a camera may offer flexibility, using a tripod for moon photography can make the overall process much simpler. By mounting my camera on a tripod, I have both hands free to adjust settings, experiment with different exposures, and focus on capturing the perfect shot without worrying about holding the camera steady.
Flexibility: Tripods come with adjustable legs and heads, providing versatility for various shooting angles and heights. This flexibility allows me to capture the moon from different perspectives, experiment with unique compositions, and ultimately create captivating moon photographs.
In conclusion, using a tripod for moon photography not only ensures stability and sharpness in images but also provides greater control over composition, ease of use, and flexibility in capturing the moon’s beauty. Incorporating a tripod into my moon photography workflow has significantly improved the quality and creativity of my shots.
Exploring the use of manual focus for capturing the moon
When it comes to capturing the beauty of the moon in your digital photographs, one of the key factors to consider is the focus. While many cameras offer an automatic focus feature, using manual focus can give you greater control over the sharpness and clarity of the moon in your images.
Manual focus allows you to adjust the focus manually, ensuring that the moon is correctly focused. This is particularly important when photographing the moon because its distance can make it challenging for cameras to accurately autofocus. By using manual focus, you can fine-tune the focus to capture the intricate details and craters on the moon’s surface.
To use manual focus for capturing the moon, start by setting your camera to manual mode. This will give you full control over the camera settings, including the focus. Next, switch your lens to manual focus mode. This allows you to manually adjust the focus ring on the lens until the moon appears sharp and clear in your viewfinder or LCD screen.
Once you have set the manual focus, consider using a tripod to stabilize your camera and reduce any shake or blur that might occur when shooting handheld. Additionally, using a remote shutter release or the camera’s self-timer can further minimize any camera shake that could potentially impact the sharpness of your moon photographs.
- Set your camera to manual mode.
- Switch your lens to manual focus mode.
- Adjust the focus ring on the lens until the moon appears sharp and clear.
- Consider using a tripod to stabilize your camera.
- Use a remote shutter release or the camera’s self-timer to minimize camera shake.
By utilizing manual focus and following these steps, you can enhance your ability to capture stunning and detailed photographs of the moon. Experiment with different manual focus settings and techniques to find the best combination that suits your camera and lens, and enjoy the process of capturing the moon’s beauty in your images.
Techniques for achieving a balanced exposure when photographing the moon
As an avid photographer, capturing the beauty of the moon is a fascinating challenge. Achieving a balanced exposure is crucial to bring out the intricate details of the moon’s surface while maintaining the surrounding dark sky. Here are some techniques I use to achieve the desired effect.
1. Use spot metering: Spot metering allows you to measure the light from a specific spot in the frame, helping you get an accurate exposure for the moon. By metering the moon itself, you can avoid overexposing the background or the rest of the sky.
2. Set a low ISO: Using a low ISO setting on your camera will help reduce noise in your moon photographs. This is particularly important when shooting in low light conditions, as noise can be more noticeable in dark areas of the image.
- 3. Adjust the aperture: Using a narrow aperture, such as f/8 or higher, will increase the depth of field and allow more of the moon’s surface to be in sharp focus. However, be mindful not to use an aperture that is too narrow, as it can introduce diffraction and decrease image sharpness.
- 4. Use a tripod: Stability is crucial when shooting the moon, as even the slightest camera shake can result in blurry images. Using a sturdy tripod will help you keep your camera steady and avoid unwanted motion blur.
- 5. Bracket your exposures: To ensure you capture all the details of the moon, consider bracketing your exposures. This involves taking multiple shots at different exposure settings to ensure you have a well-exposed image. You can later blend these images together to achieve a balanced and detailed final result.
- 6. Post-processing: Don’t forget that post-processing can be a valuable tool in achieving a balanced exposure when photographing the moon. Adjusting the brightness, contrast, and levels can help bring out the details and create a more visually appealing image.
Remember, each photography situation is unique, and it’s always a good practice to experiment with different settings to find what works best for you. These techniques should serve as a starting point to help you capture stunning images of the moon.
Common mistakes to avoid when setting up your camera for moon photography
While photographing the moon can be a rewarding experience, it is important to avoid some common mistakes that could ruin your shots. Here are a few things to keep in mind when setting up your camera for moon photography:
1. Using a high ISO
One of the most common mistakes is using a high ISO setting. While it may seem tempting to crank up the ISO to capture more light, this can result in a grainy and noisy image. Instead, opt for a lower ISO setting and use a longer exposure time to capture the details of the moon.
2. Ignoring the shutter speed
Another mistake is not paying attention to the shutter speed. A slow shutter speed can result in blurry images, especially if you are photographing the moon without a tripod. To avoid this, make sure to use a fast enough shutter speed to freeze the motion of the moon.
3. Not adjusting the white balance
White balance is often overlooked when it comes to moon photography. Incorrect white balance settings can make the moon appear too warm or too cool in your photos. It is recommended to use the “daylight” or “auto” white balance setting to ensure accurate colors in your moon shots.
4. Neglecting the focusing technique
Focusing on the moon can be tricky, especially if you are using auto-focus. Your camera may struggle to lock onto a small and bright subject like the moon. To overcome this, switch to manual focus and use the live view mode to magnify the moon on your camera’s screen. This will help you achieve a sharp and crisp focus.
5. Overexposing the image
It is important to expose the moon correctly to capture its intricate details. However, many photographers tend to overexpose the image, resulting in a bright and washed-out moon. To avoid this, use spot metering or expose for the moon directly to ensure proper exposure and capture the moon’s features.
By avoiding these common mistakes, you can set up your camera correctly for moon photography and capture stunning shots of our lunar companion.
Best digital camera settings for moon
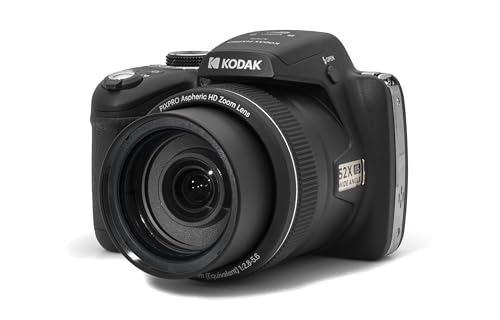
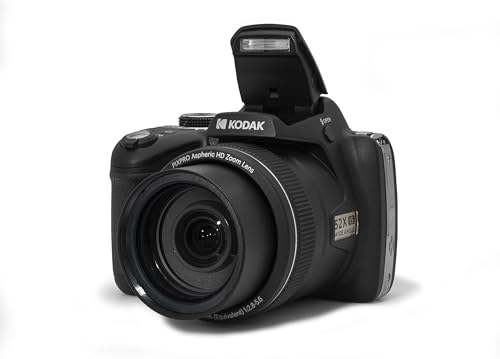
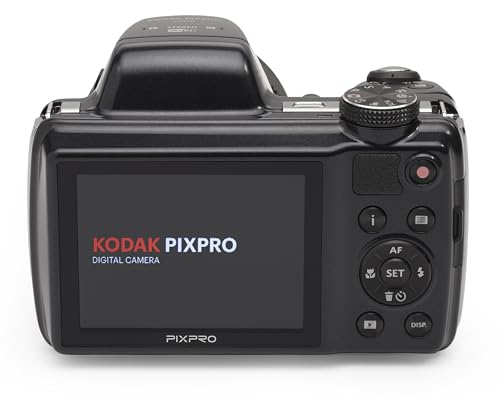
Kodak PIXPRO 16MP Digital Camera with Zoom
Features
| Part Number | 0819900013856 |
| Model | AZ528-BK |
| Warranty | 1 year manufacturer |
| Color | Black |
| Release Date | 2022-11-13T00:00:01Z |
| Language | English |


| Price history for Kodak PIXPRO 16MP Digital Camera with Zoom | |
|---|---|
|
Latest updates:
|
|
Yatao 75MP 4K Camera for Creators
Features
| Part Number | YT01 |
| Model | YT01-RM |
| Color | 4K & 75MP |


64MP 4K Vlogging Camera with Flip Screen
Features
| Model | W08 |
| Color | YL15-W08-C-Black |
| Is Adult Product |


NEEWER 79" Adjustable Camera Tripod
Features
| Part Number | 10097262 |
| Model | N284L+G0 |
| Warranty | 1 Year Manufacturer |
| Color | Black |
| Release Date | 2020-05-07T00:00:01Z |
| Size | 79 inch |


| Price history for NEEWER 79" Adjustable Camera Tripod | |
|---|---|
|
Latest updates:
|
|
SmallRig 71" Foldable Aluminum Tripod
Features
| Part Number | BS-01 |
| Model | 15551 |
| Color | black |


| Price history for SmallRig 71" Foldable Aluminum Tripod | |
|---|---|
|
Latest updates:
|
|
Question and answers:
What are the best digital camera settings for photographing the moon?
The best digital camera settings for photographing the moon include using a low ISO to reduce noise, a narrow aperture to increase depth of field, and a fast shutter speed to capture the moon’s details.
Should I use manual mode when photographing the moon?
Yes, using manual mode gives you full control over the exposure settings, which is crucial when photographing the moon. Automatic modes may not accurately expose for the moon’s brightness.
What ISO should I use for moon photography?
It is best to use a low ISO, usually around 100 or 200, for moon photography. This helps reduce the noise in the image and ensures a sharper result.
What aperture should I use for moon photography?
Using a narrow aperture, such as f/8 or higher, can help increase the depth of field and ensure that both the moon and its surrounding details are in focus.
What shutter speed should I use for moon photography?
To capture the details of the moon and prevent blurring, a fast shutter speed is recommended. Start with a shutter speed of around 1/125th of a second and adjust as needed based on the brightness of the moon.


