
 Carmen J. Moore

Security cameras are an essential part of keeping your home or business safe, but not everyone wants to invest in a dedicated DVR system to store and manage their footage. Fortunately, there are alternative solutions that allow you to set up security cameras without the need for a DVR.
In this article, we will explore different methods for setting up security cameras without a DVR, including using cloud storage options, network-attached storage (NAS) devices, and software solutions.

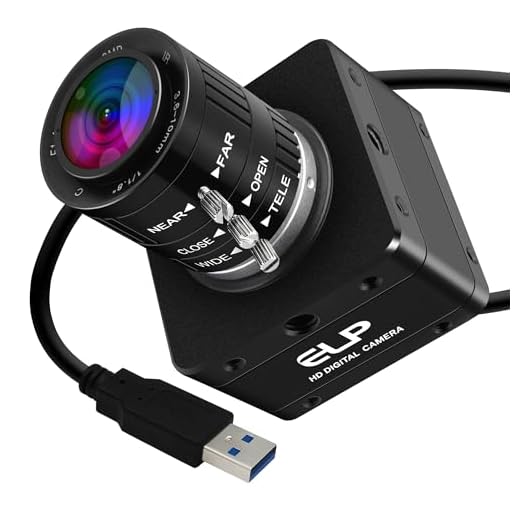

By following these steps, you can create a reliable and effective security camera system without the added expense of a DVR.
Step-by-Step Guide to Setting Up Security Camera Without DVR
Setting up a security camera without a DVR is a straightforward process that can provide you with peace of mind and added security for your home or business. Follow these steps to get your security camera system up and running:
Step 1: Choose the Right Security Camera
First, select a security camera that fits your needs and budget. Make sure it is compatible with the type of monitoring system you plan to use, whether it’s a cloud-based service or a standalone app.
Step 2: Install the Camera
Mount the camera in the desired location, ensuring it has a clear view of the area you want to monitor. Connect the camera to a power source and follow the manufacturer’s instructions for setting it up.
Step 3: Connect to Wi-Fi
Most security cameras without a DVR rely on a Wi-Fi connection for remote monitoring. Follow the camera’s instructions to connect it to your Wi-Fi network and set up any necessary passwords or security settings.
Step 4: Download the App
Download the corresponding app for your security camera onto your smartphone or tablet. This app will allow you to access your camera’s live feed, receive alerts, and adjust settings remotely.
Step 5: Set Up Monitoring
Once your camera is installed and connected, configure the monitoring settings through the app. This may include setting up motion detection, adjusting camera angles, and scheduling recording times.
Step 6: Test the System
Before relying on your security camera system, test it to ensure everything is working properly. Check the live feed, review recordings, and verify that alerts are being sent as expected.
Step 7: Regular Maintenance
Keep your security camera system in good working order by performing regular maintenance, such as cleaning the lens, updating software, and checking for any physical damage.
By following these steps, you can set up a security camera system without a DVR and enhance the security of your home or business.
Choose the Right Camera System
Before setting up your security camera without a DVR, it’s crucial to choose the right camera system for your needs. Here are a few factors to consider when selecting the best camera system:
Resolution
Opt for a camera system with high resolution to capture clear images and videos. Higher resolution cameras provide better quality footage, making it easier to identify faces and details.
Wireless vs. Wired
Decide whether you want a wireless or wired camera system. Wireless cameras offer easy installation and flexibility, while wired cameras provide a more stable connection and don’t rely on Wi-Fi.
| Wireless Cameras | Easy installation | Flexibility |
| Wired Cameras | Stable connection | No Wi-Fi dependency |
Select a Suitable Location
Choosing the right location for your security camera is crucial for effective surveillance. Consider placing the camera at a high vantage point to get a wider view of the area. Make sure the camera is positioned to cover entry points such as doors and windows.
Additionally, avoid placing the camera in direct sunlight or areas where there may be obstructions like trees or bushes. Ensure the camera is installed securely to prevent tampering or theft.
Install the Security Camera
Before installing the security camera, make sure to choose a strategic location that provides a clear view of the area you want to monitor. Ensure that the camera is positioned high enough to prevent tampering.
Steps:
- Mount the camera securely using the provided mounting hardware.
- Connect the camera to a power source using the included power adapter.
- Adjust the camera angle to ensure optimal coverage of the desired area.
- Test the camera to make sure it is functioning properly and capturing clear footage.
Connect the Camera to Wi-Fi
Once the security camera is powered on and ready to be set up, you will need to connect it to your Wi-Fi network for remote access and monitoring. Follow these steps to connect the camera to Wi-Fi:
- Launch the camera’s mobile app on your smartphone or tablet.
- Locate the Wi-Fi settings or network setup option within the app.
- Select your Wi-Fi network from the list of available networks.
- Enter your Wi-Fi password when prompted.
- Wait for the camera to establish a connection to your Wi-Fi network.
- Once the connection is successful, you can now access the camera remotely using the app.
Make sure to place the camera within the range of your Wi-Fi signal for a stable connection. You may need to repeat the process if the camera fails to connect to the network initially.
Set Up Remote Viewing
One of the key features of setting up a security camera without a DVR is the ability to view the footage remotely. To do this, you will need to connect the camera to your home network and set up port forwarding on your router.
First, connect the camera to your network using an Ethernet cable or Wi-Fi. Once the camera is connected, log in to your router’s settings and find the port forwarding section. Here, you will need to create a new port forwarding rule for the camera’s IP address and the specific port used for remote viewing (usually port 80 or 8080).
After setting up port forwarding, you can access the camera’s feed remotely by entering your public IP address and the port number in a web browser. You may also need to create a DDNS (Dynamic Domain Name System) account to access the camera using a domain name instead of an IP address.
By following these steps, you can easily set up remote viewing for your security camera without the need for a DVR.
Ensure Proper Security Measures
When setting up security cameras without a DVR, it is crucial to ensure proper security measures are in place to protect your footage and maintain the integrity of your surveillance system.
1. Secure Wireless Connection
Make sure your wireless network is secure by using a strong password and encryption protocols to prevent unauthorized access to your camera feeds.
2. Regularly Update Firmware
Keep your cameras’ firmware up to date to patch any security vulnerabilities and ensure optimal performance. Check for updates regularly and install them promptly.
By following these security measures, you can enhance the protection of your security camera system and safeguard your property effectively.



I recently set up a security camera without a DVR using an NAS device. The setup was pretty straightforward! I followed the steps in this article, and I really appreciate having my footage stored locally without monthly fees. Just a heads-up, make sure your NAS has enough storage space because video files can add up quickly. Also, I found that using a wired connection was more reliable than Wi-Fi for live streaming.
What kind of cloud storage options are typically compatible with security cameras? I'm looking for something that won't break the bank.
There are a few budget-friendly cloud storage options like Google Drive and Dropbox that work well with many cameras. It really depends on the camera brand, though, so always check compatibility.