
 Carmen J. Moore

When it comes to monitoring your property or keeping an eye on wildlife, a trail camera can be a valuable tool. However, setting up a trail camera for security purposes requires careful planning and consideration. By strategically placing your camera and adjusting its settings, you can enhance the security of your home or property.
Choose the Right Location


Before setting up your trail camera, it’s essential to choose the right location. Look for areas with high foot traffic or points of entry, such as gates or driveways. Make sure the camera is well-hidden to avoid detection by potential intruders.
Adjust the Settings
Once you’ve chosen the perfect spot for your trail camera, it’s time to adjust the settings. Configure the camera to capture high-quality images or videos, and set up motion detection to ensure that it records any movement in its range. You can also schedule the camera to only record during specific times of day or night.
Benefits of Using Trail Camera for Security
Trail cameras offer a range of benefits when used for security purposes. Here are some key advantages:
- 24/7 Surveillance: Trail cameras can capture footage round the clock, providing continuous surveillance of your property.
- Remote Monitoring: With modern trail cameras equipped with Wi-Fi or cellular connectivity, you can monitor your property remotely from anywhere.
- Motion Detection: Trail cameras with motion sensors can detect any movement and trigger recording, alerting you to potential threats.
- Evidence Collection: In the event of a security breach or crime, trail camera footage can serve as valuable evidence for law enforcement.
- Cost-Effective Security Solution: Trail cameras are a cost-effective way to enhance security without the need for expensive surveillance systems.
- Easy Installation: Setting up a trail camera for security is quick and easy, allowing you to deploy multiple cameras to cover different areas of your property.
Overall, trail cameras provide a reliable and versatile security solution that can help protect your property and assets effectively.
Choosing the Right Location for Your Trail Camera
When setting up a trail camera for security purposes, choosing the right location is crucial. Here are some tips to help you select the best spot:
1. Strategic Placement
Place your trail camera in a strategic location that offers a clear view of the area you want to monitor. Avoid placing it too high or too low, as this can affect the camera’s field of view.
2. Concealment
Make sure to camouflage your trail camera to blend in with its surroundings. Use natural elements like branches or leaves to conceal the camera and make it less noticeable to potential intruders.
By choosing the right location for your trail camera, you can maximize its effectiveness in capturing any suspicious activity on your property.
Setting Up Your Trail Camera: Step-by-Step Guide
Setting up a trail camera for security is a great way to monitor your property and keep an eye on any potential threats. Follow these steps to ensure your trail camera is properly set up:
| Step 1: | Choose a strategic location for your trail camera where it can capture a wide area of your property. |
| Step 2: | Mount the camera securely on a tree or post using the provided straps or mounts. |
| Step 3: | Adjust the angle and height of the camera to ensure optimal coverage of the area you want to monitor. |
| Step 4: | Insert fresh batteries into the camera and a memory card for storing images and videos. |
| Step 5: | Set up the camera settings, including resolution, sensitivity, and trigger interval, to meet your security needs. |
| Step 6: | Test the camera by walking in front of it to ensure it captures images or videos correctly. |
| Step 7: | Secure the camera with a lock or camouflage it to prevent theft or tampering. |
| Step 8: | Regularly check the camera for battery life and memory card capacity to ensure continuous monitoring. |
Adjusting Camera Settings for Maximum Security
When setting up a trail camera for security purposes, it’s important to adjust the camera settings to ensure you capture clear and useful footage. Here are some key settings to consider:
- Resolution: Set the camera to the highest resolution possible to capture detailed images and videos.
- Trigger Speed: Adjust the trigger speed to ensure the camera captures fast-moving subjects quickly.
- Sensitivity: Set the camera’s sensitivity to detect even the slightest movement and avoid missing any important events.
- Time Lapse: Consider setting up a time-lapse feature to capture images at set intervals, providing a comprehensive view of the area.
- Night Vision: If monitoring at night, ensure the camera has a reliable night vision feature to capture clear footage in low light conditions.
By adjusting these settings, you can maximize the security benefits of your trail camera and ensure you capture any suspicious activity effectively.
Monitoring and Accessing Footage from Your Trail Camera
Once you have set up your trail camera for security, it’s important to regularly monitor and access the footage it captures. Here are some tips on how to effectively monitor and access the footage:
Regular Check-ins
Make it a habit to check the footage from your trail camera regularly. Set a schedule to review the footage at least once a week to stay up-to-date on any activity in the area you are monitoring.
Remote Access
Consider using a trail camera that offers remote access to the footage. This way, you can check the footage from your smartphone or computer without having to physically visit the camera location. Ensure that your trail camera is connected to a reliable network for seamless remote access.
| Tips for Monitoring and Accessing Footage: |
|---|
| Set a regular schedule for checking the footage. |
| Utilize trail cameras with remote access capabilities. |
| Ensure a reliable network connection for seamless access. |
Maintaining Your Trail Camera for Longevity and Efficiency
Proper maintenance of your trail camera is essential to ensure its longevity and efficiency. Here are some tips to help you keep your camera in top condition:
| Regularly Check Batteries: | Make sure to regularly check the batteries in your trail camera and replace them as needed. Dead batteries can cause your camera to stop functioning, so it’s important to keep them fresh. |
| Clean the Lens: | Regularly clean the lens of your trail camera to ensure clear and crisp images. Use a soft cloth or lens cleaning solution to remove any dirt, dust, or debris that may accumulate on the lens. |
| Protect from the Elements: | Ensure that your trail camera is properly protected from the elements, especially rain and extreme temperatures. Use a weatherproof case or housing to shield your camera from damage. |
| Securely Mount Your Camera: | Securely mount your trail camera in a location that provides a clear view of the area you want to monitor. Make sure the mounting bracket is stable and secure to prevent the camera from falling or shifting. |
| Update Firmware: | Check for firmware updates for your trail camera and make sure to install them to keep your camera operating smoothly and efficiently. Firmware updates often include improvements and bug fixes. |
Enhancing Security Measures with Additional Accessories
When setting up a trail camera for security purposes, there are several additional accessories you can use to enhance your security measures:
- Security box: A security box can protect your trail camera from theft or damage. It is a sturdy metal box that encases the camera and can be locked to prevent unauthorized access.
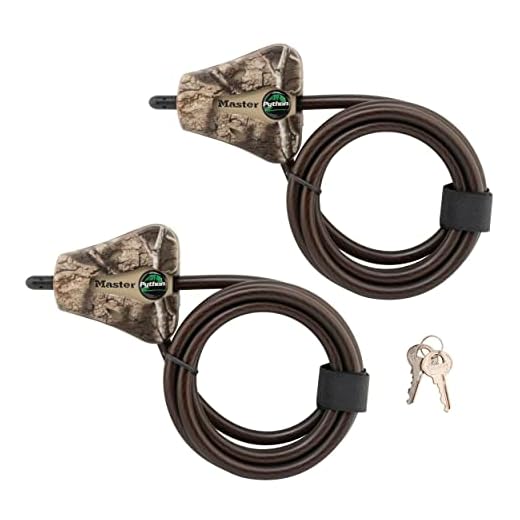
- Python cable lock: A python cable lock can be used to secure the camera to a tree or other sturdy object, making it more difficult for thieves to steal the camera.
- Solar panel: A solar panel can provide continuous power to your trail camera, ensuring it remains operational for extended periods without the need for battery changes.
- Wireless transmission module: A wireless transmission module can send images and videos captured by the trail camera to your smartphone or computer, allowing you to monitor the area in real-time.
By using these additional accessories in conjunction with your trail camera, you can significantly enhance the security measures in place and better protect your property or assets.



I set up my trail camera last month and found that placing it about 5-6 feet high worked great for capturing activity without being easily spotted. I also used some branches to camouflage it. So far, I've caught a few raccoons and even a deer! Just make sure it has a clear view of the area.
Thanks for sharing your experience! A height of 5-6 feet is generally recommended to balance visibility and concealment. Camouflaging is a great tip too!
I don’t think trail cameras are as reliable as full security systems. They lack the live monitoring feature.
Can you explain more about how remote monitoring works? Do I need to have a special app for that?
How do trail cameras compare to traditional security cameras? Are they really effective for home security?