
 Carmen J. Moore
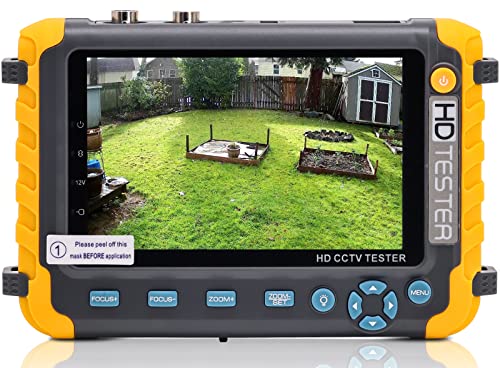
Security cameras are an essential component of any security system, providing surveillance and monitoring capabilities to help keep your property safe. However, before you install a security camera, it’s important to pre-test it to ensure that it functions properly and meets your security needs.
Pre-testing a security camera involves checking its functionality, image quality, and positioning to optimize its performance. By following a few simple steps, you can ensure that your security camera is ready to be installed and will provide reliable surveillance coverage.
From checking the camera’s power supply to adjusting its viewing angle, pre-testing can help you identify any potential issues before installation, saving you time and ensuring that your security system is operating at its best. In this article, we will provide you with a step-by-step guide on how to pre-test your security camera effectively and efficiently.
Importance of Pre Testing Security Camera
Pre testing security cameras before installation is crucial to ensure their proper functioning and effectiveness. Here are some reasons why pre testing is important:


1. Identify Issues Early
By pre testing security cameras, you can identify any hardware or software issues early on. This allows you to address and resolve these issues before the cameras are installed, saving time and preventing potential problems in the future.
2. Ensure Proper Placement
Pre testing security cameras helps you determine the best placement for optimal coverage and visibility. By testing the cameras before installation, you can make adjustments to their placement to ensure they capture the desired areas effectively.
- Test the camera angles to avoid blind spots.
- Check for any obstructions that may affect the camera’s view.
Overall, pre testing security cameras is a crucial step in ensuring the reliability and performance of your surveillance system.
Check Camera Functionality
Before installing the security cameras, it is crucial to check their functionality to ensure they are working properly. Follow these steps to pre-test the cameras:
- Connect the camera to a power source and make sure it turns on.
- Adjust the camera angle and focus to ensure proper coverage of the area.
- Test the camera’s night vision capabilities in low-light conditions.
- Check the camera’s motion detection feature by walking in front of it.
- Verify the camera’s recording and storage capabilities by reviewing test footage.
Verify Power Supply
Before installing the security camera, it is crucial to verify the power supply to ensure that the camera will receive the necessary power to function properly. Follow these steps to verify the power supply:
Step 1: Check Power Source
Ensure that the power source where you plan to connect the security camera is working and providing the correct voltage. Use a voltage tester to check the power output and make sure it matches the camera’s requirements.
Step 2: Test Camera with Power Supply
Connect the security camera to the power supply and observe if it turns on and functions correctly. Check for any signs of flickering lights or malfunctioning components. If everything looks good, the power supply is verified and ready for installation.
| Power Supply Verification | Actions |
|---|---|
| Check power source voltage | Use voltage tester |
| Test camera functionality | Observe for flickering lights |
Test Video Quality
Before installing your security camera, it’s essential to test the video quality to ensure that you’ll capture clear footage. Here are some steps to help you test the video quality:
- Connect the camera to a monitor or a computer to view the live feed.
- Check the resolution of the video to ensure it meets your requirements.
- Observe the clarity of the image, especially in low light conditions.
- Test the motion detection feature to see how quickly the camera detects movement.
Additional Tips:
- Adjust the camera settings, such as brightness and contrast, to improve video quality.
- Consider installing the camera in different locations to test video quality in various settings.
Ensure Proper Connectivity
Before installing the security camera, it is crucial to ensure proper connectivity to avoid any issues during the installation process. Here are some steps to pre-test the connectivity:
| 1. Check Ethernet Connection | Ensure that the Ethernet cable is securely connected to both the camera and the power source. Test the connection by checking if the camera is receiving power. |
| 2. Test Wi-Fi Connection | If the camera supports Wi-Fi connectivity, test the Wi-Fi signal strength in the location where the camera will be installed. Make sure the camera can connect to the Wi-Fi network without any issues. |
| 3. Verify Remote Access | If the camera allows remote access, test the connection by accessing the camera feed from a different device or location. Ensure that the remote access is secure and working properly. |
Adjust Camera Angle
Before installing your security camera, it’s important to adjust the camera angle to ensure optimal coverage and visibility. Follow these steps to properly adjust the camera angle:
1. Mount the Camera
Mount the camera at the desired location, making sure it is securely fastened to the surface. Use a level to ensure the camera is straight and aligned properly.
2. Adjust the Tilt and Pan
| Tilt: Use the camera’s tilt mechanism to adjust the vertical angle of the camera. Tilt the camera up or down to capture the desired view. |
| Pan: Use the camera’s pan mechanism to adjust the horizontal angle of the camera. Pan the camera left or right to cover the desired area. |
By adjusting the tilt and pan of the camera, you can ensure that the camera captures the necessary areas and minimizes blind spots. Test the camera angle by checking the live feed on your monitoring device to confirm the coverage before finalizing the installation.
Confirm Recording Capability
Before installing the security camera, it is crucial to ensure that the recording capability is working properly. Follow these steps to pre-test the recording feature:
1. Check the Storage Device
Make sure the storage device (such as an SD card or cloud storage) is properly inserted and recognized by the camera. Test the recording function by capturing a short video clip and checking if it saves correctly.
2. Verify Remote Access
Ensure that you can access the live feed and recorded footage remotely via the camera’s app or software. Test the remote playback feature to confirm that you can view and download recorded videos from anywhere.



I don’t think pre-testing is that necessary. Most cameras work fine right out of the box.
I disagree. Even a small issue can cause major problems later. It's better to check ahead!
What specific tools do I need to check the camera's power supply effectively? Any recommendations?
I’m considering a few different cameras. How do they compare in terms of night vision capabilities? Any suggestions based on experience?
I pre-tested my camera using the steps mentioned, and it saved me a lot of hassle later. Definitely recommend doing it!