
 Carmen J. Moore

Are you looking to enhance the security of your space by installing a security camera on the drop ceiling? Drop ceilings, also known as suspended ceilings, can be a convenient and discreet location for mounting security cameras. By positioning the camera above eye level, you can capture a wide field of view while keeping the camera out of reach.
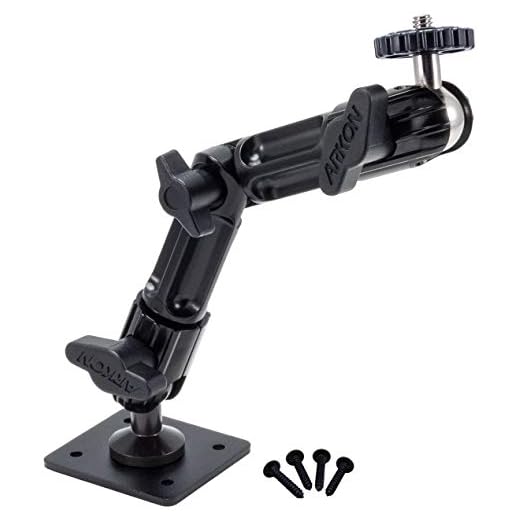


In this guide, we will walk you through the process of mounting a security camera on a drop ceiling, providing you with step-by-step instructions to ensure a successful installation.
From selecting the right camera to securing it in place, we will cover all the essential steps to help you set up your security system effectively. Whether you are a DIY enthusiast or a business owner looking to improve security, this guide will equip you with the knowledge needed to mount a security camera on a drop ceiling with confidence.
Step-by-step guide to mounting security camera on drop ceiling
Mounting a security camera on a drop ceiling is a great way to discreetly monitor your space. Follow these steps to securely install your camera:
Step 1: Gather your tools
Before you begin, make sure you have all the necessary tools handy. You will need a ladder, a power drill, screws, a screwdriver, and the security camera itself.
Step 2: Choose the mounting location
Determine the best location to mount your security camera on the drop ceiling. Make sure it provides a clear view of the area you want to monitor.
| Step 3: Mark the drilling spots | Use a pencil to mark the spots on the drop ceiling where you will drill holes for mounting the camera. |
| Step 4: Drill the holes | Using the power drill, carefully drill holes in the marked spots on the drop ceiling. |
| Step 5: Mount the camera | Attach the camera to the drop ceiling using screws and a screwdriver. Make sure it is securely in place. |
| Step 6: Connect the camera | Connect the camera to a power source and your monitoring system. Test the camera to ensure it is functioning properly. |
Choose the right location for your security camera
When mounting a security camera in a drop ceiling, it is crucial to choose the right location to ensure optimal coverage and functionality. Here are some tips to help you select the best spot:
| 1. Consider the area to be monitored | Identify the specific areas you want to monitor and choose a location that provides a clear view of those areas. |
| 2. Avoid obstructions | Avoid mounting the camera near any obstructions such as light fixtures, vents, or ceiling fans that could obstruct the camera’s view. |
| 3. Ensure adequate lighting | Choose a location with adequate lighting to ensure clear and sharp images captured by the camera. |
| 4. Concealment | If you want to discreetly monitor an area, consider mounting the camera in a less conspicuous location to avoid detection. |
| 5. Accessibility | Make sure the camera is easily accessible for maintenance and adjustments, but not easily accessible for tampering or vandalism. |
Prepare the necessary tools and materials
Before you start mounting your security camera on a drop ceiling, make sure you have all the necessary tools and materials ready. Here is a list of items you will need:
- Security camera
- Mounting bracket
- Drop ceiling clips or hanger wire
- Power drill
- Screwdriver
- Tape measure
- Pencil
- Stud finder
- Cable management clips
- Screws and anchors
- Ladder or step stool
Turn off the power supply
Before you start mounting your security camera in the drop ceiling, it’s crucial to turn off the power supply to the area where you’ll be working. This will ensure your safety and prevent any electrical accidents. Locate the breaker switch that controls the power to the ceiling lights or outlets in the vicinity and switch it off.
Install the mounting bracket on the drop ceiling
Before mounting the security camera on the drop ceiling, you need to install the mounting bracket securely. Follow these steps:
- Locate the ideal spot: Decide on the best location on the drop ceiling to mount the camera for optimal coverage.
- Mark the spots: Use a pencil to mark the spots where you will attach the mounting bracket.
- Attach the bracket: Securely attach the mounting bracket to the drop ceiling using the appropriate screws or anchors.
- Adjust the angle: Make sure the bracket is level and adjust the angle if needed for the camera to capture the desired area.
Once the mounting bracket is securely in place, you can proceed with mounting the security camera onto it according to the manufacturer’s instructions.
Attach the security camera to the mounting bracket
Step 1: Position the security camera on the mounting bracket so that the screw holes align.
Step 2: Insert screws through the holes in the camera and bracket, then tighten them securely using a screwdriver.
Step 3: Ensure the camera is securely attached to the bracket and adjust its position if needed for optimal viewing angles.
Connect the camera to the power source and network
Once the security camera is mounted on the drop ceiling, it’s time to connect it to the power source and network. Follow these steps:
- Locate a nearby power outlet and plug in the camera’s power adapter.
- Connect the power adapter to the camera using the provided cable.
- If the camera is a PoE (Power over Ethernet) camera, connect an Ethernet cable from the camera to a PoE switch or injector.
- Ensure the network cable is securely connected to the camera and the network device.
- Power on the camera and wait for it to boot up.
- Check the camera’s documentation for specific setup instructions to configure it on your network.
Once the camera is connected to power and network, you can access and configure it for monitoring your desired area. Be sure to test the camera’s functionality before finalizing the installation.
Test the security camera to ensure proper functionality
Once you have successfully mounted the security camera on the drop ceiling, it is crucial to test it to ensure that it is functioning properly. Follow these steps to test the camera:
1. Power on the camera
Ensure that the camera is properly connected to a power source and turned on. Check for any indicator lights to confirm that the camera is receiving power.
2. Check the camera feed
Access the camera feed on your monitoring device or computer to see if the camera is capturing the intended area. Make sure the image quality is clear and that there are no obstructions blocking the view.
| Camera Movement | Test the camera’s movement capabilities by adjusting its angle and direction to ensure it covers the desired area. |
| Recording Test | Initiate a recording test to confirm that the camera is properly recording and storing footage. |



I just mounted a security camera in my drop ceiling last weekend. The process was pretty straightforward as the article described. I used a power drill and followed all the steps carefully. I opted for a PoE camera, which made the wiring easier since I didn't have to find a nearby outlet. Just a tip: double-check the camera angle before finalizing the mount to ensure it's capturing the right area — I had to adjust mine a couple of times.
Thanks for sharing your experience! It's great to hear that the installation went smoothly. Adjusting the angle beforehand can really save time later.
I’m planning to mount a camera in my drop ceiling but I'm not sure about the right height. How high should I position it for the best coverage?