
 Carmen J. Moore

When it comes to securing your property, installing security cameras is a crucial step. However, mounting these cameras on aluminum soffit can be a bit tricky if you don’t know the right techniques. Aluminum soffit is a popular choice for many homeowners due to its durability and low maintenance, but it requires special considerations when it comes to installing security cameras.
In this guide, we will walk you through the step-by-step process of installing security cameras on aluminum soffit. From choosing the right type of cameras to ensuring a secure and stable mount, we will cover everything you need to know to effectively protect your home or business.
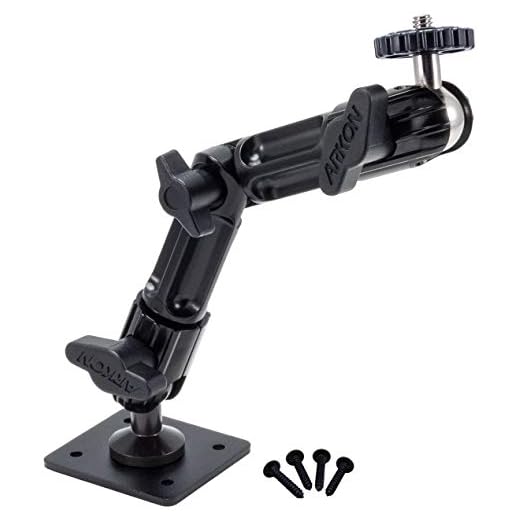

By following our instructions and tips, you can rest assured that your security cameras will be properly installed on your aluminum soffit, providing you with peace of mind knowing that your property is well-protected. Let’s get started!
Step-by-step guide for installing security cameras on aluminum soffit
Installing security cameras on aluminum soffit can be a great way to enhance your home’s security. Follow these steps to properly install your security cameras:
| Step 1: | Choose the location: Select the best location on your aluminum soffit to mount the security camera. Make sure it has a clear view of the area you want to monitor. |
| Step 2: | Drill pilot holes: Use a drill to create pilot holes in the aluminum soffit where you plan to mount the camera. Make sure the holes are aligned properly. |
| Step 3: | Mount the camera: Attach the camera mount to the aluminum soffit using appropriate screws. Ensure that the camera is securely mounted and angled correctly. |
| Step 4: | Route cables: Carefully route the camera cables along the aluminum soffit and secure them in place using cable clips or ties. |
| Step 5: | Connect the camera: Connect the camera to the power source and your recording device or monitoring system. Test the camera to ensure it is functioning properly. |
| Step 6: | Adjust and test: Adjust the camera angle if needed and test its functionality from different angles to ensure optimal coverage. |
Gather necessary tools and materials
Before you begin installing security cameras on aluminum soffit, make sure you have all the necessary tools and materials on hand. Here is a list of items you will need:
- Security cameras
- Aluminum soffit mount
- Drill
- Screws
- Screwdriver
- Measuring tape
- Pencil
- Wire cutters
- Power source
Make sure to check the manufacturer’s instructions for any specific tools or materials required for your particular security camera model.
Choose the right location for camera placement
Before installing security cameras on aluminum soffit, it is important to carefully choose the right location for camera placement. Here are some tips to help you select the best spots:
- Identify high-risk areas: Determine the areas around your property that are most vulnerable to break-ins or security threats. These could include entry points like doors and windows, dark corners, or blind spots.
- Consider camera coverage: Make sure to position the cameras in a way that provides optimal coverage of the targeted areas. Aim for wide angles and clear views to capture any potential threats.
- Avoid obstructions: Ensure that the cameras are not obstructed by any objects that could block their view, such as tree branches, walls, or other structures. This will help maximize the effectiveness of the surveillance system.
- Protect cameras from weather elements: Since the cameras will be mounted on aluminum soffit, be mindful of the weather conditions in your area. Choose locations that are sheltered from rain, snow, and direct sunlight to prevent damage and ensure clear footage.
Mark the drilling points on the soffit
Before drilling any holes, carefully plan the placement of your security cameras on the aluminum soffit. Use a measuring tape and a pencil to mark the precise locations where you want to install the cameras. Make sure the locations provide optimal coverage of the desired area while ensuring the cables can reach the power source and recording device.
Drill holes and attach mounting brackets
Before installing security cameras on aluminum soffit, you need to drill holes and attach mounting brackets. Here’s how to do it:
- Mark the locations where you want to install the security cameras on the aluminum soffit.
- Use a drill with a metal drill bit to create holes in the marked locations. Make sure the holes are the right size for the mounting screws.
- Attach the mounting brackets to the aluminum soffit using the screws provided. Make sure the brackets are securely fastened to the soffit.
- Once the mounting brackets are in place, you can then attach the security cameras to the brackets according to the manufacturer’s instructions.
Install the security camera on the mounting brackets
Once the mounting brackets are securely attached to the aluminum soffit, it’s time to install the security camera. Follow these steps:
- Attach the security camera to the mounting brackets using the provided screws and tools.
- Ensure that the camera is securely mounted and facing the desired direction for optimal coverage.
- Adjust the camera angle as needed to capture the desired area and tighten any screws to secure the position.
Once the security camera is properly installed on the mounting brackets, you can proceed with connecting it to the power source and configuring any necessary settings for monitoring and recording.
Connect the camera to power and set up monitoring system
Once the security camera is securely mounted on the aluminum soffit, the next step is to connect it to power and set up the monitoring system. Follow these steps:
1. Connect the camera to power:
- Locate a nearby power outlet or use a power extension cord to reach the camera.
- Plug in the power adapter of the camera to the power source.
- Ensure that the camera is receiving power and that the LED lights indicate it is functioning.
2. Set up the monitoring system:
- Install the necessary software or app on your computer or smartphone to access the camera feed.
- Follow the manufacturer’s instructions to connect the camera to the monitoring system.
- Configure the camera settings, such as motion detection, recording schedules, and notifications.
- Test the monitoring system to ensure proper functionality and adjust settings as needed.



I recently installed cameras on my aluminum soffit following a similar guide. It was tricky but manageable. I suggest using a level to make sure the cameras are straight before you tighten the screws. Also, double-check that the cables are secured well to avoid them hanging loose.
I think it's more complicated than just following steps in a guide. Each house is different, and you might run into unexpected issues.
How does mounting on aluminum soffit compare to mounting on wood? Are there more challenges with aluminum?