
 Carmen J. Moore

Are you looking to enhance the security of your home or office with a Cox security camera? Installing a security camera system can provide peace of mind and added protection for your property. However, the installation process may seem daunting at first glance. In this guide, we’ll walk you through the steps to install your Cox security camera system efficiently and effectively.
Before you begin the installation process, it’s essential to gather all the necessary equipment and familiarize yourself with the instructions provided by Cox. Make sure you have the camera, mounting hardware, cables, and any tools required for installation. Additionally, ensure that you have a stable internet connection and a power source nearby for the camera.


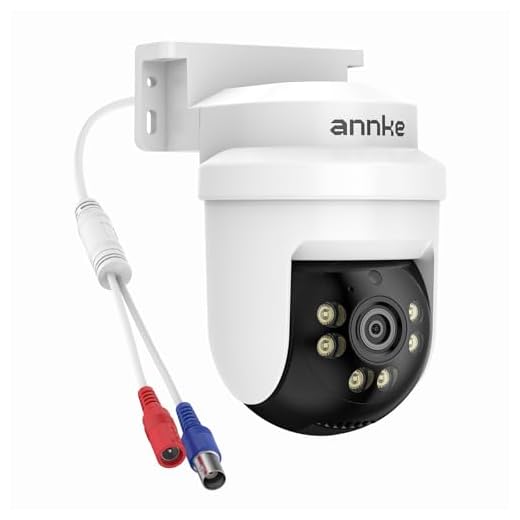
Once you have everything ready, it’s time to start the installation process. Begin by determining the ideal location for mounting the camera. Consider factors such as the field of view, accessibility, and potential obstructions. Once you’ve chosen the location, use the mounting hardware to secure the camera in place. Make sure the camera is positioned correctly to capture the desired area and adjust as needed.
Step-by-Step Guide to Installing Cox Security Camera
Installing a Cox security camera is a straightforward process that can help enhance the security of your home or business. Follow these steps to ensure a successful installation:
- Choose a suitable location for your Cox security camera that provides a clear view of the area you want to monitor.
- Ensure that the camera is within range of your Wi-Fi network to ensure a stable connection.
- Mount the camera securely using the included mounting hardware and adjust the angle for optimal coverage.
- Connect the camera to a power source using the provided power adapter.
- Download the Cox Homelife app on your smartphone and follow the on-screen instructions to set up the camera.
- Once the camera is set up, you can access live video feeds and receive alerts on your smartphone whenever motion is detected.
- Make sure to test the camera regularly to ensure it is functioning properly and adjust settings as needed.
By following these steps, you can easily install and set up your Cox security camera to keep your property safe and secure.
Prepare Your Cox Security Camera
Before you start the installation process for your Cox security camera, it is important to properly prepare all the necessary equipment and tools. Follow these steps to ensure a smooth setup:
| 1. | Unbox your Cox security camera and check for all the components including the camera, mounting hardware, power adapter, and cables. |
| 2. | Find a suitable location to install the camera that provides a clear view of the area you want to monitor. |
| 3. | Ensure that the camera is compatible with your Wi-Fi network and that you have the necessary credentials to connect it. |
| 4. | Charge the camera if it has a rechargeable battery or connect it to a power source using the provided power adapter. |
| 5. | Download the Cox security camera app on your smartphone or tablet to complete the setup process. |
Choose the Right Location for Installation
When installing your Cox security camera, it is crucial to choose the right location to ensure optimal coverage and functionality. Here are some tips to help you select the best spot:
1. Survey the Area
Start by surveying the area where you want to install the camera. Look for areas with high traffic, potential blind spots, and vulnerable entry points.
2. Consider Camera Range
Take into account the camera’s range and field of view when choosing a location. Make sure it can capture the desired area effectively without any obstructions.
Pro tip: Install the camera at a height of 9-10 feet for optimal coverage and to prevent tampering.
Mounting the Cox Security Camera
Once you have chosen the ideal location for your Cox security camera, it’s time to mount it. Follow these steps to securely install your camera:
- Use the mounting template provided with your camera to mark the holes for drilling.
- Drill the necessary holes using a drill bit suitable for the surface you are mounting the camera on.
- Insert wall anchors into the drilled holes to provide extra support.
- Securely attach the mounting bracket to the wall using screws or bolts.
- Attach the Cox security camera to the mounting bracket, ensuring it is securely in place.
- Adjust the camera angle to capture the desired field of view.
Pro Tip:
Make sure the camera is mounted at a height and angle that allows for optimal coverage of the area you want to monitor.
Connecting Power to the Camera
Before installing your Cox security camera, make sure to connect it to a power source. Locate the power adapter that comes with your camera and plug it into an electrical outlet. Then, connect the other end of the power adapter to the camera’s power input port. Make sure the connection is secure and that the power adapter is providing the necessary power to the camera.
Setting Up the Camera’s Wi-Fi Connection
Before you can start using your Cox security camera, you need to connect it to your Wi-Fi network. Follow these steps to set up the camera’s Wi-Fi connection:
1. Power on the Camera
Plug the camera into a power source and wait for it to power on. Make sure the camera’s LED lights are blinking, indicating that it is ready for setup.
2. Download the App
Download the Cox security camera app on your smartphone or tablet from the App Store or Google Play Store. Follow the on-screen instructions to create an account and log in.
3. Connect to Wi-Fi
Once the app is installed, open it and follow the prompts to connect the camera to your Wi-Fi network. Make sure to enter the correct Wi-Fi password to establish a secure connection.
After completing these steps, your Cox security camera should be successfully connected to your Wi-Fi network, allowing you to monitor your home or office remotely.
Downloading the Cox Security Camera App
To install and set up your Cox security camera system, you will need to download the Cox Security Camera app on your mobile device.
- Open the App Store on your iOS device or Google Play Store on your Android device.
- Search for “Cox Security Camera” in the search bar.
- Locate the app developed by Cox Communications, Inc. and tap on the “Download” or “Install” button.
- Wait for the app to download and install on your device.
- Once the app is installed, open it and follow the on-screen instructions to set up your security camera system.
Downloading the Cox Security Camera app is an essential step to access and control your security cameras remotely.
Pairing the Camera with the App
Once you have installed the Cox security camera at the desired location, the next step is to pair it with the Cox Homelife mobile app for remote access and control.
Follow these steps to pair the camera with the app:
- Open the Cox Homelife app on your smartphone or tablet.
- Log in to your account using your credentials.
- On the app’s dashboard, navigate to the “Add Device” or “Pair Camera” option.
- Follow the on-screen instructions to scan the QR code or enter the camera’s unique identification number.
- Once the camera is successfully paired, you can now access live video feeds, receive notifications, and control the camera remotely through the app.
Testing the Camera’s Functionality
Once you have successfully installed your Cox security camera, it is important to test its functionality to ensure that it is working properly. Follow these steps to test the camera:
- Check the camera’s connection to the power source to ensure it is receiving power.
- Access the camera’s live feed on your mobile device or computer to see if the video is clear and the camera is capturing the intended area.
- Test the camera’s motion detection feature by moving in front of the camera and verifying that it detects and records motion.
- Check the camera’s night vision capabilities by testing it in low-light conditions to see if the video is still clear.
- Ensure that the camera’s alert notifications are working by intentionally triggering a motion alert and verifying that you receive the notification.
By following these testing steps, you can ensure that your Cox security camera is functioning properly and providing you with the security and peace of mind you need.
Troubleshooting Common Installation Issues
Installing a Cox security camera can sometimes be challenging due to various factors. Here are some common installation issues and troubleshooting tips:
1. Poor Wi-Fi Signal
If your security camera is not connecting to the Wi-Fi network, check the signal strength in the installation area. You may need to move the camera closer to the router or install a Wi-Fi extender for better connectivity.
2. Incorrect Camera Placement
Ensure that the camera is positioned correctly for optimal coverage. Avoid obstructing objects or placing it too high or too low. Adjust the angle and height to capture the desired area effectively.
Pro Tip: Use the camera’s mobile app to view the live feed and make adjustments in real-time.
If you encounter any other issues during the installation process, refer to the user manual or contact Cox customer support for assistance.



I'm planning to install my Cox security camera tomorrow. What tools do I actually need for the installation? Can I do it all by myself?
How does the Cox security camera compare to other brands like Ring or Arlo? Are there any major pros or cons?
I installed my Cox security camera last month, and I found it pretty straightforward. The step-by-step guide was helpful, especially the tips about camera height and angles. I mounted mine about 10 feet up, and the view is great. Just remember to test the motion detection after setup; it saved me when I caught a raccoon messing around in my yard!
In the installation steps, is it necessary to have the camera plugged in while connecting it to Wi-Fi? Or can I just connect it to the app first?