
 Carmen J. Moore

Blink Home Security Cameras offer a convenient and reliable way to monitor your home and keep your family safe. Whether you’re looking to enhance your home security system or simply want to keep an eye on your pets while you’re away, installing Blink cameras can provide peace of mind.
Setting up Blink home security cameras is a straightforward process that can be completed in just a few simple steps. In this guide, we’ll walk you through the installation process, from unboxing the cameras to connecting them to your home network and configuring the settings.

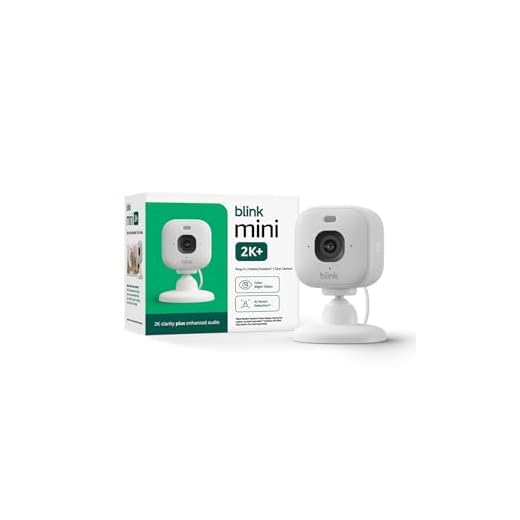

By following these steps carefully, you’ll be able to set up your Blink home security cameras quickly and easily, ensuring that your home is well-protected and secure.
Step-by-Step Guide for Setting Up Blink Cameras
Setting up your Blink home security cameras is a straightforward process that can be done in just a few simple steps. Follow this guide to get your cameras up and running quickly and easily.
Step 1: Unboxing and Preparation
Start by unboxing your Blink camera kit and ensuring that you have all the necessary components. This typically includes the camera unit, mounting hardware, batteries, and a sync module. Make sure to have a stable internet connection and download the Blink Home Monitor app on your smartphone.
Step 2: Mounting the Camera
Choose the location where you want to install your camera and use the mounting hardware to secure it in place. Make sure the camera has a clear view of the area you want to monitor and is positioned at the right angle. Adjust the camera as needed.
| Tip: | Ensure the camera is within the Wi-Fi range for a stable connection. |
Continue with the setup process by following the instructions on the Blink Home Monitor app. This typically involves connecting the sync module to your router and syncing your camera with the app. Once everything is set up, you can customize your camera settings and start monitoring your home.
Choosing the Right Location for Your Blink Camera
When installing your Blink home security camera, choosing the right location is crucial to ensure optimal performance. Here are some tips to help you select the best spot:
- Consider the field of view: Place the camera where it can capture the most important areas of your property.
- Avoid obstructions: Make sure the camera has a clear line of sight and is not obstructed by objects like trees or bushes.
- Protect from weather: Place the camera under an eave or use a weatherproof housing to shield it from rain and direct sunlight.
- Secure mounting: Mount the camera on a stable surface that cannot be easily tampered with or knocked down.
- Check Wi-Fi signal: Ensure the camera is within range of your Wi-Fi network for a strong connection.
By following these guidelines, you can ensure that your Blink camera is installed in the ideal location to enhance your home security system.
Connecting Your Blink Camera to Wi-Fi
Before you can start using your Blink home security camera, you need to connect it to your Wi-Fi network. Here’s how:
1. Power on the Camera
Plug in your Blink camera and wait for the LED light to start flashing blue.
2. Connect to Wi-Fi
Open the Blink app on your smartphone and follow the on-screen instructions to connect your camera to your Wi-Fi network. Make sure to enter the correct Wi-Fi password.
Installing the Blink Camera Mounting Bracket
Before you can mount your Blink home security camera, you’ll need to install the mounting bracket. Follow these steps to properly install the mounting bracket:
- Locate a suitable mounting location for your camera. Make sure it is within range of your Wi-Fi network and offers a clear view of the area you want to monitor.
- Using the provided screws and anchors, attach the mounting bracket to the desired location. Ensure it is securely fastened to the surface.
- Adjust the angle of the mounting bracket to achieve the desired camera view. Tighten any screws or bolts to lock the bracket in place.
Important Tips:
- Ensure the mounting bracket is installed at a height that provides optimal coverage of the monitored area.
- Check the stability of the bracket before mounting the camera to prevent any potential issues.
Configuring Motion Detection Settings on Your Blink Camera
One of the key features of Blink home security cameras is their motion detection capability. By configuring the motion detection settings on your Blink camera, you can ensure that you receive alerts and recordings only when motion is detected. Here’s how to configure the motion detection settings:
- Open the Blink app on your smartphone and select the camera you want to configure.
- Go to the camera settings and find the “Motion Detection” option.
- Adjust the sensitivity level of the motion detection to suit your needs. You can choose from low, medium, or high sensitivity.
- Set the motion detection zone by selecting the areas in the camera’s field of view where you want motion to be detected.
- Enable or disable the motion detection feature based on your preferences.
By fine-tuning the motion detection settings on your Blink camera, you can customize the alerts and recordings to meet your specific security needs. Experiment with different settings to find the optimal configuration for your home.
Setting Up Cloud Storage for Blink Camera Footage
One of the key features of Blink home security cameras is the ability to store footage in the cloud for easy access and peace of mind. Follow these steps to set up cloud storage for your Blink cameras:
Step 1: Create a Blink Account
If you haven’t already, create a Blink account on the Blink app or website. This will allow you to access your camera footage from anywhere.
Step 2: Purchase a Blink Subscription
Choose a subscription plan that includes cloud storage for your camera footage. Blink offers different plans based on the number of cameras and storage duration you need.
After purchasing a subscription, follow the prompts to link your cameras to your Blink account and set up cloud storage. Your camera footage will now be securely stored in the cloud for easy retrieval.
Testing Your Blink Camera Installation
Once you have successfully installed your Blink home security cameras, it is important to test them to ensure they are functioning correctly. Follow these steps to test your Blink camera installation:
- Open the Blink app on your smartphone or tablet.
- Select the camera you want to test.
- Check the live view to see if the camera is capturing footage.
- Trigger the camera’s motion detection by moving in front of it.
- Verify that you receive notifications on your device when motion is detected.
- Check the quality of the recorded footage to ensure it is clear and in focus.
If any issues arise during testing, refer to the Blink user manual or troubleshooting guide for assistance.
Troubleshooting Common Installation Issues with Blink Cameras
If you encounter any issues during the installation of your Blink home security cameras, here are some common troubleshooting steps you can take:
1. Check the Wi-Fi Connection
Ensure that your Wi-Fi network is working properly and that the camera is within range of the Wi-Fi signal. If the signal is weak, consider moving the camera closer to the router or using a Wi-Fi extender.
2. Reset the Camera
If the camera is not connecting to the app, try resetting it by pressing the reset button on the camera for about 10 seconds. This will reset the camera to its default settings and may resolve any connectivity issues.
- Ensure the camera is powered on before resetting.
- Reconnect the camera to the app after resetting.
By following these troubleshooting steps, you should be able to address common installation issues with your Blink home security cameras and enjoy the peace of mind that comes with enhanced home security.
Final Tips for Maximizing the Security Benefits of Blink Cameras
1. Position your Blink cameras strategically to cover key entry points and vulnerable areas of your property.
2. Regularly check the camera angles and adjust them as needed to ensure optimal coverage.
3. Set up motion detection sensitivity to avoid false alarms while capturing important events accurately.
4. Keep your Blink cameras clean and free from obstructions for clear and reliable footage.
5. Secure your camera placement to prevent tampering or theft by using mounts or secure fixtures.
6. Regularly update the Blink camera firmware to ensure the latest security features and bug fixes.
7. Utilize the Blink mobile app to monitor your cameras remotely and receive instant alerts of any suspicious activity.
8. Consider integrating your Blink cameras with other smart home devices for a comprehensive security system.


