
 Carmen J. Moore

Arlo wire-free HD security cameras provide a convenient and reliable way to monitor your home or business. Setting up your Arlo cameras is a simple process that can be done in just a few easy steps. Whether you’re a first-time user or looking to expand your existing system, this guide will walk you through the process of hooking up your Arlo wire-free HD security cameras.
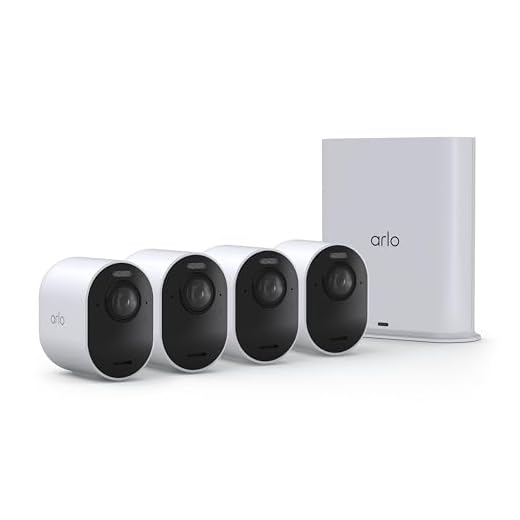


First, ensure that you have all the necessary components for your Arlo camera system, including the cameras, base station, and power adapter. Once you have everything you need, place your cameras in the desired locations around your property. Arlo cameras can be mounted on walls, ceilings, or placed on flat surfaces for optimal coverage.
Next, connect the base station to your home’s Wi-Fi network using the included Ethernet cable. Once the base station is connected, follow the on-screen instructions to sync your cameras with the base station. This process typically involves pressing a sync button on the base station and each camera to pair them together.
Step-by-step guide to setting up Arlo wire-free HD security cameras
Setting up Arlo wire-free HD security cameras is a straightforward process that can help you secure your home or office. Follow these steps to get your Arlo cameras up and running:
- Unbox your Arlo cameras: Open the package and make sure you have all the necessary components, including the cameras, base station, and power adapters.
- Install the Arlo app: Download and install the Arlo app on your smartphone or tablet from the App Store or Google Play Store.
- Set up the base station: Connect the base station to your router using the provided Ethernet cable and power adapter. Follow the on-screen instructions in the Arlo app to set up the base station.
- Mount the cameras: Place the cameras in the desired locations, making sure they are within range of the base station. Use the provided mounts or screws to secure the cameras in place.
- Sync the cameras: Press the sync button on the base station and then on each camera to pair them with the base station. Follow the instructions in the app to complete the syncing process.
- Adjust camera settings: Customize the camera settings in the Arlo app, such as motion detection sensitivity, video quality, and recording schedules, to suit your needs.
- Monitor your cameras: Once the setup is complete, you can view live footage from your Arlo cameras in the app and receive alerts for any motion detected.
With these simple steps, you can easily set up your Arlo wire-free HD security cameras and enhance the security of your property.
Unboxing your Arlo security camera system
When you receive your Arlo wire-free HD security camera system, you’ll find it carefully packaged to ensure all components are protected during transit. Start by opening the box and inspecting each item included in the package.
Inside the box, you should find the Arlo cameras, the base station, mounting hardware, power adapters, Ethernet cable, batteries, and any additional accessories that came with your specific package. Take inventory of all the items to make sure nothing is missing.
Once you’ve confirmed that everything is included, you can begin setting up your Arlo system by following the instructions provided in the user manual. Make sure to charge the batteries before installing the cameras and connect the base station to your home network using the Ethernet cable.
Unboxing your Arlo security camera system is the first step towards creating a secure and reliable surveillance network for your home or business. Take your time to familiarize yourself with the components and installation process to ensure a smooth setup experience.
Installing batteries in your Arlo cameras
Before setting up your Arlo wire-free HD security cameras, you need to make sure they have batteries installed. Here’s how to do it:
- Open the battery compartment on the back of your Arlo camera.
- Insert the provided batteries into the compartment, making sure to match the polarity symbols.
- Close the battery compartment securely.
- Repeat the process for each Arlo camera you plan to install.
Once the batteries are installed, you can proceed with the setup process to connect your Arlo cameras to the base station and start monitoring your home or property.
Mounting your Arlo cameras in the desired locations
When setting up your Arlo wire-free HD security cameras, it’s crucial to mount them in the right locations to ensure optimal coverage and security. Here are some tips to help you with the mounting process:
1. Choose strategic locations: Select spots that offer a clear view of the area you want to monitor. Avoid obstructions like trees or walls that could block the camera’s line of sight.
2. Adjust the mounting angle: Position the camera at an angle that provides the best view of the area. You can adjust the camera’s position up or down to capture the desired footage.
3. Use the mounting hardware: Securely attach the camera to the mounting hardware provided with your Arlo system. Make sure the camera is firmly in place to prevent it from shifting or falling.
4. Test the camera’s view: Before finalizing the installation, test the camera’s view to ensure it covers the intended area effectively. Make any necessary adjustments to the positioning if needed.
By following these steps, you can mount your Arlo cameras in the desired locations to enhance your home security system and keep your property safe.
Setting up the Arlo base station
Before you can start connecting your Arlo wire-free HD security cameras, you need to set up the Arlo base station. Follow these steps to get started:
Step 1: Unbox the base station
Unpack the Arlo base station and find a suitable location to place it. Make sure it is within range of your Wi-Fi network for a stable connection.
Step 2: Power up the base station
Connect the power adapter to the base station and plug it into a power outlet. Wait for the LED lights on the front of the base station to turn solid green.
With the base station set up, you are now ready to pair your Arlo wire-free HD security cameras for a complete home surveillance system.
Connecting your Arlo cameras to the base station
To set up your Arlo wire-free HD security cameras, you need to connect them to the base station. Follow these steps to ensure a successful connection:
Step 1: Power on the Base Station
Plug in the power adapter to the base station and connect it to a power source. Wait for the LEDs on the front of the base station to turn solid green, indicating that it is powered on and ready to connect.
Step 2: Sync the Cameras
Press the Sync button on the base station and then press the Sync button on the camera. Wait for the blue LED on the camera to blink rapidly, indicating that it is syncing with the base station. Once the LED turns solid blue, the camera is successfully connected.
Repeat this process for each camera you want to connect to the base station. Make sure the cameras are within range of the base station for a strong connection.
By following these steps, you can easily connect your Arlo wire-free HD security cameras to the base station and start monitoring your property. Enjoy the peace of mind that comes with a reliable security system!
Syncing your Arlo cameras with the Arlo app
Once you have set up your Arlo wire-free HD security cameras, the next step is to sync them with the Arlo app for easy access and control. Here’s how you can sync your cameras with the app:
| 1. | Download the Arlo app from the App Store or Google Play Store on your smartphone or tablet. |
| 2. | Open the Arlo app and log in to your Arlo account. If you don’t have an account, you will need to create one. |
| 3. | Tap on the “Add Device” option in the app and select “Camera” from the list of devices. |
| 4. | Follow the on-screen instructions to sync your Arlo camera with the app. This usually involves pressing the sync button on the camera and waiting for the app to detect it. |
| 5. | Once the camera is successfully synced, you can view live footage, adjust settings, and receive notifications through the Arlo app. |
By syncing your Arlo cameras with the Arlo app, you can easily monitor your home or business from anywhere using your smartphone or tablet.
Adjusting settings and configuring motion detection
After successfully setting up your Arlo wire-free HD security cameras, the next step is to adjust the settings and configure motion detection to ensure optimal performance. Follow these steps to customize your camera settings:
1. Accessing camera settings
To adjust the settings of your Arlo cameras, log in to your Arlo account on the Arlo app or web portal. Navigate to the camera settings section to modify various parameters such as video quality, motion sensitivity, and recording modes.
2. Configuring motion detection
Enable motion detection on your Arlo cameras to receive alerts and recordings whenever motion is detected within the camera’s field of view. Adjust the sensitivity level of the motion detection to minimize false alarms while ensuring accurate detection of relevant events.
| 1 | Check the motion detection settings. |
| 2 | Adjust the motion sensitivity slider. |
| 3 | Set up custom activity zones if needed. |
Testing your Arlo wire-free HD security cameras
Once you have successfully set up your Arlo wire-free HD security cameras, it is important to test them to ensure they are functioning properly. Here are some steps you can take to test your cameras:
- Check the camera placement: Make sure your cameras are positioned correctly to capture the desired area.
- Test the motion detection: Walk in front of the camera to see if the motion detection is working properly.
- Check the night vision: Test the night vision feature by viewing the camera feed in low light conditions.
- Review the video quality: Take a look at the recorded footage to ensure the video quality meets your expectations.
- Test the connectivity: Move around your home or property to test the camera’s connectivity to the base station.
By following these steps, you can ensure that your Arlo wire-free HD security cameras are working effectively to protect your home or property.
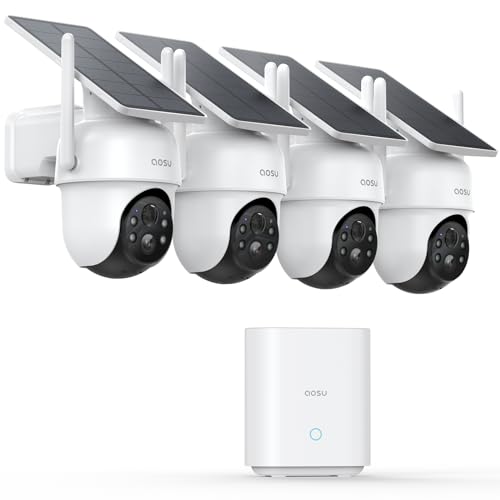



I recently set up my Arlo cameras, and I have to say, the process was pretty straightforward. The part I found most helpful was being able to mount the cameras at different angles. It took a bit of trial and error to get the views just right, but now I feel much safer knowing I can monitor my property from anywhere. Just make sure to test the view after mounting!
Is it necessary to use the Ethernet cable for the base station setup? Can I set it up wirelessly instead?
While using an Ethernet cable for the initial setup of the base station is recommended for a stable connection, you can set it up wirelessly afterward. Just ensure that the base station is within range of your Wi-Fi for the best performance.
I'm thinking about getting the Arlo camera system, but how do I know if it's compatible with my home Wi-Fi? Any specific requirements I should be aware of?