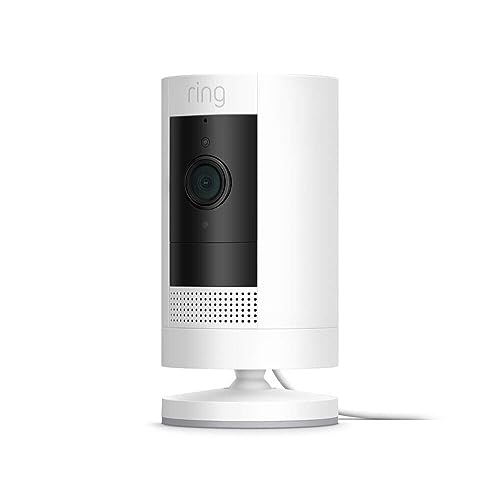


Security cameras are essential for keeping your property safe, but sometimes they can develop issues that need to be fixed. One common problem is a loose or damaged rubber ring on the camera, which can affect its performance and protection from the elements.
In this guide, we will walk you through the steps to fix the rubber ring on your security camera so that it can continue to function effectively.
Follow these instructions carefully to ensure that your security camera is properly sealed and protected.
How to Fix Rubber Ring on Security Camera
If the rubber ring on your security camera is loose or damaged, you can easily fix it with a few simple steps. Follow these instructions to repair the rubber ring on your security camera:
| Step 1: | Remove the camera from its mounting bracket to access the rubber ring. |
| Step 2: | Inspect the rubber ring for any tears, cracks, or damage. If the rubber ring is damaged, it will need to be replaced. |
| Step 3: | If the rubber ring is intact but loose, carefully stretch it back into place around the camera lens. |
| Step 4: | Secure the rubber ring in place by gently pressing it around the lens until it fits snugly. |
| Step 5: | Reattach the camera to its mounting bracket and make sure the rubber ring is properly secured. |
By following these steps, you can easily fix the rubber ring on your security camera and ensure that it provides reliable protection for your property.
Identify the Issue
Before attempting to fix the rubber ring on your security camera, it is important to first identify the issue. Here are some common problems that may be causing the rubber ring to come loose:
- Wear and tear: Over time, the rubber ring may deteriorate and lose its grip on the camera.
- Incorrect installation: If the rubber ring was not properly installed or secured, it may easily come off.
- Damage: Any physical damage to the rubber ring or the camera itself could cause it to loosen.
By identifying the specific issue causing the rubber ring to come loose, you can determine the best course of action to fix it effectively.
Gather Necessary Tools
Before you start fixing the rubber ring on your security camera, make sure you have the following tools handy:
- Replacement rubber ring
- Screwdriver
- Needle-nose pliers
- Cotton swabs
- Clean cloth
Remove the Camera Cover
To access the rubber ring on your security camera, you will first need to remove the camera cover. Follow these steps to safely remove the cover:
- Power Off: Make sure the camera is powered off to avoid any electrical hazards.
- Unscrew: Use a screwdriver to carefully unscrew the screws holding the camera cover in place.
- Detach: Gently detach the camera cover from the main body of the camera.
Once you have successfully removed the camera cover, you will have access to the rubber ring and can proceed with fixing or replacing it as needed.
Inspect the Rubber Ring
Before attempting to fix the rubber ring on your security camera, it’s important to thoroughly inspect the condition of the ring. Check for any cracks, tears, or damage that may be causing it to fail. If the rubber ring is worn out or damaged, it will need to be replaced rather than simply re-attached.
Make sure to clean the area around the rubber ring to remove any dirt, debris, or residue that could be affecting its ability to seal properly. Use a soft cloth and gentle cleaner to wipe down the surface and ensure it is clean and dry before proceeding with any repairs.
Clean the Rubber Ring
Before attempting to fix the rubber ring on your security camera, it’s important to make sure that the ring is clean and free from any dirt or debris. This will help ensure a better grip and seal when reattaching it to the camera.
Start by gently wiping the rubber ring with a damp cloth to remove any surface dirt. You can also use a mild soap solution if needed, but be sure to rinse it thoroughly to prevent any residue from affecting the rubber’s elasticity.
Once the rubber ring is clean and dry, carefully inspect it for any tears or damage. If you notice any significant wear and tear, it may be best to replace the ring altogether to ensure proper protection for your security camera.
Reattach the Rubber Ring
To fix the rubber ring on your security camera, start by ensuring that the ring is clean and free from any debris or dirt. Once clean, carefully align the ring with the camera lens and slowly press it into place, making sure it fits securely. You may need to apply gentle pressure to ensure a snug fit. Be cautious not to apply too much force to avoid damaging the ring or the camera. Once the ring is reattached, inspect it to ensure it is properly secured and in the correct position.
Secure the Camera Cover
Once the rubber ring is properly aligned, carefully secure the camera cover back onto the camera body. Make sure all the edges are properly lined up before pressing down to snap the cover into place.
Check for Proper Alignment
Ensure that the rubber ring is securely in place and that there are no gaps between the camera cover and the camera body. This will help prevent any water or dust from entering the camera.
Caution: Be gentle when securing the camera cover to avoid damaging the rubber ring or any other components of the camera.
Test the Camera Functionality
Before completing the process of fixing the rubber ring on the security camera, it is important to test the camera’s functionality to ensure that it is working properly. This step will help you determine if any adjustments need to be made to the camera’s position or settings before securing the rubber ring in place.
Steps to test the camera functionality:
- Power on the camera: Ensure that the camera is powered on and connected to the appropriate power source.
- Check the camera feed: Access the camera feed on your monitoring device or computer to see if the camera is capturing clear images and videos.
- Adjust camera settings: If the camera feed is not clear or if the camera is not capturing the desired area, adjust the camera’s position or settings accordingly.
- Test motion detection: Trigger the camera’s motion detection feature to ensure that it is working properly and capturing any movement in the designated area.
- Verify remote access: Test the camera’s remote access functionality to ensure that you can view the camera feed from a different location.
Once you have tested the camera’s functionality and made any necessary adjustments, you can proceed with fixing the rubber ring on the security camera to ensure its stability and protection.


