
 Carmen J. Moore
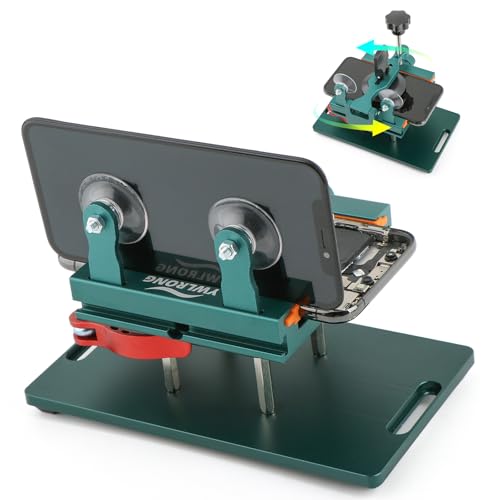
If you’re experiencing issues with your iPhone 5s front camera assembly, you may need to reassemble it. Whether you’re replacing a faulty camera or just performing maintenance, this guide will walk you through the steps to properly reassemble the front camera assembly on your iPhone 5s.
Before you begin, make sure you have the necessary tools, such as a small Phillips screwdriver, tweezers, and a spudger. Additionally, it’s a good idea to work on a clean, well-lit surface to avoid losing any small components.



Follow these step-by-step instructions carefully to ensure a successful reassembly of your iPhone 5s front camera assembly and get your device back to capturing those perfect selfies and video calls!
How to Reassemble iPhone 5S Front Camera Assembly
After successfully disassembling your iPhone 5S front camera assembly, it’s time to reassemble it to ensure everything works properly. Follow these steps to put everything back together:
| 1. | Start by carefully placing the front camera back into its designated position on the front panel. |
| 2. | Secure the front camera in place by gently pressing it down and ensuring it sits flush with the front panel. |
| 3. | Next, reconnect the front camera flex cable to the logic board by carefully aligning the connectors and gently pressing them together. |
| 4. | Secure the front camera flex cable in place using the adhesive or clips provided to prevent it from coming loose. |
| 5. | Double-check all the connections and ensure everything is properly aligned before reattaching the display assembly. |
| 6. | Once you’ve confirmed everything is in place, carefully reattach the display assembly by following the steps in reverse order of disassembly. |
Preparation for Reassembly
Before reassembling the iPhone 5s front camera assembly, make sure you have all the necessary tools and components ready. This will help streamline the reassembly process and ensure a successful outcome. Here are the steps you should follow to prepare for reassembly:
1. Organize Your Workspace
Clear a clean and well-lit workspace to work on reassembling the front camera assembly. Make sure you have enough space to lay out the components and tools without any clutter.
2. Gather the Required Tools and Components
Ensure you have all the tools needed for reassembly, including a small Phillips screwdriver, a plastic spudger, tweezers, and a suction cup. Additionally, make sure you have the replacement front camera assembly kit ready for installation.
| Tools: | Components: |
| Phillips screwdriver | Replacement front camera assembly |
| Plastic spudger | |
| Tweezers | |
| Suction cup |
Removing the Old Front Camera Assembly
To remove the old front camera assembly from your iPhone 5s, follow these steps:
| 1. | Power off your iPhone and remove the two screws located next to the charging port using a Pentalobe screwdriver. |
| 2. | Use a suction cup to gently lift the screen assembly from the rear case. |
| 3. | Remove the screws securing the metal bracket covering the front camera and earpiece speaker connectors. |
| 4. | Disconnect the front camera and earpiece speaker connectors from the logic board. |
| 5. | Remove the old front camera assembly carefully from the iPhone. |
Inspecting the Replacement Front Camera Assembly
Before reassembling your iPhone 5s front camera assembly, it’s important to carefully inspect the replacement part to ensure it is in good condition and free of any defects. Here are some key steps to follow:
| Step 1: | Check the front camera lens for any scratches or smudges. Clean it gently with a microfiber cloth if necessary. |
| Step 2: | Inspect the flex cable connectors for any signs of damage or corrosion. Make sure they are properly aligned and undamaged. |
| Step 3: | Verify that the proximity sensor and ambient light sensor are present and securely attached to the assembly. |
| Step 4: | Check the earpiece speaker grille for any debris or blockages that could affect sound quality. |
By thoroughly inspecting the replacement front camera assembly, you can ensure a successful reassembly process and optimal performance of your iPhone 5s camera.
Attaching the Replacement Front Camera to the Phone
Once you have the replacement front camera assembly ready, carefully place it back into the phone following these steps:
- Align the front camera assembly with the slot on the top of the phone.
- Gently press the assembly down to secure it in place.
Make sure the front camera is properly aligned and sits flush with the phone before proceeding to the next step.
Securing the Front Camera Assembly in Place
Once you have reconnected the front camera assembly to the logic board, carefully position it in place. Make sure the front camera is aligned with the front camera hole in the display assembly.
Use the small screws that you removed earlier to secure the front camera assembly in place. Be gentle and make sure not to overtighten the screws as it could damage the assembly.
After securing the front camera assembly, double-check all the connections and ensure everything is properly in place before reassembling the rest of the iPhone 5s.
Reconnecting the Cables and Components
Once you have carefully aligned the front camera assembly in place, it’s time to reconnect the cables and components. Start by reconnecting the front camera flex cable to the logic board. Be gentle and make sure the connection is secure.
Next, reconnect the display assembly cable and the digitizer cable to the logic board. Again, ensure that the connections are secure and properly aligned.
After reconnecting all the cables, carefully place the metal bracket back over the connectors and secure it with the screws. Make sure the bracket is snug but not too tight.
Finally, reattach the metal shield covering the front camera assembly and secure it with the screws. Once everything is reconnected and secured, you can proceed with reassembling the rest of the iPhone 5s.
Testing the Front Camera Functionality
After reassembling the front camera assembly of your iPhone 5s, it is essential to test the functionality to ensure that everything is working correctly. Follow these steps to test the front camera:
| 1. | Power on your iPhone 5s and navigate to the camera app. |
| 2. | Switch to the front camera mode by tapping the icon that looks like a camera with curved arrows. |
| 3. | Take a photo or video using the front camera to check the image quality. |
| 4. | Test the front camera’s autofocus by tapping on different objects at varying distances. |
| 5. | Check if the front camera’s flash works properly in low light conditions. |
| 6. | Verify that the front camera’s microphone is capturing audio during video recording. |
| 7. | If everything is functioning correctly, your iPhone 5s front camera assembly has been successfully reassembled. |
Adjusting Camera Settings if Necessary
If you notice that the front camera is not functioning properly after reassembly, you may need to adjust the camera settings on your iPhone 5s. To do this, follow these steps:
1. Open the Camera app: Launch the Camera app on your iPhone 5s to access the camera settings.
2. Tap on the Settings icon: Look for the settings icon within the Camera app and tap on it to access the camera settings menu.
3. Adjust camera settings: In the settings menu, you can adjust various camera settings such as resolution, focus, exposure, and more. Experiment with different settings to see if it improves the front camera’s performance.
4. Reset settings: If adjusting the settings does not solve the issue, you can try resetting the camera settings to default. To do this, go to the settings menu and look for the option to reset camera settings.
By adjusting the camera settings on your iPhone 5s, you may be able to troubleshoot any issues with the front camera after reassembly.
Final Assembly and Testing
Once you have reattached the front camera assembly to the iPhone 5s, it’s time to perform the final assembly and testing.
Step 1: Carefully reattach the front panel assembly to the rest of the phone, making sure all the connectors are properly aligned and secured.
Step 2: Once the front panel is securely attached, power on the iPhone 5s to test the front camera functionality. Make sure the camera is working properly and that there are no issues with the display.
Step 3: If everything is functioning correctly, you can proceed to reassemble the rest of the phone and secure all the screws and components in place.
Step 4: Finally, perform a final test by taking a few photos with the front camera to ensure it is working as expected.
Once you have completed these steps, your iPhone 5s front camera assembly should be successfully reassembled and tested, ready for use.
Troubleshooting Common Front Camera Assembly Issues
Front camera assembly issues can be frustrating, but they are often easily fixable. Here are some common issues you may encounter and how to troubleshoot them:
1. Blurry images: If the front camera is producing blurry images, make sure the lens is clean and free of any smudges or dirt. If cleaning the lens doesn’t help, the camera module may need to be replaced.
2. Camera not working: If the front camera is not working at all, check the connection to ensure it is securely plugged in. If the connection is secure and the camera still doesn’t work, the camera module may be faulty and require replacement.
3. Dark or distorted images: Dark or distorted images can be caused by a faulty camera sensor. Try resetting the camera settings or restarting the device. If the issue persists, the camera sensor may need to be replaced.
By troubleshooting these common front camera assembly issues, you can get your iPhone 5s front camera back up and running smoothly.


I’ve seen guides suggesting to use a heat gun to loosen the adhesive before lifting the screen. Is that something you would recommend too, or is it better to stick with the suction cup method?
Using a heat gun can help soften the adhesive, which might make the process easier. Just be careful not to overheat the device.
I recently did this repair and it was a bit tricky! I found that using a suction cup to lift the screen made a huge difference. Just make sure to be gentle to avoid cracking the glass. I also agree with the tip on keeping a clean workspace; I lost a screw because I didn’t organize my tools properly!
Great article! Could you clarify if I need any special tools for this? I have a basic screwdriver set, but I'm not sure about the spudger or tweezers.
I’m curious, how do I know if my replacement front camera assembly is compatible with my iPhone 5s? Is there a specific model number I should look for?
I'm wondering how difficult it is to reassemble the front camera assembly on the iPhone 5s. Is it something a beginner can do, or should I consider a professional?
Can anyone clarify if the front camera flex cable needs to be replaced every time you disassemble it? Or can it be reused?
I recently reassembled my iPhone 5s front camera assembly and it went surprisingly well! I took extra time to organize my workspace and double-check each step. I did run into a small issue with the flex cable not fitting snugly, but after a few tries, I got it right. The camera works perfectly now! Just make sure to have a good light source and maybe a friend to help. Highly recommend trying it yourself if you're in a similar situation!