
 Carmen J. Moore
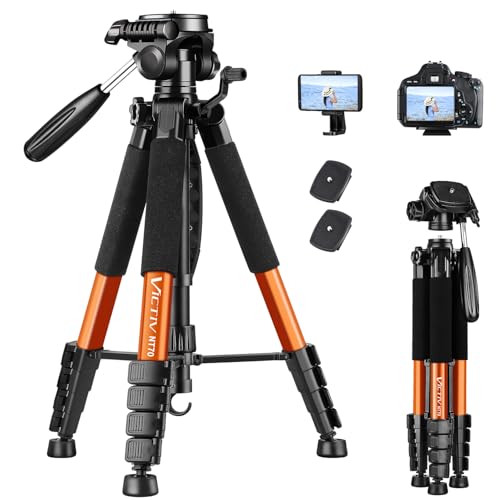
Do you want to take professional-looking photos and videos with your iPhone? Mounting your iPhone to a tripod with a camera can help you achieve steady shots and capture stunning visuals. Whether you’re a photographer, filmmaker, or content creator, having your iPhone securely attached to a tripod can elevate the quality of your work.
In this guide, we’ll show you how to easily mount your iPhone to a tripod with a camera attachment. With the right tools and techniques, you can transform your iPhone into a versatile photography and videography tool that rivals traditional cameras.
Step-by-Step Guide: Mounting iPhone to Tripod with Camera
To mount your iPhone to a tripod with a camera, follow these simple steps:
Step 1: Gather Your Equipment
Make sure you have your iPhone, tripod, and camera attachment ready.


Step 2: Attach Camera to Tripod
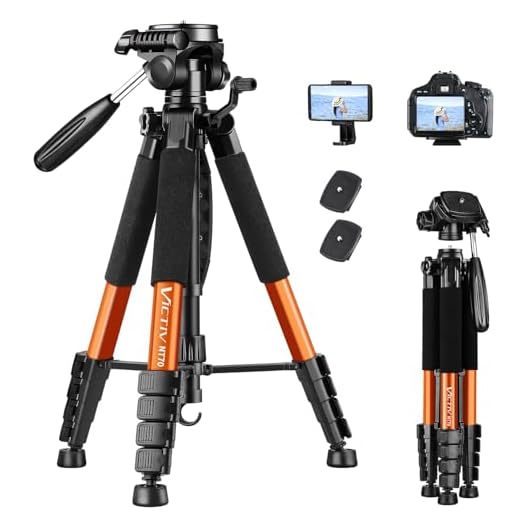
Securely attach the camera to the tripod head and make sure it is stable.
Step 3: Attach iPhone to Camera
Use a phone mount or adapter to attach your iPhone to the camera. Make sure it is securely fastened.
Step 4: Adjust Position
Position your iPhone in the desired angle and tighten any adjustments to secure it in place.
Now you are ready to capture amazing photos and videos using your iPhone mounted on a tripod with a camera!
Choose the Right Tripod for Your iPhone
When selecting a tripod for your iPhone, there are a few key factors to consider to ensure you get the best fit for your needs. Here are some important points to keep in mind:
| Compatibility: | Make sure the tripod is compatible with your iPhone model. Some tripods come with adjustable phone mounts that can accommodate various phone sizes. |
| Stability: | Look for a tripod that is stable and sturdy enough to support your iPhone and prevent any wobbling or shifting during use. |
| Height and Adjustability: | Consider the height and adjustability of the tripod to ensure you can capture the shots you want from different angles and perspectives. |
| Portability: | If you plan to take your iPhone tripod on the go, opt for a lightweight and compact design that is easy to transport. |
| Additional Features: | Some tripods come with extra features like remote controls, Bluetooth connectivity, or built-in level indicators for added convenience. |
Attach the Tripod Mount to Your iPhone
To mount your iPhone to a tripod, you will need a tripod mount specifically designed for smartphones. These mounts typically have an adjustable clamp that can securely hold your iPhone in place. Follow these steps to attach the tripod mount to your iPhone:
- Start by placing the tripod mount on a flat surface with the clamp open.
- Position your iPhone horizontally or vertically, depending on your desired orientation for filming.
- Slide your iPhone into the clamp of the tripod mount, making sure it is centered and secure.
- Tighten the clamp gently to hold your iPhone firmly in place without damaging it.
- Double-check the stability of the mount by gently shaking your iPhone to ensure it is securely attached.
Once you have successfully attached the tripod mount to your iPhone, you are ready to connect it to your tripod and start capturing stable and professional-looking videos or photos.
Adjust the Angle and Height of the Tripod
Once you have securely attached your iPhone to the tripod, it’s important to adjust the angle and height of the tripod to achieve the desired shot. Follow these steps:
- Loosen the tripod head by turning the adjustment knobs or levers.
- Rotate the tripod head to adjust the angle of your iPhone. Make sure it is positioned correctly for the shot you want.
- If needed, adjust the height of the tripod by extending or retracting the legs. Ensure the tripod is stable and balanced.
- Tighten the adjustment knobs or levers to secure the tripod head and maintain the desired angle and height.
By adjusting the angle and height of the tripod, you can capture the perfect shot with your iPhone mounted securely in place.
Secure Your iPhone in the Tripod Mount
Before mounting your iPhone to the tripod, make sure it is securely in place to prevent any accidents or damage. Here are the steps to securely attach your iPhone to the tripod mount:
- Remove any protective case from your iPhone to ensure a secure fit.
- Slide your iPhone into the tripod mount slot, ensuring it is centered and aligned properly.
- Tighten the mount screw to securely hold your iPhone in place. Make sure it is tight enough to prevent any wobbling or movement.
- Double-check the alignment and stability of your iPhone in the mount before attaching it to the tripod.
By following these steps, you can securely mount your iPhone to the tripod with the camera on it, ensuring stability and safety during use.
Check the Stability of the Setup
Before you start recording or taking photos with your iPhone mounted on a tripod, it’s important to ensure that the setup is stable. Here are some tips to check the stability:
- Make sure the tripod legs are fully extended and securely locked in place.
- Verify that the mounting adapter or clamp is tightly secured to the tripod head.
- Double-check that your iPhone is securely attached to the mounting adapter or clamp.
- Test the stability by gently nudging the tripod to see if it wobbles or shifts.
- If the setup feels unstable, adjust the tripod legs or tighten the mounting hardware as needed.
Connect the Camera App on Your iPhone
Before mounting your iPhone to a tripod with a camera on it, make sure to connect the Camera app on your device. This will allow you to access and control the camera functions easily while it is mounted.
To connect the Camera app, simply open the app on your iPhone and familiarize yourself with its features and settings. You can adjust the resolution, focus, exposure, and other camera settings to ensure you capture the best possible shots.
Additionally, you can use various accessories and add-ons to enhance your photography experience, such as remote shutter triggers, external lenses, and stabilizers. These tools can help you take professional-looking photos and videos with your iPhone mounted on a tripod.
Start Recording or Taking Photos
Once your iPhone is securely mounted on the tripod with the camera facing the desired direction, you are ready to start recording or taking photos. Here are the steps to get started:
- Open the camera app on your iPhone.
- Adjust the camera settings as needed, such as resolution, exposure, or timer.
- Position the tripod and iPhone to frame your shot correctly.
- Ensure the iPhone is stable and not wobbling on the tripod.
- Press the record button to start recording a video or tap the shutter button to take a photo.
- Monitor the recording or photo-taking process on your iPhone’s screen.
- Once you are done, press the stop button to end the recording or review the photo you just took.



What type of tripod would you recommend for an iPhone? I want something lightweight but still stable.
For iPhones, lightweight aluminum tripods with adjustable mounts are great. Look for features like sturdy legs and a good height range.
What’s the best way to ensure my iPhone is secure in the mount? I’m worried it might slip and fall.
To ensure security, remove any case before mounting, tighten the clamp snugly, and double-check stability before use.
I think using a phone for serious photography is limiting. A DSLR is still way better for quality. Maybe iPhones are convenient, but they can’t compete!
I see your point, but iPhones have come a long way with their camera technology. It's all about what you need for the project.
Does the tripod have to be specially designed for phones, or can any tripod work with an adapter?
A remote shutter is a game changer when using a tripod! Helps avoid any shake when taking a picture.
I recently mounted my iPhone to a tripod for the first time and it was surprisingly easy! I used a basic phone mount and a standard tripod I already had. The stability improved my video quality a lot, especially when filming outdoors. Just make sure to test the setup before recording to avoid any surprises!