
 Carmen J. Moore
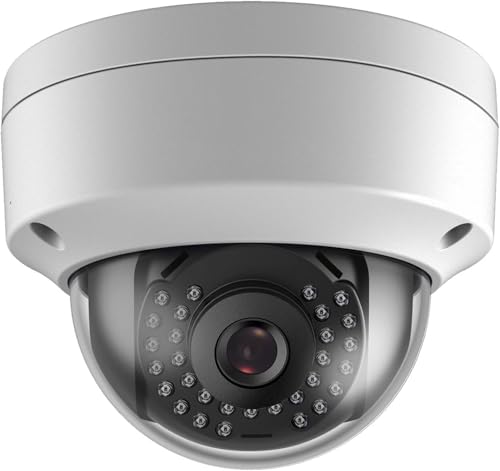
Are you looking to set up your Tenvis IP camera on your iPhone for remote monitoring? Look no further! In this guide, we will walk you through the step-by-step process to install your Tenvis IP camera on your iPhone seamlessly.

Tenvis IP cameras are popular for their ease of use and high-quality video streaming capabilities. By following these simple instructions, you can have your camera up and running in no time, allowing you to keep an eye on your home or office from anywhere.
Whether you’re a tech-savvy individual or a beginner, this guide will provide you with all the necessary information to connect your Tenvis IP camera to your iPhone effortlessly. Let’s dive into the installation process and get your camera set up for remote access!
Step-by-step guide to installing Tenvis IP camera on iPhone
Installing a Tenvis IP camera on your iPhone is a straightforward process that allows you to monitor your home or office remotely. Follow these steps to set up your Tenvis IP camera on your iPhone:
- Download the “Tenvis” app from the App Store on your iPhone.
- Open the app and create an account or log in if you already have one.
- Tap on the “Add Camera” button in the app.
- Choose “Scan QR Code” or “Search LAN” to add your camera.
- If using the QR code method, scan the QR code on the camera or its packaging.
- If using the LAN search, make sure your camera is connected to the same network as your iPhone.
- Follow the on-screen instructions to complete the setup process.
- You can now view the live feed from your Tenvis IP camera on your iPhone.
Download the Tenvis app from the App Store
To start using your Tenvis IP camera with your iPhone, you need to download the Tenvis app from the App Store. Follow these steps to install the app on your device:
| 1. | Open the App Store on your iPhone. |
| 2. | Tap on the Search tab at the bottom of the screen. |
| 3. | Type “Tenvis” in the search bar and press Enter. |
| 4. | Locate the Tenvis app in the search results and tap on it. |
| 5. | Tap the “Install” button next to the app. |
Once the app is downloaded and installed on your iPhone, you can proceed to set up your Tenvis IP camera and connect it to the app for remote monitoring and control.
Create a Tenvis account
To install a Tenvis IP camera on your iPhone, you will first need to create a Tenvis account. Follow these steps to create your account:
- Visit the Tenvis official website.
- Click on the “Sign Up” or “Register” button.
- Fill out the required information, such as your email address, username, and password.
- Agree to the terms and conditions of the Tenvis service.
- Click on the “Create Account” or “Register” button to complete the process.
Once you have successfully created your Tenvis account, you can proceed with the installation of your IP camera on your iPhone.
Connect the IP camera to your Wi-Fi network
Once you have powered on your Tenvis IP camera and completed the initial setup, you need to connect it to your Wi-Fi network. Follow these steps:
- Open the Tenvis app: Launch the Tenvis app on your iPhone.
- Access camera settings: Go to the camera settings within the app.
- Select Wi-Fi setup: Look for the option to set up Wi-Fi connection for your camera.
- Choose your Wi-Fi network: Select your Wi-Fi network from the list of available networks.
- Enter Wi-Fi password: Enter the password for your Wi-Fi network when prompted.
- Connect the camera: Wait for the camera to connect to your Wi-Fi network.
- Confirmation: Once the connection is successful, you should see a confirmation message on the app.
After completing these steps, your Tenvis IP camera should be successfully connected to your Wi-Fi network, allowing you to monitor and control it using your iPhone.
Add the IP camera to the Tenvis app
After downloading and installing the Tenvis app on your iPhone, follow these steps to add your IP camera:
- Open the Tenvis app on your iPhone.
- Tap on the “Add Camera” option.
- Enter the camera’s unique ID, username, and password.
- Click on the “Add” button to add the camera to the app.
Once the camera is successfully added, you can now access it through the Tenvis app on your iPhone and monitor the live feed from your IP camera.
Configure the camera settings
After successfully connecting your Tenvis IP camera to your iPhone, you will need to configure the camera settings to ensure optimal performance. Follow these steps to set up your camera:
- Open the camera app on your iPhone and locate the settings menu.
- Access the camera settings by selecting the camera model from the list of connected devices.
- Adjust the camera settings according to your preferences, such as resolution, frame rate, and motion detection sensitivity.
- Enable any additional features or security settings offered by the camera, such as night vision or two-way audio.
- Save the changes and test the camera to ensure that it is functioning correctly.
Access the live feed on your iPhone
Once you have successfully set up your Tenvis IP camera and connected it to your Wi-Fi network, you can easily access the live feed on your iPhone using the Tenvis app.
Step 1: Download the Tenvis app
Go to the App Store on your iPhone and search for the “Tenvis” app. Download and install the app on your device.
Step 2: Log in and connect to your camera
Open the Tenvis app and log in with your account credentials. Once logged in, you should see your camera listed in the app. Tap on the camera to connect to the live feed.



I followed the steps, but my camera isn't showing up in the app. What should I do?
Make sure your camera is connected to the same Wi-Fi network as your iPhone. Also, try restarting both the camera and the app.
I think the Tenvis IP camera is great, but I've also tried the Wyze Cam. The Tenvis has better resolution, but Wyze offers more features. How do they compare in terms of reliability?
The QR code method worked perfectly for me. Super quick setup!