
 Carmen J. Moore

Are you experiencing issues with the front camera on your iPhone 6 Plus? If so, you may need to replace the front camera module. This task may seem daunting, but with the right tools and a bit of patience, you can successfully install a new front camera on your device.
In this guide, we will walk you through the steps to replace the front camera on your iPhone 6 Plus. Make sure to follow each step carefully to avoid damaging your device and to ensure the front camera works properly after installation.
Step-by-Step Guide to Installing iPhone 6 Plus Front Camera
Replacing the front camera on your iPhone 6 Plus can help improve the quality of your selfies and video calls. Follow these steps to install a new front camera:
- Turn off your iPhone and remove the two screws next to the charging port using a pentalobe screwdriver.
- Use a suction cup to lift the screen slightly and slide a plastic opening tool between the screen and the frame to loosen the adhesive.
- Open the iPhone carefully like a book and support the screen at a 90-degree angle to prevent damaging the cables.
- Locate the front camera assembly at the top of the phone and remove the screws holding it in place.
- Disconnect the front camera and sensor cables from the logic board and carefully remove the old front camera.
- Install the new front camera in place and reconnect the cables to the logic board.
- Secure the front camera assembly with screws and close the iPhone by pressing the screen back into place.
- Reinsert the two screws next to the charging port and power on your iPhone to test the new front camera.
By following these steps, you can successfully install a new front camera on your iPhone 6 Plus and enjoy better selfies and video calls.
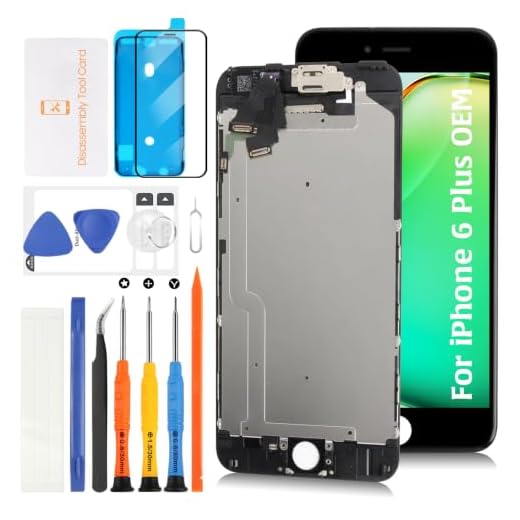

Gather Necessary Tools
Before you begin the installation process of the iPhone 6 Plus front camera, make sure you have all the necessary tools and equipment ready. Here is a list of tools you will need:
| 1. Small Phillips screwdriver |
| 2. Plastic opening tools |
| 3. Tweezers |
| 4. Suction cup |
| 5. Replacement front camera module |
Important Note:
Make sure to work in a clean and well-lit area to avoid losing any small components during the installation process.
Prepare Your Workspace
Before beginning the installation process for the iPhone 6 Plus front camera, it is important to prepare your workspace to ensure a smooth and efficient process. Here are some steps to follow:
- Clean and well-lit area: Find a clean and well-lit workspace where you can comfortably work without any distractions.
- Organize your tools: Gather all the necessary tools and components required for the installation, such as a screwdriver, tweezers, and the replacement front camera.
- Have a soft cloth handy: Keep a soft cloth nearby to clean any dust or fingerprints from the iPhone screen during the process.
- Keep a small container: Use a small container to store the screws and small components as you remove them from the iPhone.
- Take your time: Make sure you have enough time set aside to complete the installation without rushing, as precision is key in this process.
Remove the Old Front Camera
Before installing the new front camera on your iPhone 6 Plus, you need to remove the old one. Follow these steps to safely remove the old front camera:
- Power off your iPhone and remove any case or cover.
- Use a Pentalobe screwdriver to remove the two screws located next to the lightning connector.
- Place a suction cup near the Home button and gently pull the screen up to create a small gap.
- Insert a plastic spudger or opening tool into the gap and carefully pry the screen open. Be gentle to avoid damaging the screen cables.
- Open the screen like a book, but be careful not to open it completely as the display cables are still connected.
- Locate the front camera assembly at the top of the phone near the earpiece speaker.
- Use a spudger to disconnect the front camera flex cable and the proximity sensor flex cable from the logic board.
- Remove the two Phillips screws securing the front camera bracket in place.
- Once the bracket is removed, you can carefully lift and remove the front camera assembly from the phone.
Install the New Front Camera
Once you have removed the old front camera, it’s time to install the new one. Carefully place the new front camera into the designated slot, making sure it is aligned properly with the connectors.
Secure the front camera in place by gently pressing down on it until it is firmly set in the housing. Make sure not to apply too much pressure to avoid damaging the delicate components.
Once the new front camera is securely in place, reassemble the iPhone 6 Plus by following the steps in reverse order. Test the front camera to ensure it is working properly before fully reassembling the device.
Reassemble Your iPhone 6 Plus
Once you have successfully installed the front camera, it’s time to reassemble your iPhone 6 Plus. Follow these steps:
- Place the display assembly back onto the body of the phone.
- Reattach the three screws at the bottom of the display assembly.
- Reconnect the display cables by gently pressing them into place.
- Reinstall the metal bracket over the display cables and secure it with the screws.
- Carefully place the earpiece speaker back into its housing.
- Reattach the front camera sensor assembly to the display assembly.
- Reinstall the metal bracket over the front camera sensor assembly and secure it with the screws.
- Finally, snap the phone back together, starting at the top and working your way down to the bottom.
Once you have reassembled your iPhone 6 Plus, power it on and test the front camera to ensure it is functioning correctly.
Test Your New Front Camera
Once you have successfully installed the front camera on your iPhone 6 Plus, it’s important to test it to ensure it’s functioning properly. Here are some steps to test your new front camera:
1. Open the Camera App
Launch the Camera app on your iPhone 6 Plus to access the front camera. You can switch between the front and rear cameras by tapping on the camera icon.
2. Take a Selfie
Use the front camera to take a selfie or a photo of yourself to check the quality of the image. Make sure the camera focuses properly and the image is clear.
By following these steps, you can ensure that your new front camera is installed correctly and working as expected.


I'm thinking of replacing my front camera but I'm a bit worried about damaging my device. Is there a specific step that's the most tricky or prone to mistakes?
What kind of replacement camera do I need to buy? Do I need a specific model?
You will need a replacement camera specifically for the iPhone 6 Plus. Make sure it's compatible with that model to ensure proper functionality.
I found that using a soft cloth to wipe the screen while working made a big difference. No fingerprints left behind!
I'm considering replacing my iPhone 6 Plus front camera, but I’m not sure if I should attempt it myself or take it to a repair shop. How difficult is this process really?
I did it myself and it was easier than I thought! Just make sure you have all the tools ready and take your time.
It's definitely a manageable task if you follow the steps carefully. Just ensure you're comfortable with handling small components and working in a clean space.
I replaced my front camera last week following this guide, and it went smoothly! I took my time and made sure to organize all the screws. The only tricky part was prying the screen open without damaging it. I used a lot of caution, but now my selfies look amazing again!
I just replaced my front camera using this guide, and it was surprisingly straightforward! Just make sure to have a good light source and be gentle with the screen. I almost broke a cable when I was lifting the screen. Definitely worth it for better selfies though!
Thanks for sharing your experience! It’s great to hear that the guide was helpful. Being careful with the cables is crucial as they can be quite delicate.
I disagree with the idea that anyone can do this without prior experience. I had a hard time even following the steps, especially with the tiny screws!
I replaced my front camera with an aftermarket part instead of an OEM one. The image quality is decent, but not as great as the original. Has anyone else noticed a difference in quality between OEM and aftermarket parts?
I've heard that OEM parts give better results too. I plan to stick with them for any future repairs.
Do I really need a suction cup for this? Can't I just use my fingers to lift the screen?
Using a suction cup helps prevent damage to the screen and cables. It's recommended for a safer installation.
I replaced mine last month. It was a bit challenging, but following the steps carefully helped a lot. Just take your time!
I think this process might be more difficult than it seems. I tried replacing my camera and ended up having to go to a repair shop to fix some mistakes I made.
I found that using a small container for screws really helped keep everything organized. Don’t lose those tiny screws!
What kind of replacement camera module should I buy for the iPhone 6 Plus? Is there a specific brand that works best?
Can someone clarify what tools I really need for this? I don't want to buy more than necessary. Is a suction cup really essential?