
 Carmen J. Moore

Are you looking to transfer your photos from your camera to your iPhone? Whether you’re a professional photographer or just a casual snap-happy individual, knowing how to get your pictures onto your iPhone can be a game-changer. With the right tools and methods, you can easily transfer your photos and have them ready to share or edit on your phone in no time.
In this article, we will guide you through the step-by-step process of transferring photos from your camera to your iPhone. From using a USB cable to utilizing cloud services, we’ll cover various methods that will suit your needs and preferences. Say goodbye to the hassle of transferring photos and hello to the convenience of having them on your iPhone!
Transfer Photos from Camera to iPhone
Transferring photos from your camera to your iPhone can be a convenient way to easily access and share your pictures on the go. Here are some methods you can use to transfer photos from your camera to your iPhone:
- Using a USB cable: Connect your camera to your computer using a USB cable and transfer the photos to your computer. Then, connect your iPhone to your computer and sync the photos using iTunes.
- Using a memory card reader: Remove the memory card from your camera and insert it into a memory card reader. Connect the card reader to your computer and transfer the photos to your computer. Then, transfer the photos from your computer to your iPhone using iTunes or iCloud.
- Using a Wi-Fi enabled camera: If your camera has Wi-Fi capabilities, you can transfer photos directly to your iPhone using a Wi-Fi connection. Follow the instructions in your camera’s manual to set up the Wi-Fi connection and transfer the photos.
- Using a third-party app: There are several third-party apps available that allow you to transfer photos from your camera to your iPhone wirelessly. Install the app on both your camera and iPhone, follow the instructions to connect the devices, and transfer the photos.
Choose the method that works best for you and enjoy easy access to your photos on your iPhone!
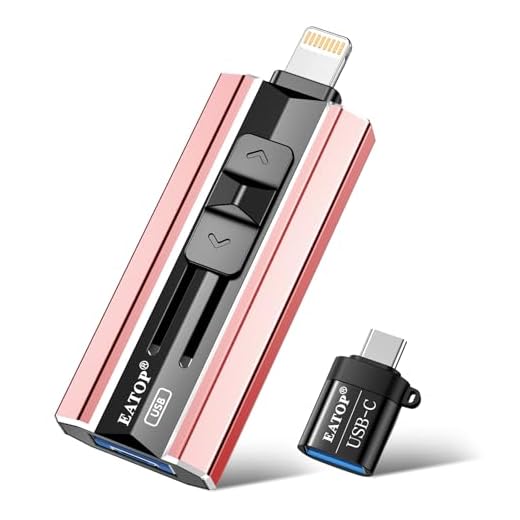


Using a USB Cable
Step 1: Connect one end of the USB cable to your camera, and the other end to the iPhone’s lightning port.
Step 2: Unlock your iPhone and you may see a prompt asking you to trust the connected device. Tap “Trust” to proceed.
Step 3: Open the Photos app on your iPhone. Your camera should appear as a connected device, and you can import photos by selecting them and tapping “Import.”
Step 4: Once the import is complete, you can view and edit your photos on your iPhone.
Using a Memory Card Reader
If your camera uses a memory card to store photos, you can easily transfer pictures to your iPhone using a memory card reader. Here’s how:
Step 1: Connect the Memory Card Reader to your iPhone
First, insert the memory card into the memory card reader. Then, connect the memory card reader to your iPhone using the appropriate adapter or cable.
Step 2: Access the Photos on the Memory Card
Once connected, your iPhone should automatically detect the memory card reader. Open the Photos app on your iPhone and select the option to import photos from the memory card reader.
| Step 3: | Choose the Photos to Import |
| Review the photos on the memory card and select the ones you want to import to your iPhone. You can choose to import all photos or select individual pictures. | |
| Step 4: | Import the Selected Photos |
| After selecting the photos, tap the import button to transfer them to your iPhone’s photo library. Once the import is complete, you can access the photos on your iPhone. |
Using Cloud Storage Services
If you want to easily transfer your pictures from your camera to your iPhone, you can use cloud storage services like Google Photos, Dropbox, or iCloud. Here’s how:
- Download the cloud storage app on your iPhone and sign in to your account.
- Upload the pictures from your camera to the cloud storage service using a computer or the app on your phone.
- Open the cloud storage app on your iPhone and download the pictures to your device.
Cloud storage services make it convenient to access your pictures from anywhere and easily transfer them between devices.
Using Wi-Fi Transfer Apps
If you prefer a wireless solution for transferring photos from your camera to your iPhone, you can use Wi-Fi transfer apps. These apps allow you to connect your camera to your iPhone over a Wi-Fi network and transfer photos without the need for cables or a computer.
Here are some popular Wi-Fi transfer apps that you can use:
- PhotoSync: PhotoSync allows you to transfer photos and videos between your camera and iPhone over Wi-Fi. It is easy to use and supports a wide range of camera models.
- Wi-Fi SD Card: Some cameras come with Wi-Fi-enabled SD cards that allow you to transfer photos wirelessly to your iPhone using a dedicated app.
- Canon Camera Connect: If you have a Canon camera, you can use the Canon Camera Connect app to transfer photos to your iPhone over Wi-Fi.
Make sure to follow the instructions provided by the app and connect both your camera and iPhone to the same Wi-Fi network for seamless photo transfer.
Using Apple’s Lightning to SD Card Camera Reader
If you have an iPhone and want to transfer photos from your camera directly to your device, Apple’s Lightning to SD Card Camera Reader is a convenient solution. This accessory allows you to easily import photos and videos from a digital camera to your iPhone without the need for a computer.
Here’s how to use the Lightning to SD Card Camera Reader:
Step 1: Connect the Camera Reader
Insert the SD card from your camera into the Lightning to SD Card Camera Reader. Then, connect the Camera Reader to your iPhone’s Lightning port. Your iPhone should automatically launch the Photos app.
Step 2: Import Photos
In the Photos app, you’ll see the option to import all photos or select individual photos to import. Choose the photos you want to transfer to your iPhone and tap “Import.” The selected photos will be copied to your iPhone’s Camera Roll.
Using Photo Transfer Software
If you want a more efficient way to transfer pictures from your camera to your iPhone, you can use photo transfer software. There are various apps available in the App Store that allow you to wirelessly transfer photos from your camera to your iPhone. Simply download the app on both devices, follow the instructions to connect the camera and iPhone to the same Wi-Fi network, and start transferring your pictures. Some popular photo transfer apps include PhotoSync, Photo Transfer App, and WiFi Transfer.


Good article! I’m curious if there are any specific camera brands that work better with the Lightning to SD Card Camera Reader, or if it's pretty universal?
The Lightning to SD Card Camera Reader is generally compatible with most cameras that use standard SD cards. However, it's always good to check your camera's specifications to ensure compatibility.
I’ve tried using a USB cable with my camera and it worked well for me. I just had to make sure my iPhone was updated to the latest iOS version. The process was straightforward, but the cable can be a bit finicky sometimes. I also like using Google Photos for cloud storage; it makes it easy to access my photos from anywhere. Have you tried both methods?
I haven't used Google Photos yet, but I find it convenient to back up my pictures. I'll have to give it a go for transferring!
I disagree about using third-party apps. I've had mixed results with them, and sometimes they can be really slow compared to direct methods like USB or a memory card reader. Anyone else feel the same way?