
 Carmen J. Moore

Are you looking for a reliable way to backup your iPhone camera roll to your Mac? Keeping your precious photos and videos safe is essential, and having a backup on your Mac ensures that you won’t lose them even if something happens to your iPhone. In this guide, we will show you how to easily and securely backup your iPhone camera roll to your Mac, so you can have peace of mind knowing that your memories are safe.
With the help of iCloud, iTunes, or third-party software, you can quickly and efficiently transfer your camera roll from your iPhone to your Mac. Whether you want to free up space on your iPhone or create a backup for safekeeping, these methods will help you achieve your goal without any hassle. Follow the step-by-step instructions below to ensure that your precious memories are securely backed up on your Mac.
Step-by-step guide to backup iPhone camera roll to Mac
Backing up your iPhone camera roll to your Mac is essential to ensure you don’t lose precious memories captured on your phone. Follow these steps to easily back up your iPhone camera roll to your Mac:
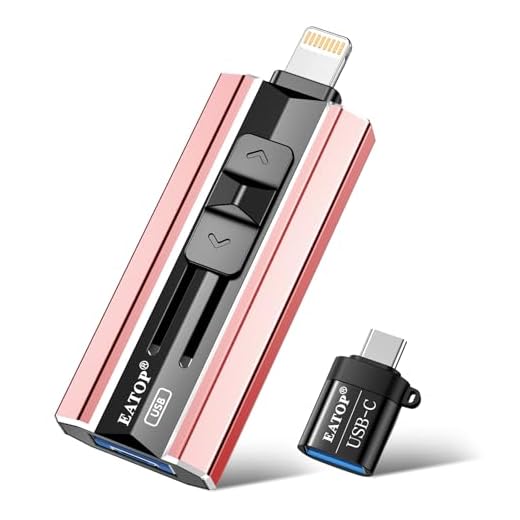


Step 1: Connect your iPhone to your Mac
Use a USB cable to connect your iPhone to your Mac. Make sure your iPhone is unlocked and you trust the device on your phone.
Step 2: Open the Photos app on your Mac
Once your iPhone is connected, open the Photos app on your Mac. The app should recognize your iPhone and show it in the sidebar.
Step 3: Select the photos you want to backup
Choose the photos from your iPhone camera roll that you want to backup to your Mac. You can select individual photos or entire albums.
Step 4: Import the selected photos
Click on the “Import” button in the Photos app to start importing the selected photos from your iPhone to your Mac. Wait for the process to complete.
Step 5: Check the imported photos
Once the import is finished, you can check the imported photos in the Photos app on your Mac. Make sure all the photos you wanted to backup are successfully imported.
| Tip: | It’s recommended to regularly backup your iPhone camera roll to your Mac to keep your memories safe. |
Connect your iPhone to Mac
To back up your iPhone camera roll to your Mac, you first need to connect your iPhone to your Mac using a USB cable. Make sure both devices are turned on and unlocked before connecting them. Once connected, you may need to trust the connection on both devices to enable data transfer.
After connecting your iPhone to your Mac, open the Photos app on your Mac. Your iPhone should appear as a device in the sidebar of the Photos app. Click on your iPhone to access its contents, including the camera roll photos and videos.
You can now select the photos and videos you want to back up to your Mac and import them into the Photos app. Make sure to check the import settings to ensure your photos are imported in the desired format and quality.
Open the Photos app on your Mac
To start backing up your iPhone camera roll to your Mac, you need to open the Photos app on your computer. You can find the Photos app in your Applications folder or by searching for it using Spotlight.
Select your iPhone in the Photos app
Once you have connected your iPhone to your Mac using a USB cable, open the Photos app on your Mac. You should see your iPhone listed in the sidebar of the Photos app under the “Devices” section. Click on your iPhone to view its contents.
If prompted on your iPhone to trust this computer, make sure to tap “Trust” to establish a connection between your iPhone and Mac.
Now you can access your iPhone’s camera roll and select the photos and videos you want to back up to your Mac. You can either import all the media or choose specific items to transfer by selecting them individually.
Once you have selected the items you want to backup, click on the “Import” button to start transferring the selected photos and videos from your iPhone to your Mac. The imported media will be saved in your Photos library on your Mac for safekeeping.
Click on the Import button
Once your iPhone is connected to your Mac, open the Photos app on your computer. In the Photos app, you will see your iPhone listed under the Devices section. Click on your iPhone to access your camera roll photos.
Next, look for the Import button in the top right corner of the Photos app. Click on the Import button to start transferring your camera roll photos from your iPhone to your Mac.
Choose the photos you want to backup
Before starting the backup process, it’s important to select the photos you want to save from your iPhone camera roll to your Mac. You can either choose to backup all photos or select specific ones that you want to transfer.
Here’s how you can choose the photos you want to backup:
- Open the Photos app on your iPhone.
- Navigate to the Camera Roll or Albums where your photos are located.
- Select the photos you want to backup by tapping on them. You can select multiple photos by tapping on each one individually.
- Once you have selected all the photos you want to backup, click on the share icon (usually a square with an arrow pointing up) to bring up the sharing options.
- Choose the option to share or transfer the selected photos to your Mac. You can use AirDrop, iCloud, or a USB cable to transfer the photos.
By following these steps, you can easily choose the photos you want to backup from your iPhone camera roll to your Mac.
Click on the Import Selected button
Once you have selected the photos and videos you want to back up from your iPhone camera roll to your Mac, click on the “Import Selected” button at the bottom right corner of the Photos app window. This will start the process of transferring the selected media files to your Mac.


I tried this method, and it worked great for me! Just remember to unlock your iPhone before connecting it.
When selecting photos to back up, do I need to choose them one by one, or is there a way to select multiple at once?
You can select multiple photos by holding the Command key on Mac while clicking on each photo.
Can I back up my iPhone camera roll without using iTunes?
Yes, you can use iCloud or third-party software for backups.
Using AirDrop is another quick method if you don’t want to use a USB cable!
I’m a bit confused about the USB connection. Do I need to have my iPhone unlocked and the Photos app open on my Mac before connecting?
Yes, it's important to have your iPhone unlocked and to trust the connection. Additionally, it's a good idea to have the Photos app open to recognize your device immediately.
What happens if I accidentally disconnect my iPhone during the backup process? Will I lose any photos?
I recently backed up my camera roll following a similar guide. I noticed that it was much easier than I thought! Just make sure to check the import settings to get the quality you want. I had a few photos that didn't come through clearly because I didn’t double-check those settings. Overall, a great way to keep my memories safe!
I prefer using iCloud for backups. It seems easier than connecting my phone to my Mac all the time.