
 Carmen J. Moore

Vlogging has become a popular way to share your life and thoughts with the world through video content. With the advancement of technology, you can now create high-quality vlogs using just your iPhone’s back camera. Whether you’re a beginner or a seasoned vlogger, utilizing your iPhone’s back camera can help you capture stunning footage for your vlogs.


Why use the iPhone back camera for vlogging? The iPhone’s back camera is known for its exceptional quality, allowing you to record videos in high definition with great clarity and detail. By using the back camera for vlogging, you can take advantage of features like optical image stabilization, improved low-light performance, and the ability to shoot in 4K resolution.
In this article, we’ll explore tips and tricks on how to vlog effectively using your iPhone’s back camera. From setting up your shots to enhancing your videos with editing apps, we’ll cover everything you need to know to create engaging and professional-looking vlogs.
How to Start Vlogging
If you’re new to vlogging and want to get started, here are some tips to help you kick off your vlogging journey:
1. Choose a niche: Decide on the type of content you want to create and find your target audience.
2. Get the right equipment: Invest in a good quality camera, microphone, and lighting to ensure your videos look and sound professional.
3. Plan your content: Create a content calendar and brainstorm video ideas to keep your channel consistent and engaging.
4. Be yourself: Authenticity is key in vlogging, so don’t be afraid to show your personality and connect with your viewers.
5. Edit your videos: Learn basic video editing skills to enhance the quality of your content and make it more engaging.
6. Promote your channel: Use social media platforms to promote your videos and engage with your audience to grow your channel.
7. Stay consistent: Post videos regularly to keep your audience engaged and build a loyal following.
Choose the Right Location
When vlogging with your iPhone’s back camera, selecting the right location is crucial for capturing high-quality footage. Here are some tips to help you choose the perfect location:
- Consider natural lighting: Opt for well-lit areas to avoid grainy or dark footage. Natural light can significantly enhance the quality of your vlogs.
- Background noise: Avoid noisy environments that can disrupt your audio quality. Choose quiet locations to ensure clear sound in your videos.
- Interesting backdrop: Select a visually appealing backdrop that complements your vlog’s theme. A scenic location can make your videos more engaging and captivating.
- Avoid distractions: Choose a location with minimal distractions to keep the focus on you and your content. Steer clear of busy or cluttered backgrounds.
- Accessibility: Ensure that your chosen location is easily accessible and safe for filming. Consider factors like crowd control and privacy when selecting a filming spot.
By carefully selecting the right location for your vlogs, you can elevate the production quality of your videos and create engaging content that resonates with your audience.
Set Up Your iPhone
Before you start vlogging with your iPhone’s back camera, it’s essential to set it up properly for the best results. Here are some tips to help you get started:
- Clean the lens: Make sure the lens of your iPhone’s back camera is clean and free from any dust or smudges. Use a soft cloth to gently wipe the lens before you start recording.
- Adjust the exposure: Tap on the screen to focus on the subject and adjust the exposure. This will ensure that your vlogs are well-lit and clear.
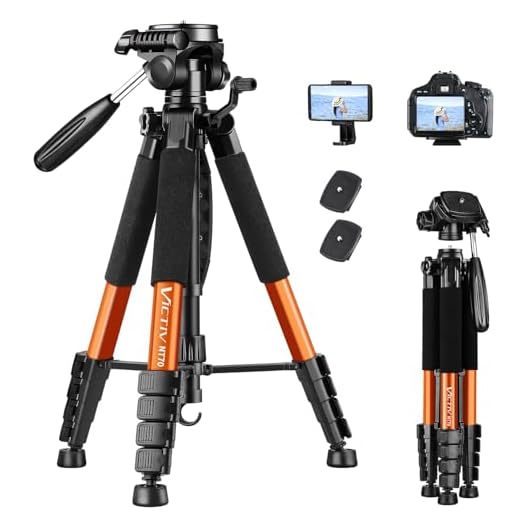
- Use a tripod: To avoid shaky footage, consider using a tripod or a stabilizer to keep your iPhone steady while you vlog.
- Set the resolution: Check the settings on your iPhone to make sure you’re recording at the highest resolution possible for better quality videos.
- Turn on the grid: Enable the grid feature on your iPhone to help you frame your shots better and maintain a balanced composition.
By following these simple steps, you can set up your iPhone’s back camera for vlogging and capture high-quality videos with ease.
Adjust Camera Settings
Before you start vlogging with your iPhone’s back camera, it’s important to adjust the camera settings for optimal video quality. Here are a few key settings you should consider:
1. Resolution and Frame Rate
Make sure to set the resolution and frame rate of the camera to the highest possible settings for the best video quality. This will ensure that your vlogs look professional and sharp.
2. Exposure and Focus
Adjust the exposure and focus settings to ensure that your vlogs are well-lit and in focus. You can tap on the screen to adjust the exposure and focus manually or use the auto settings for convenience.
By adjusting these camera settings, you can enhance the quality of your vlogs and create engaging content for your viewers.
Plan Your Content
Before you start vlogging with your iPhone’s back camera, it’s essential to plan your content. Think about what you want to share with your audience and how you can make it engaging and interesting. Consider creating an outline or storyboard to guide your vlog and ensure you cover all the key points you want to include.
Choose Your Topic
Decide on a specific topic or theme for your vlog. Whether it’s a travel vlog, a cooking tutorial, a day-in-the-life video, or a product review, having a clear focus will help you create more compelling content.
Outline Your Shots
Once you’ve chosen your topic, outline the shots you want to capture. Think about the angles, framing, and composition that will best convey your message. Consider using a mix of wide, medium, and close-up shots to add visual interest to your vlog.
Practice Your Delivery
One of the most important aspects of vlogging is your delivery. Practice speaking clearly, confidently, and with enthusiasm. Make sure to vary your tone and pace to keep your audience engaged. It can be helpful to practice in front of a mirror or record yourself to see how you come across on camera. You can also try rehearsing your content a few times before filming to ensure you feel comfortable and confident in what you’re saying. Remember, the more you practice, the more natural and authentic your delivery will become.
Use Proper Lighting
One of the most important aspects of creating quality vlogs with your iPhone back camera is using proper lighting. Good lighting can make a huge difference in the overall look and feel of your videos.
Here are some tips for getting the best lighting:
1. Natural Light
Whenever possible, try to film in natural light. Natural light is usually the most flattering and can make your videos look more professional. Position yourself facing a window or go outside to take advantage of natural sunlight.
2. Artificial Lighting
If natural light is not available or not sufficient, consider investing in some artificial lighting sources. You can use ring lights, softbox lights, or even desk lamps to illuminate your scene. Make sure the lighting is even and not too harsh to avoid harsh shadows or overexposure.
Record and Edit Your Vlog
Once you have set up your iPhone and found the perfect location, it’s time to start recording. Make sure you have enough storage space on your phone and a stable internet connection if you plan to upload your vlog directly.
When recording, keep in mind the framing and lighting. Position the iPhone at eye level and make sure there is enough light on your face. Speak clearly and engage with your audience to keep them interested.
After you have recorded your vlog, it’s time to edit. There are many apps available for editing videos on your iPhone, such as iMovie or Adobe Premiere Rush. Trim the footage, add music or text overlays, and make sure the video flows smoothly.
Once you are happy with the final edit, you can export the video and share it on your vlog channel or social media platforms. Don’t forget to engage with your viewers and respond to comments to build a loyal following.
Share Your Vlog
Once you’ve finished recording and editing your vlog using your iPhone’s back camera, it’s time to share it with the world. Here are some tips on how to effectively share your vlog:
- Upload your vlog to popular video-sharing platforms like YouTube, Vimeo, or TikTok.
- Promote your vlog on social media platforms such as Instagram, Facebook, Twitter, and Snapchat to reach a wider audience.
- Engage with your viewers by responding to comments and messages to build a community around your vlog.
- Collaborate with other vloggers or influencers to cross-promote each other’s content and grow your audience.
- Utilize SEO techniques to optimize your vlog’s title, description, and tags to improve its visibility on search engines.
By following these tips, you can increase the reach and impact of your vlogs and connect with a larger audience who shares your interests.
Engage with Your Audience
One of the key elements of vlogging is engaging with your audience. Make sure to respond to comments on your videos, ask for feedback, and encourage your viewers to interact with you. This can help build a loyal following and create a sense of community around your vlog.
Consider hosting live Q&A sessions, contests, or giveaways to keep your audience engaged and coming back for more. Show genuine interest in your viewers and their opinions, and incorporate their feedback into your vlogs whenever possible.


While I agree that the iPhone's back camera is great, I think the front camera can also be useful for certain vlogs, especially when you need to see yourself while recording. It has its own advantages for those who are just starting out and want to ensure they're in frame and well-lit!
I started vlogging with my iPhone last year. Initially, I struggled with lighting, but once I started using natural light, my videos improved dramatically. I also invested in a ring light, which works wonders indoors. Planning content has also helped me stay on track. This article touches on some great points about setup and planning!
Can you clarify what resolution is best to set for vlogging? Is 4K necessary for all types of videos?