
 Carmen J. Moore

Setting up your DSLR camera can be a daunting task for beginners, but with a little guidance, you can quickly become familiar with its features and functions. Whether you’re a photography enthusiast or a professional, knowing how to properly set up your DSLR camera is essential for capturing stunning photos.
In this article, we will walk you through the essential steps to set up your DSLR camera, from adjusting the settings to understanding the different modes and functions. By following these tips, you’ll be able to unleash the full potential of your camera and take your photography skills to the next level.


Choose the Right Lens
When setting up your DSLR camera, one of the most important factors to consider is the choice of lens. The type of lens you use will greatly impact the quality and style of your photos. There are a wide variety of lenses available, each with its own specific purpose and characteristics.
For example, a wide-angle lens is great for capturing landscapes and architecture, while a telephoto lens is ideal for shooting wildlife or sports. A prime lens with a fixed focal length can help you achieve sharp, high-quality images with a beautiful bokeh effect. Consider your photography style and the subjects you plan to shoot when selecting a lens for your DSLR camera.
Understand Your Camera Settings
Before you start using your DSLR camera, it’s important to familiarize yourself with the various settings it offers. Understanding your camera settings will help you capture better photos and make the most out of your equipment.
1. Shooting Mode
The shooting mode on your camera determines how the camera will capture the image. Common shooting modes include auto, manual, aperture priority, and shutter speed priority. Experiment with different modes to see which one works best for your shooting style.
2. White Balance
White balance affects the color temperature of your photos. Adjusting the white balance settings can help you achieve more accurate colors in different lighting conditions. Experiment with different white balance presets or set a custom white balance for specific situations.
Adjust the ISO Settings
ISO refers to the sensitivity of your camera’s sensor to light. A lower ISO setting (such as 100) is ideal for brightly lit environments, while a higher ISO setting (such as 800 or above) is suitable for low-light situations. Adjusting the ISO setting can help you capture clear and sharp images in various lighting conditions.
How to adjust the ISO settings:
- Locate the ISO button on your camera, usually found on the top or back of the camera body.
- Press the ISO button and use the dial or arrow buttons to select the desired ISO setting.
- Check the camera’s display or viewfinder to ensure the ISO setting is appropriate for the lighting conditions.
Set the Aperture
Aperture is the opening in the lens that allows light to pass through to the camera sensor. It is measured in f-stops, with lower f-stop numbers indicating a larger aperture and higher f-stop numbers indicating a smaller aperture. The aperture not only controls the amount of light that enters the camera but also affects the depth of field in your photos.
To set the aperture on your DSLR camera, you can use the aperture priority mode (Av or A on the mode dial) or the manual mode. In aperture priority mode, you select the desired f-stop value, and the camera automatically adjusts the shutter speed to achieve the correct exposure. In manual mode, you have full control over both the aperture and shutter speed settings.
When setting the aperture, consider the effect it will have on your photos. A larger aperture (lower f-stop number) will create a shallower depth of field, making the background more blurred and the subject stand out. On the other hand, a smaller aperture (higher f-stop number) will increase the depth of field, keeping more of the scene in focus.
Experiment with different aperture settings to see how they affect your photos and choose the one that best suits your creative vision.
| Low f-stop number (e.g., f/2.8) | Larger aperture, shallow depth of field |
| High f-stop number (e.g., f/16) | Smaller aperture, greater depth of field |
Focus on Manual Mode
When setting up your DSLR camera, it’s essential to understand and master the Manual Mode. This mode gives you full control over settings such as aperture, shutter speed, and ISO, allowing you to achieve the best results in various shooting conditions.
Aperture
Adjusting the aperture in Manual Mode lets you control the depth of field in your photos. A lower f-stop (e.g., f/2.8) creates a shallow depth of field, ideal for portraits, while a higher f-stop (e.g., f/11) produces a greater depth of field, perfect for landscapes.
Shutter Speed
Setting the shutter speed manually allows you to freeze fast-moving subjects or create motion blur effects. A faster shutter speed (e.g., 1/1000) is suitable for sports photography, while a slower speed (e.g., 1/30) can capture light trails or flowing water.
Use Proper White Balance
One important aspect of setting up your DSLR camera is to ensure you have the correct white balance. White balance refers to the color temperature of the light in your scene, and setting it correctly can make a big difference in the overall look of your photos.
Most cameras have several white balance presets, such as daylight, cloudy, tungsten, fluorescent, and flash. You can also set a custom white balance by using a white or gray card and adjusting the settings manually.
Choosing the right white balance setting will help your camera capture colors accurately and prevent your photos from looking too warm or too cool. Experiment with different white balance settings in different lighting conditions to find the best one for your situation.
Set the Shutter Speed
Shutter speed determines how long the shutter stays open when you take a photo. A faster shutter speed (e.g., 1/500) will freeze motion, while a slower shutter speed (e.g., 1/30) will create motion blur. Adjust the shutter speed according to the scene you are capturing. For fast-moving subjects, use a faster shutter speed, and for low-light situations or creative effects, try a slower shutter speed. Experiment with different shutter speeds to achieve the desired results.
Stabilize Your Camera
Stability is key to capturing sharp photos with your DSLR camera. Here are some tips to help stabilize your camera:
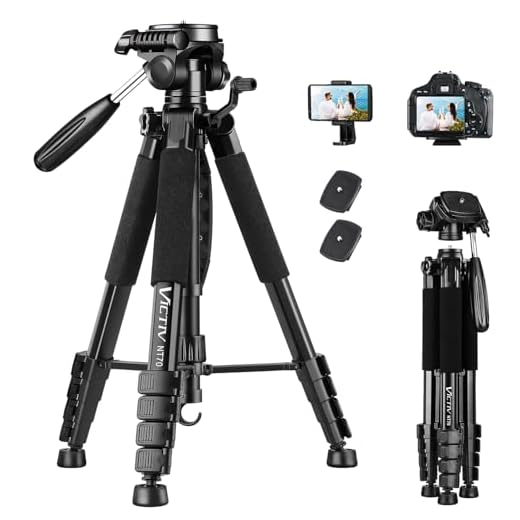
- Use a tripod: A sturdy tripod is essential for keeping your camera steady, especially in low light situations or when using slow shutter speeds.
- Hold your camera correctly: Use proper hand placement and hold your camera close to your body to minimize camera shake.
- Brace yourself: Lean against a wall or brace your elbows on a stable surface to help stabilize your camera.
- Use image stabilization: If your lens or camera has image stabilization, make sure it is turned on to reduce camera shake.
- Use a remote shutter release: Avoid camera shake caused by pressing the shutter button by using a remote shutter release or the camera’s self-timer.
FAQ
How do I set up my DSLR camera for the first time?
Setting up your DSLR camera for the first time involves familiarizing yourself with the camera body, attaching the lens, inserting the battery and memory card, adjusting settings such as ISO, aperture, and shutter speed, and ensuring the camera is ready to shoot.
What are some important settings to configure on a DSLR camera?
Important settings to configure on a DSLR camera include white balance, autofocus mode, shooting mode (such as manual, aperture priority, or shutter priority), image quality settings, and custom functions tailored to your shooting preferences.




When I first set up my DSLR, I found the white balance settings confusing. I didn’t realize how much it could change the look of my photos until I experimented in different lighting. It’s amazing how a simple adjustment can make colors pop! Just a tip: try taking the same shot with various white balance settings to see the differences.
That’s a great tip! I always just used the auto white balance, but I think I’ll give the manual adjustments a try. It's nice to know that small tweaks can really improve image quality.
Don’t forget to practice with different shutter speeds! It can make a huge difference in capturing motion.
I don't think using a tripod is always necessary. I often shoot hand-held and still get sharp images. It depends on the situation!
I see your point, but in low light, a tripod really does help. If you're shooting fast subjects, I guess that’s a different story!
What’s the best lens to start with for general photography?
I disagree that manual mode is necessary for every shot. Auto mode can still give great results, especially for beginners who might find manual settings confusing and daunting.
Can someone explain the difference between aperture priority and manual mode in simple terms?
Aperture priority allows you to set the aperture while the camera automatically adjusts the shutter speed for correct exposure. In manual mode, you control both settings, giving you full creative control.
Good question! What’s the best way to start learning about the different shooting modes? I’ve only ever used auto mode and want to explore more options.
I recommend trying out the aperture priority mode first. It lets you control the depth of field while the camera takes care of the shutter speed. It's a good middle ground before jumping into manual mode.
When I first set up my DSLR, I was overwhelmed by the settings. But once I played around with the manual mode, everything clicked! I love the control it gives you over aperture and shutter speed. It really helped improve my photos, especially in low-light situations.