
 Carmen J. Moore

If you’re a photography enthusiast, you know how important it is to keep your DSLR camera safe and protected while on the go. A good camera bag is essential for storing your gear and ensuring it stays in top condition. However, finding the perfect camera bag that suits your style and needs can be a challenge. Instead of settling for a generic bag, why not make your own custom DSLR camera bag that reflects your personality and meets all your requirements?
Creating your own DSLR camera bag allows you to customize the design, size, and features to match your specific needs. Whether you’re a professional photographer or a hobbyist, having a personalized camera bag can make a big difference in how you carry and access your equipment. In this article, we’ll guide you through the process of making your own DSLR camera bag from scratch, using materials that are durable, affordable, and easy to work with.
From selecting the right fabric to adding padding and compartments, we’ll provide step-by-step instructions and tips to help you create a functional and stylish camera bag that fits your DSLR camera, lenses, accessories, and personal belongings. Whether you’re planning a photoshoot in the great outdoors or a studio session, having a custom camera bag that is both practical and attractive will make your photography experience more enjoyable and convenient.


Choosing the Right Materials
When making your own DSLR camera bag, it is crucial to choose the right materials to ensure durability and protection for your gear. Here are some key materials you will need:
| Outer Fabric: Select a sturdy and water-resistant fabric such as canvas or nylon to protect your camera from external elements. |
| Lining Material: Use a soft and padded fabric like fleece or foam to cushion your camera and lenses inside the bag. |
| Zippers and Fasteners: Opt for high-quality zippers and fasteners to ensure easy access to your gear and secure closure of the bag. |
| Padding: Include foam padding or dividers to protect your camera and lenses from impact and scratches while on the move. |
| Straps and Handles: Choose comfortable and adjustable straps and handles to carry your DIY camera bag with ease and convenience. |
Designing the Bag
When designing your own DSLR camera bag, consider the following factors:
1. Size and Shape
Choose a size and shape that can comfortably fit your camera body, lenses, accessories, and any other gear you typically carry. Consider the dimensions of your largest lens and ensure the bag has enough space to accommodate it.
2. Padding and Protection
Ensure the bag provides adequate padding to protect your camera and lenses from bumps and shocks. Consider using foam inserts or padded dividers to create compartments for each piece of equipment, keeping them secure and cushioned.
By carefully designing your DSLR camera bag, you can create a customized solution that meets your specific needs and preferences.
Measuring and Cutting
Before you start making your own DSLR camera bag, you need to measure and cut the fabric to the appropriate size. Here are the steps to follow:
| 1. | Measure the dimensions of your DSLR camera and accessories to determine the size of the bag you need. |
| 2. | Use these measurements to cut the main pieces of fabric for the body of the bag, including the front, back, bottom, and sides. |
| 3. | Cut additional pieces for pockets, dividers, and straps, if desired. |
| 4. | Make sure to leave seam allowances when cutting the fabric to allow for sewing the pieces together. |
Sewing the Bag Together
Now that you have all your pieces cut out, it’s time to start sewing your DSLR camera bag together. Follow these steps to assemble your bag:
| 1. | Start by sewing the side panels to the bottom panel. Place the side panels right sides together with the bottom panel and sew along the edges. |
| 2. | Next, attach the front panel to the side and bottom panels. Sew along the edges to secure the front panel in place. |
| 3. | Then, sew the back panel to the side and bottom panels, leaving an opening at the top for the zipper. |
| 4. | Attach the zipper to the top opening of the bag. Make sure to sew it securely in place. |
| 5. | Finally, sew the shoulder strap to the sides of the bag to complete your DIY DSLR camera bag. |
Once you finish sewing all the pieces together, your custom camera bag will be ready to use for your next photography adventure!
Adding Pockets and Compartments
When making your own DSLR camera bag, it’s important to consider adding pockets and compartments to keep your camera accessories organized and easily accessible. Here are some tips on how to add pockets and compartments:
1. Determine the size and number of pockets
Think about the accessories you’ll need to carry with your camera, such as extra lenses, memory cards, batteries, and filters. Based on your needs, decide on the size and number of pockets you want to add to your camera bag.
2. Sew or attach pockets
You can sew or attach pockets to the inside or outside of your camera bag using fabric or mesh materials. Make sure the pockets are secure and have closures like zippers or Velcro to keep your accessories safe.
Final Touches and Customization
Once you have assembled your DIY DSLR camera bag, you can add some final touches to make it more personalized and functional.
1. Add padding: If your bag doesn’t have enough padding to protect your camera gear, consider adding extra foam or padding to the interior of the bag.
2. Customize compartments: Use dividers or velcro inserts to create custom compartments that fit your camera and accessories perfectly.
3. Label compartments: To stay organized, label each compartment with the type of gear it holds, so you can easily find what you need when shooting.
4. Add a personal touch: Consider adding patches, stickers, or other decorations to personalize your camera bag and make it stand out.
5. Test the fit: Before using your DIY camera bag in the field, test the fit and make any necessary adjustments to ensure your gear is secure and protected.
With these final touches and customizations, your DIY DSLR camera bag will be ready to accompany you on all your photography adventures.
FAQ
What materials do I need to make my own DSLR camera bag?
To make your own DSLR camera bag, you will need sturdy fabric, foam padding, a sewing machine, zippers, straps, and additional pockets for accessories. You can also customize the materials based on your preferences and the level of protection you want for your camera.
Is it difficult to make a DIY DSLR camera bag?
Making a DIY DSLR camera bag can be a fun and rewarding project, but it may require some basic sewing skills and attention to detail. With the right materials and a clear plan, you can create a custom camera bag that suits your needs and style.
Can I add extra compartments for lenses and accessories in my homemade DSLR camera bag?
Yes, you can easily customize your homemade DSLR camera bag to include extra compartments for lenses, batteries, memory cards, and other accessories. Adding pockets and dividers will help you stay organized and protect your gear while on the go.
How can I ensure my DIY DSLR camera bag provides enough protection for my camera?
To ensure that your DIY DSLR camera bag provides adequate protection for your camera, make sure to use high-quality padding and durable fabric. You can also add extra layers of foam or padding to critical areas to safeguard your camera from impact and scratches.
Are there any tips for designing a stylish and functional DIY DSLR camera bag?
When designing a DIY DSLR camera bag, consider both style and functionality. Choose a fabric that reflects your personal taste and use colors that match your camera gear. Additionally, pay attention to the layout of compartments and pockets to make sure your bag is both stylish and practical.


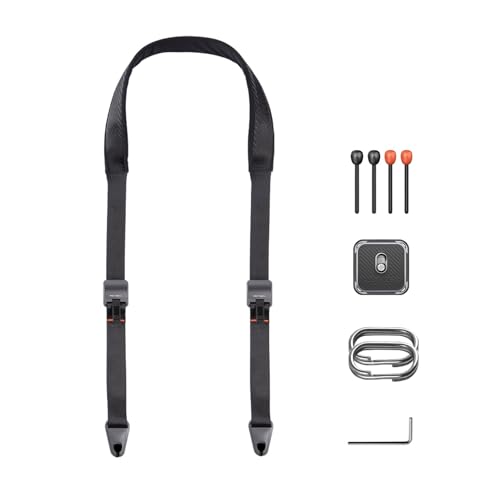


I’ve been using a store-bought camera bag, but it’s not very comfortable. How does making your own bag compare in terms of comfort and functionality?
I recently made my own DSLR camera bag following similar steps. I used a waterproof canvas for the outside and added some soft fleece lining. It really helped protect my gear. I also included a few extra pockets, which are super handy for carrying batteries and memory cards. It's not too difficult, but measuring everything correctly is key for a good fit!
I'm really interested in making my own DSLR camera bag but unsure about the best fabric to use. Is canvas better than nylon for durability?
What type of fabric would you recommend for a DIY camera bag that needs to be water-resistant but also lightweight?
I've used nylon for my bags, and it's both lightweight and water-resistant. It's been great for outdoor shoots!
I think making a DIY camera bag might be overkill. There are some really good affordable options out there that are already designed well. It could save you time and effort.
I see your point, but making my own allows for customization that's hard to find in a store. Plus, it can be a fun project!
What type of fabric do you recommend for beginners? Is there a specific brand or material that’s easier to work with?
Don't forget to label your compartments! It really helps when you're in a hurry during a shoot.
Can you clarify how much padding I should include? I want to protect my gear without making the bag too bulky.
What type of fabric do you recommend for the outer layer? I want something durable but also weather-resistant.
I’m not sure if making a DIY camera bag is worth it. Some of the pre-made ones have great designs and are not too expensive. I think I'd rather buy one than spend time making it.
I made my own camera bag last summer and it was such a rewarding experience! I used canvas for the outer fabric and added extra padding inside. It turned out to be very sturdy and I customized it with a few patches that represent my photography style. I highly recommend trying it out!